Leaderboard


Popular Content
Showing content with the highest reputation since 24/03/24 in all areas
-
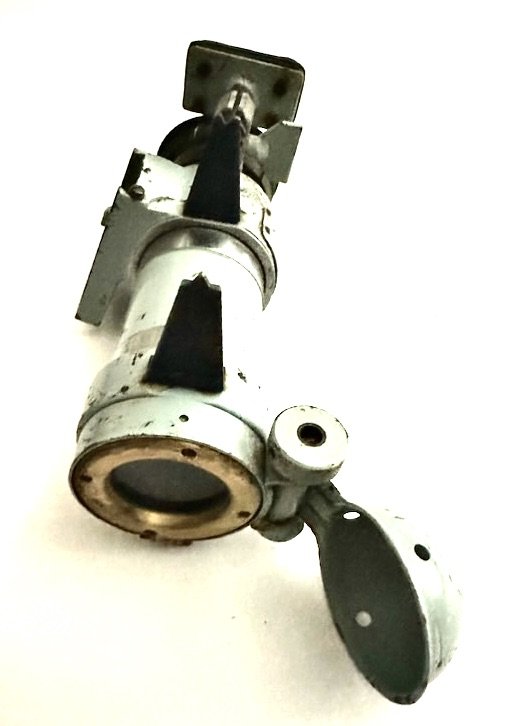
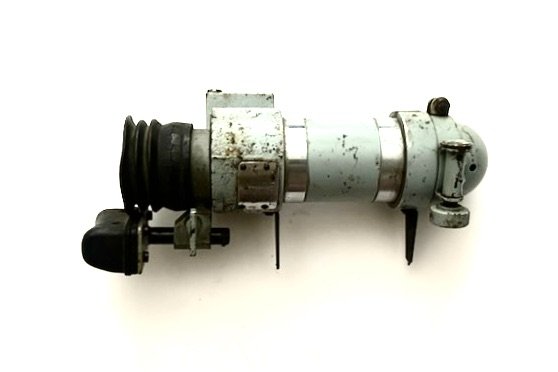
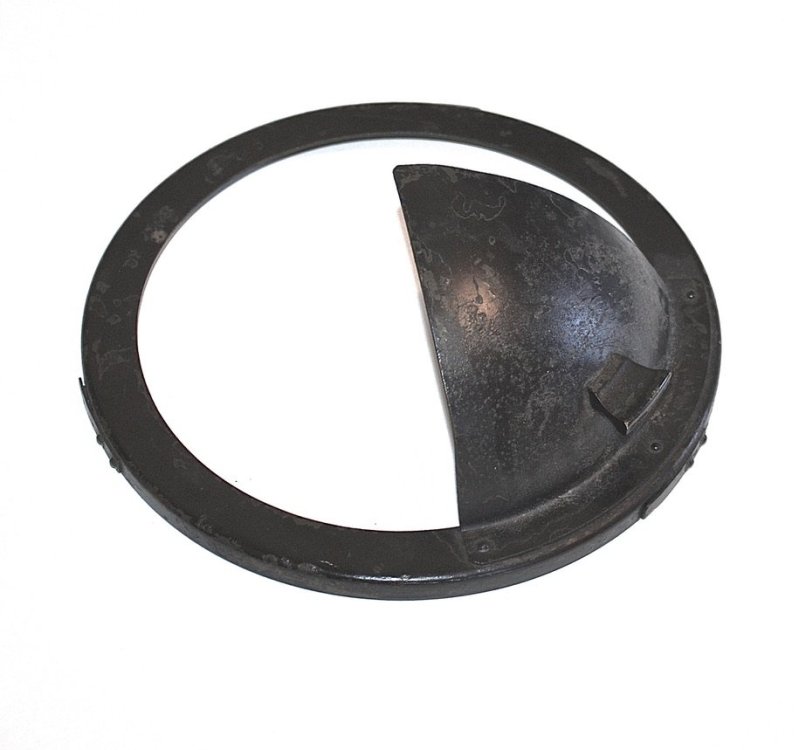
Pictured from my collection is an optical gunsight for a 3.7 cm anti-aircraft gun (Flak M42) manufactured for the Kriegsmarine. The code for this manufacture is 'dow' (Waffenwerke Brunn A.G. (1943 - Opticotechna Gmbh, Prerau Czech.)). The optic has a wide field of view with a ranging reticle. Even though designed to withstand harsh environments, this optic was made to be removed from the weapon system mounted on an U-boat .
 6 points
 -
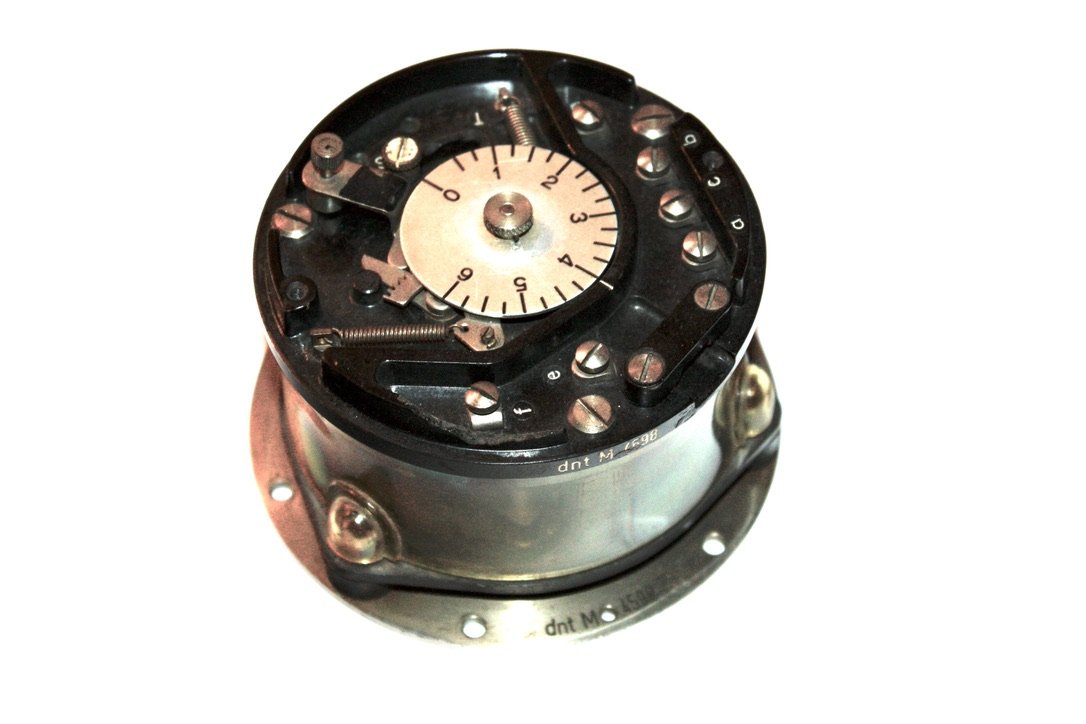
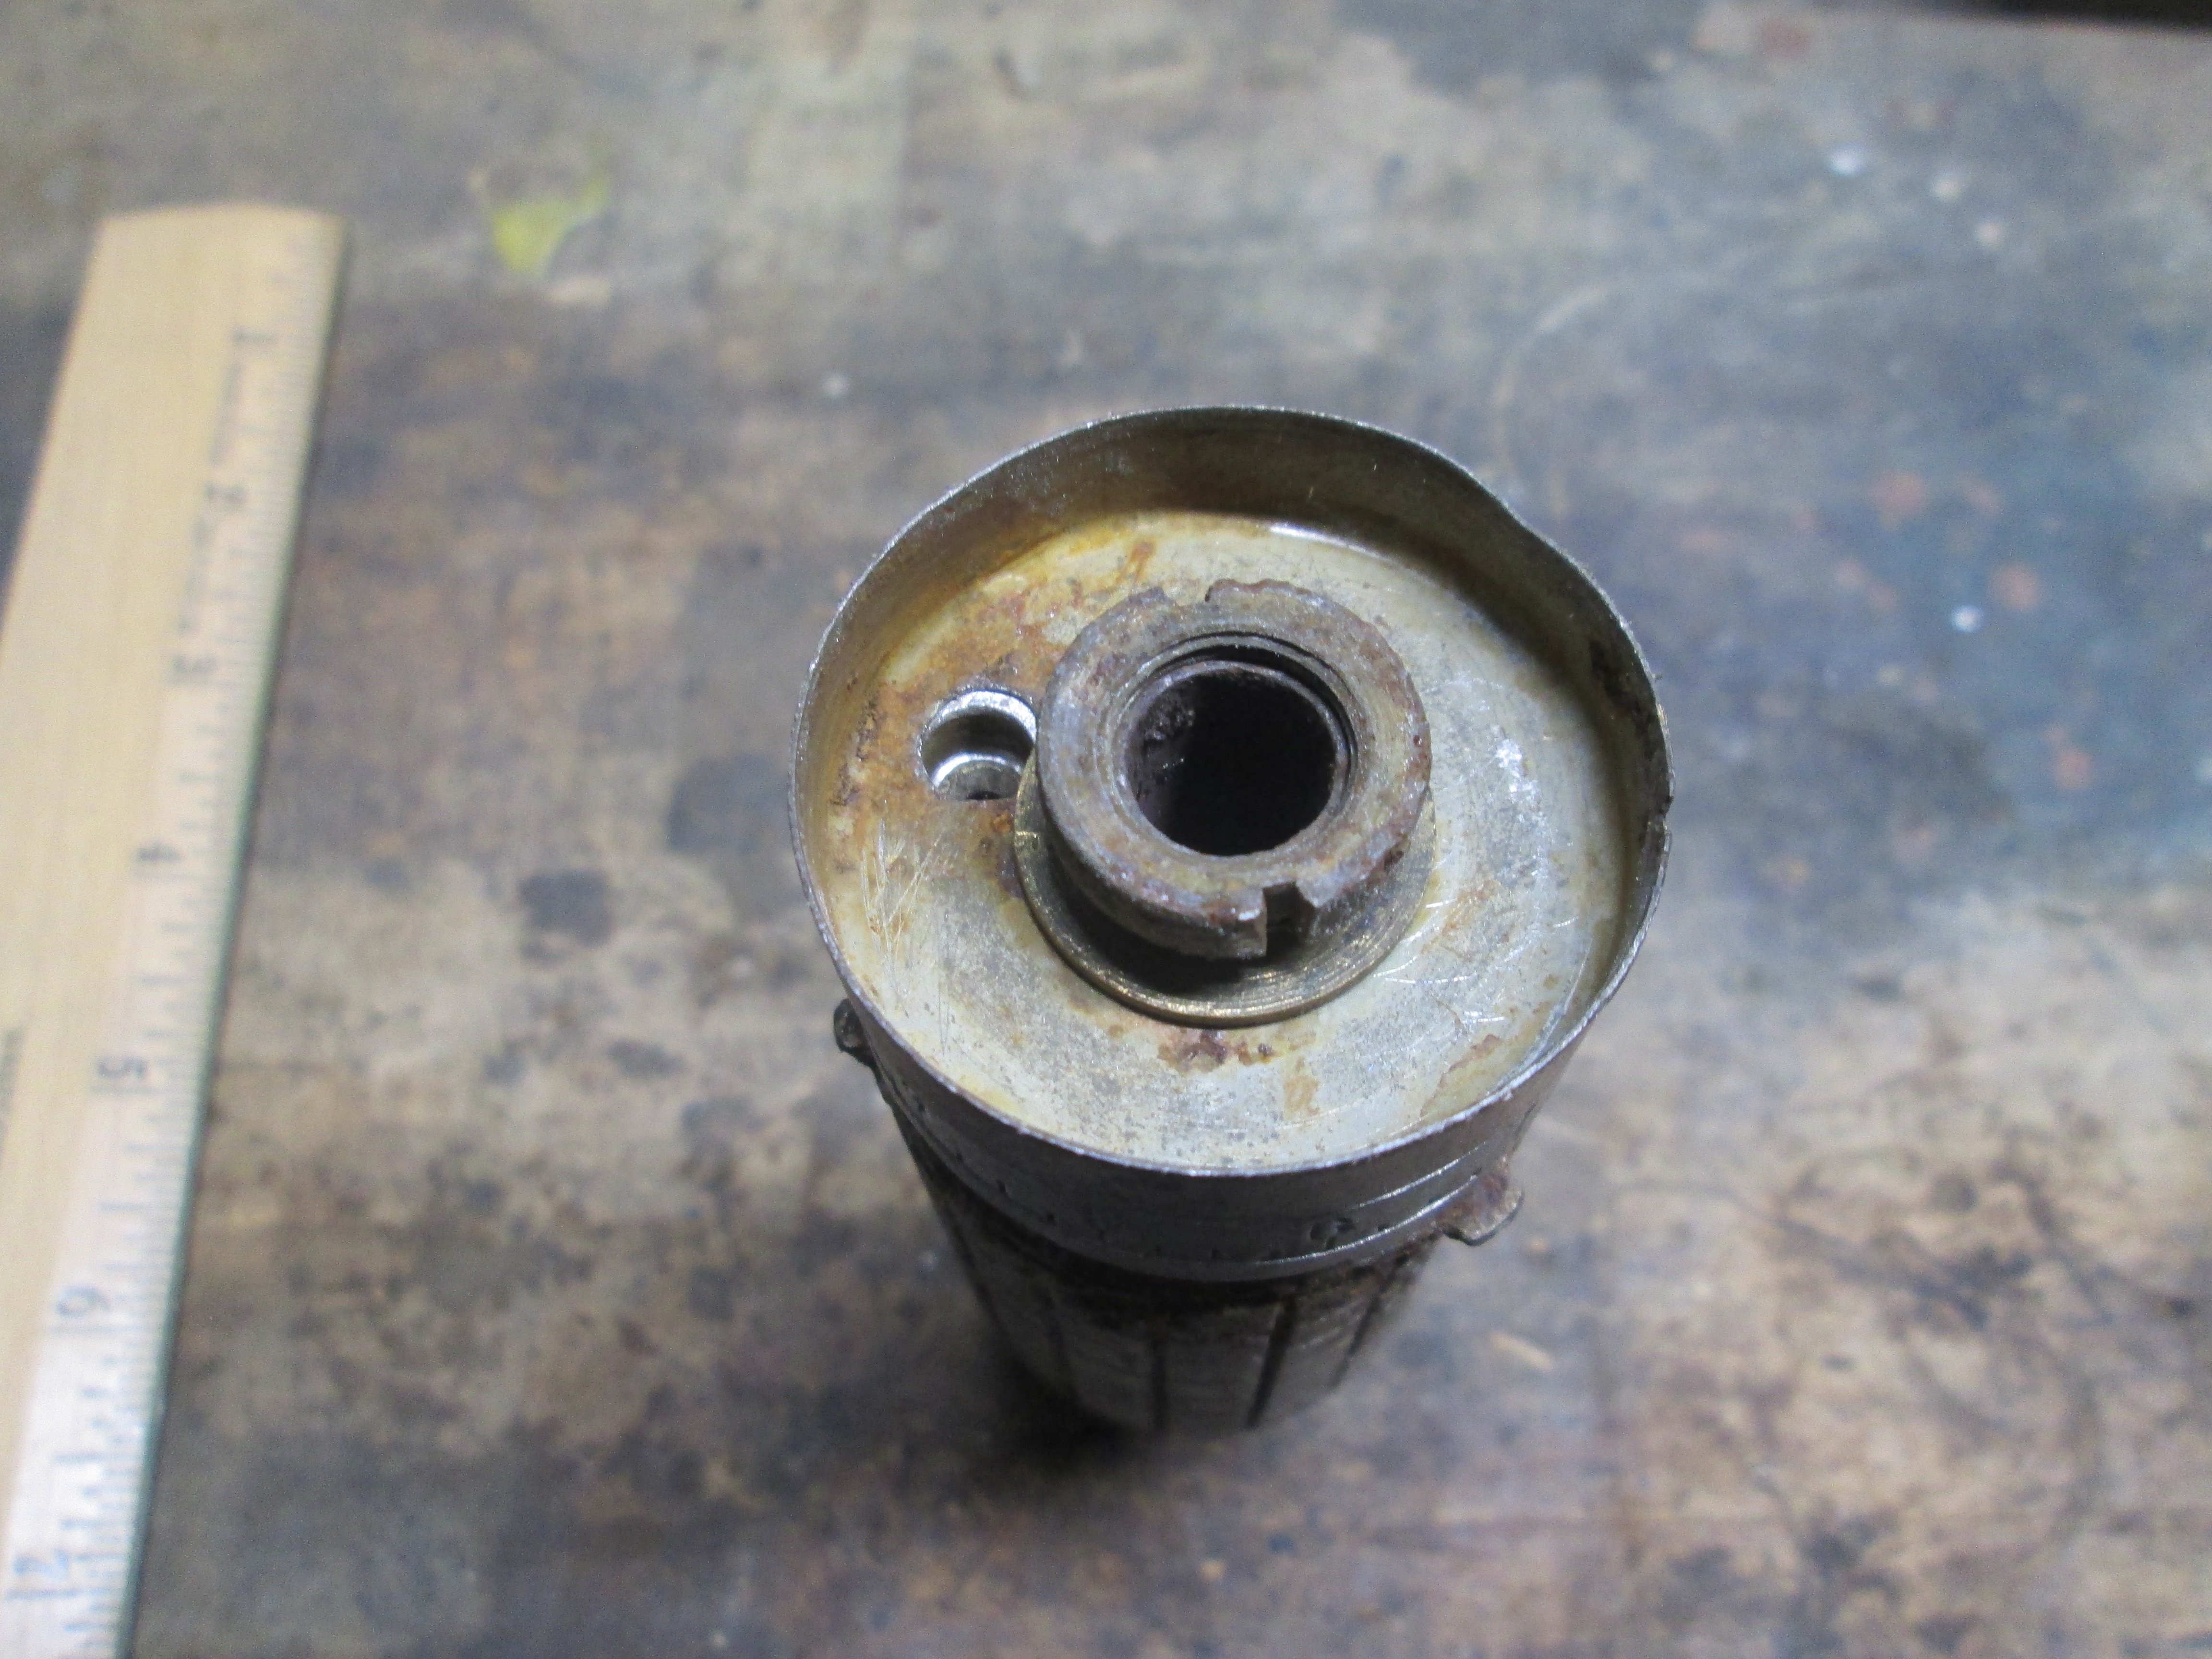
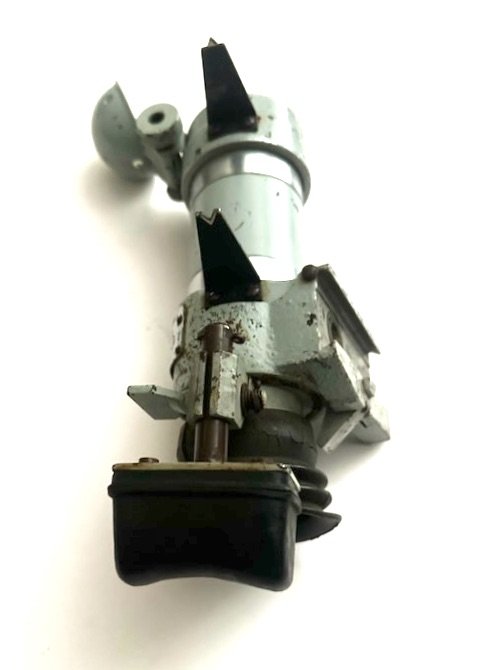
Pictured from my collection is a Kriegsmarine sea mine timer marked dnt M 4598.
 6 points
 -
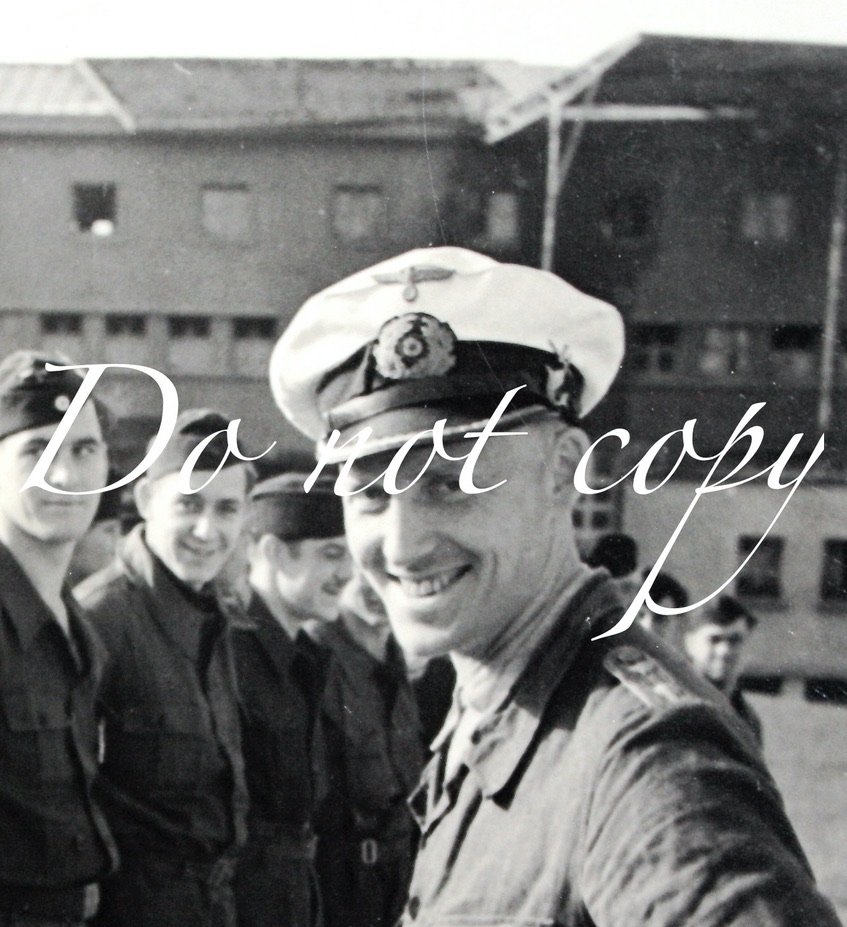
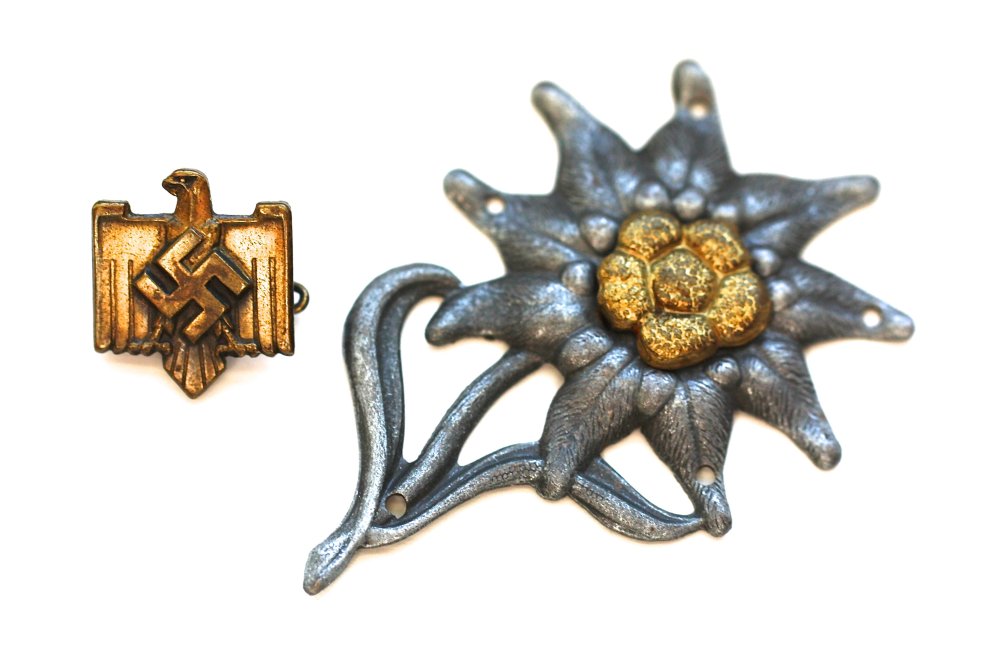
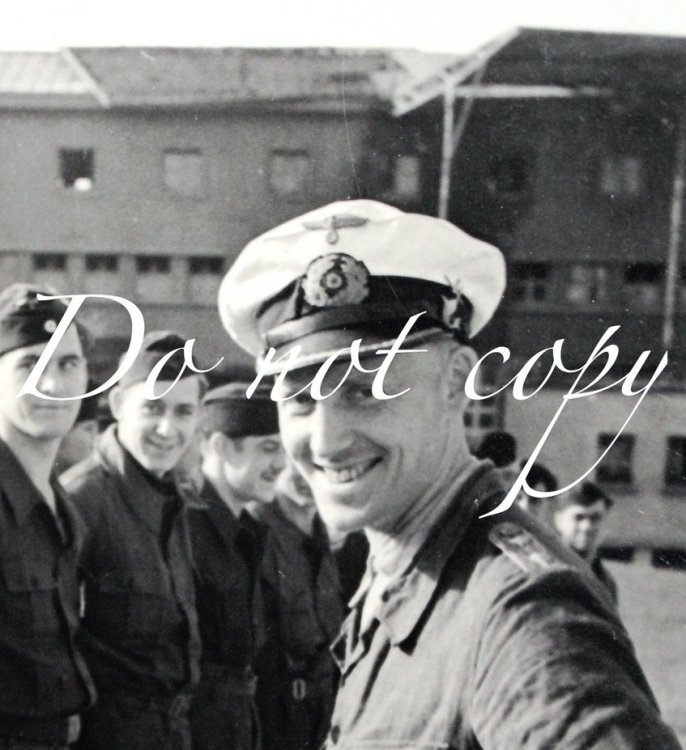
Pictured from my kriegsmarine collection is an emblem and a badge used by the Ubootwaffe as tradition cap insignia. The emblem for the National Socialist League of the Reich foe Physical Fitness( left) was worn as an U-Boat cap insignia by the crew of U-274, as was the Edelweiss gap device of the German Army Mountain Troops (right) by the crew of U-124. Examples of the these tradition badges are on page 77, page 81, and page 83 of 'Torpedo Los! THE FASCINATING WORLD OF U-BOAT COLLECTIBLES' by Gordon Williamson. Pictured from my collection is a U-Boat tradition cap insignia 'Swordfish spearing an enemy sip' for the U-441 being worn by its Commander, Klaus Hartmann (white cap). All 51 hands, including Hartmann, died when U-441 was sunk by Allied depth-charges on 30 June 1944.
 6 points
 -
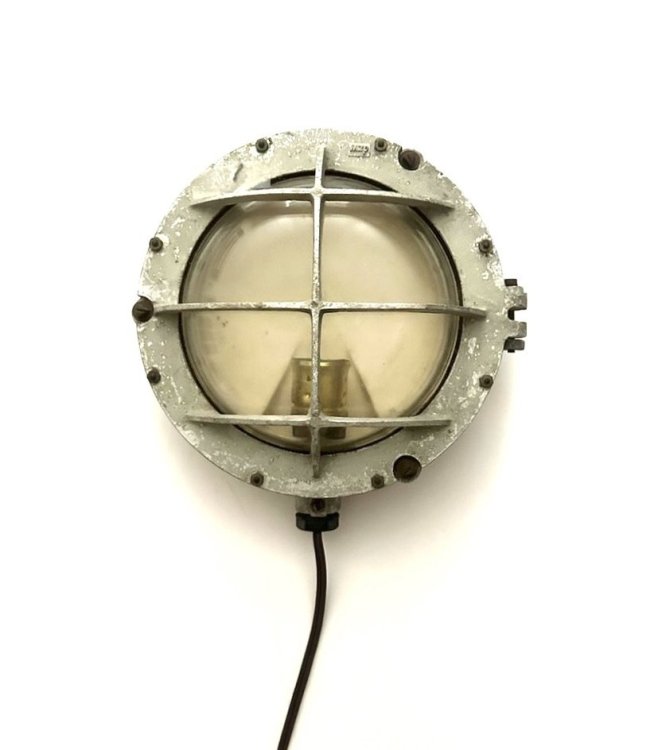
Pictured from my collection of Kriegsmarine antiques is bunker light from the Channel Islands. This light was manufactured by 'dzw' Metalwerke v. Galkowsky u. Kielblock, Finow. The fixture is original to the period with only wiring and socket mount being replaced by the prior owner years ago.
 5 points
 -
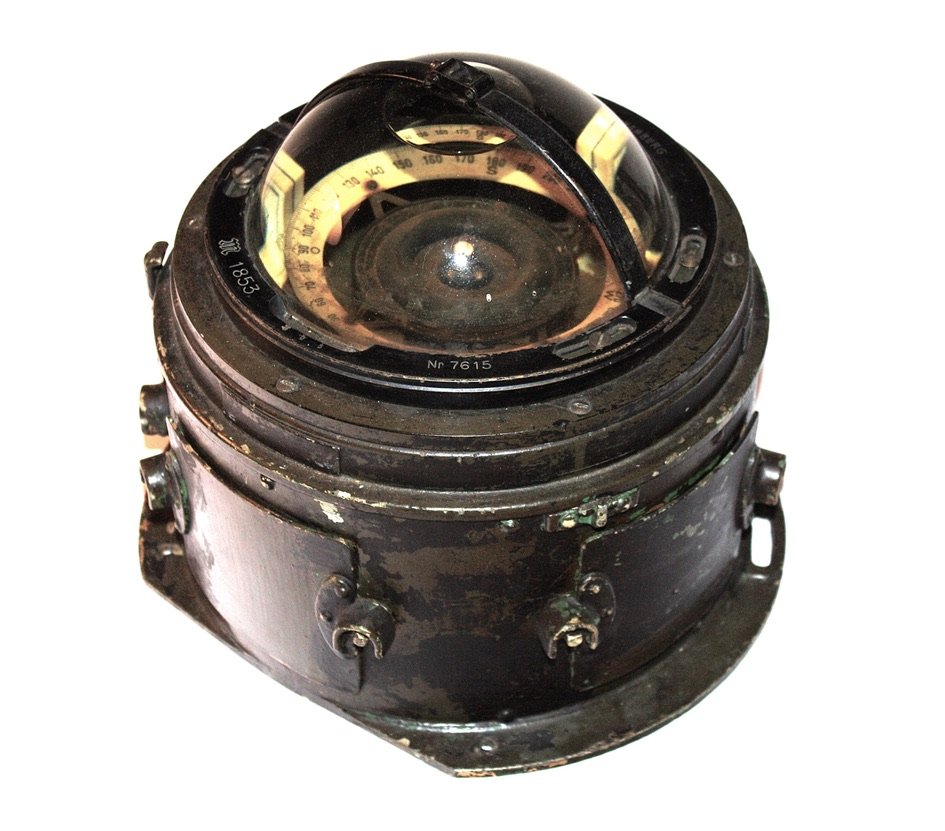
Pictured from my collection is dome compass (top) with lower binnacle case, type used aboard a Schnellboot. The Eagle, left of the gothic letter M on the bezel, was denazified with black paint, but not damaged. It is visible, just not in this photograph. The compass and sunshade (bottom) are marked C. PLATH of HAMBURG by the maker.
 5 points
 -
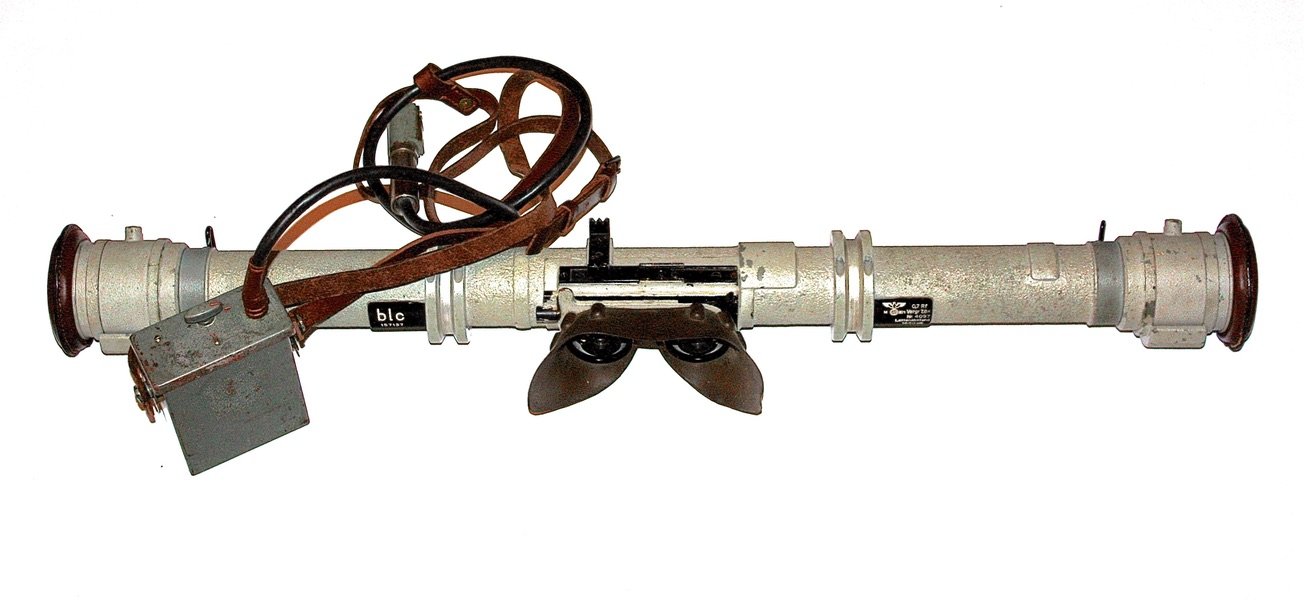
Pictured from my collection is a stereoscopic range finder manufactured for the Kriegsmarine by Carl Zeiss Jena (blc). This instrument was used to accurately estimate distance to a target calculated through triangulation, based on the length of the range finder. It can be operated with or without battery. The range finder and all its accessories are kept in a grey painted wood storage box, not shown from collection. A range finder like mine is pictured on page 424 and page 425 of 'Deutsche Kriegsmarine Uniforms, Insignias and Equipment of the German Navy 1933-1945' by Eduardo Delgado.
 5 points
 -
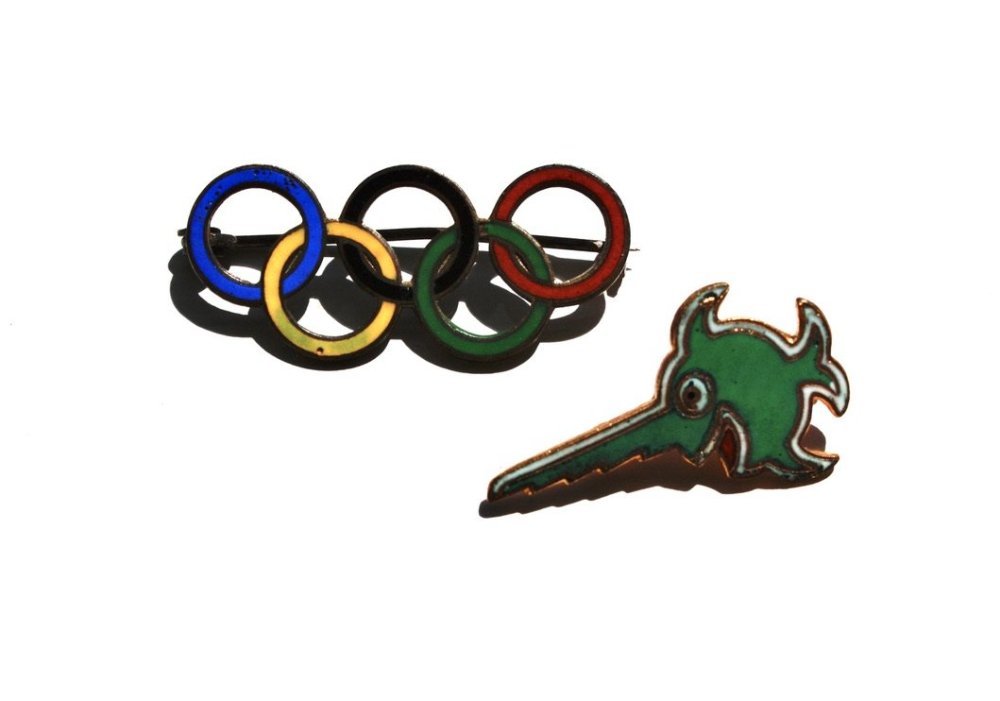
Pictured from my kriegsmarine collection is the emblem of the 1936 Olympics rings (top left) that was worn as an U-Boat tradition cap insignia by several crews, including U-165 and U-995. Also pictured is the insignia for the 9th U-Boat Flotilla 'Laughing Sawfish' (bottom right). Examples of the these tradition badges are on page 64, page 77, and page 83 of 'Torpedo Los! THE FASCINATING WORLD OF U-BOAT COLLECTIBLES' by Gordon Williamson.
 5 points
 -
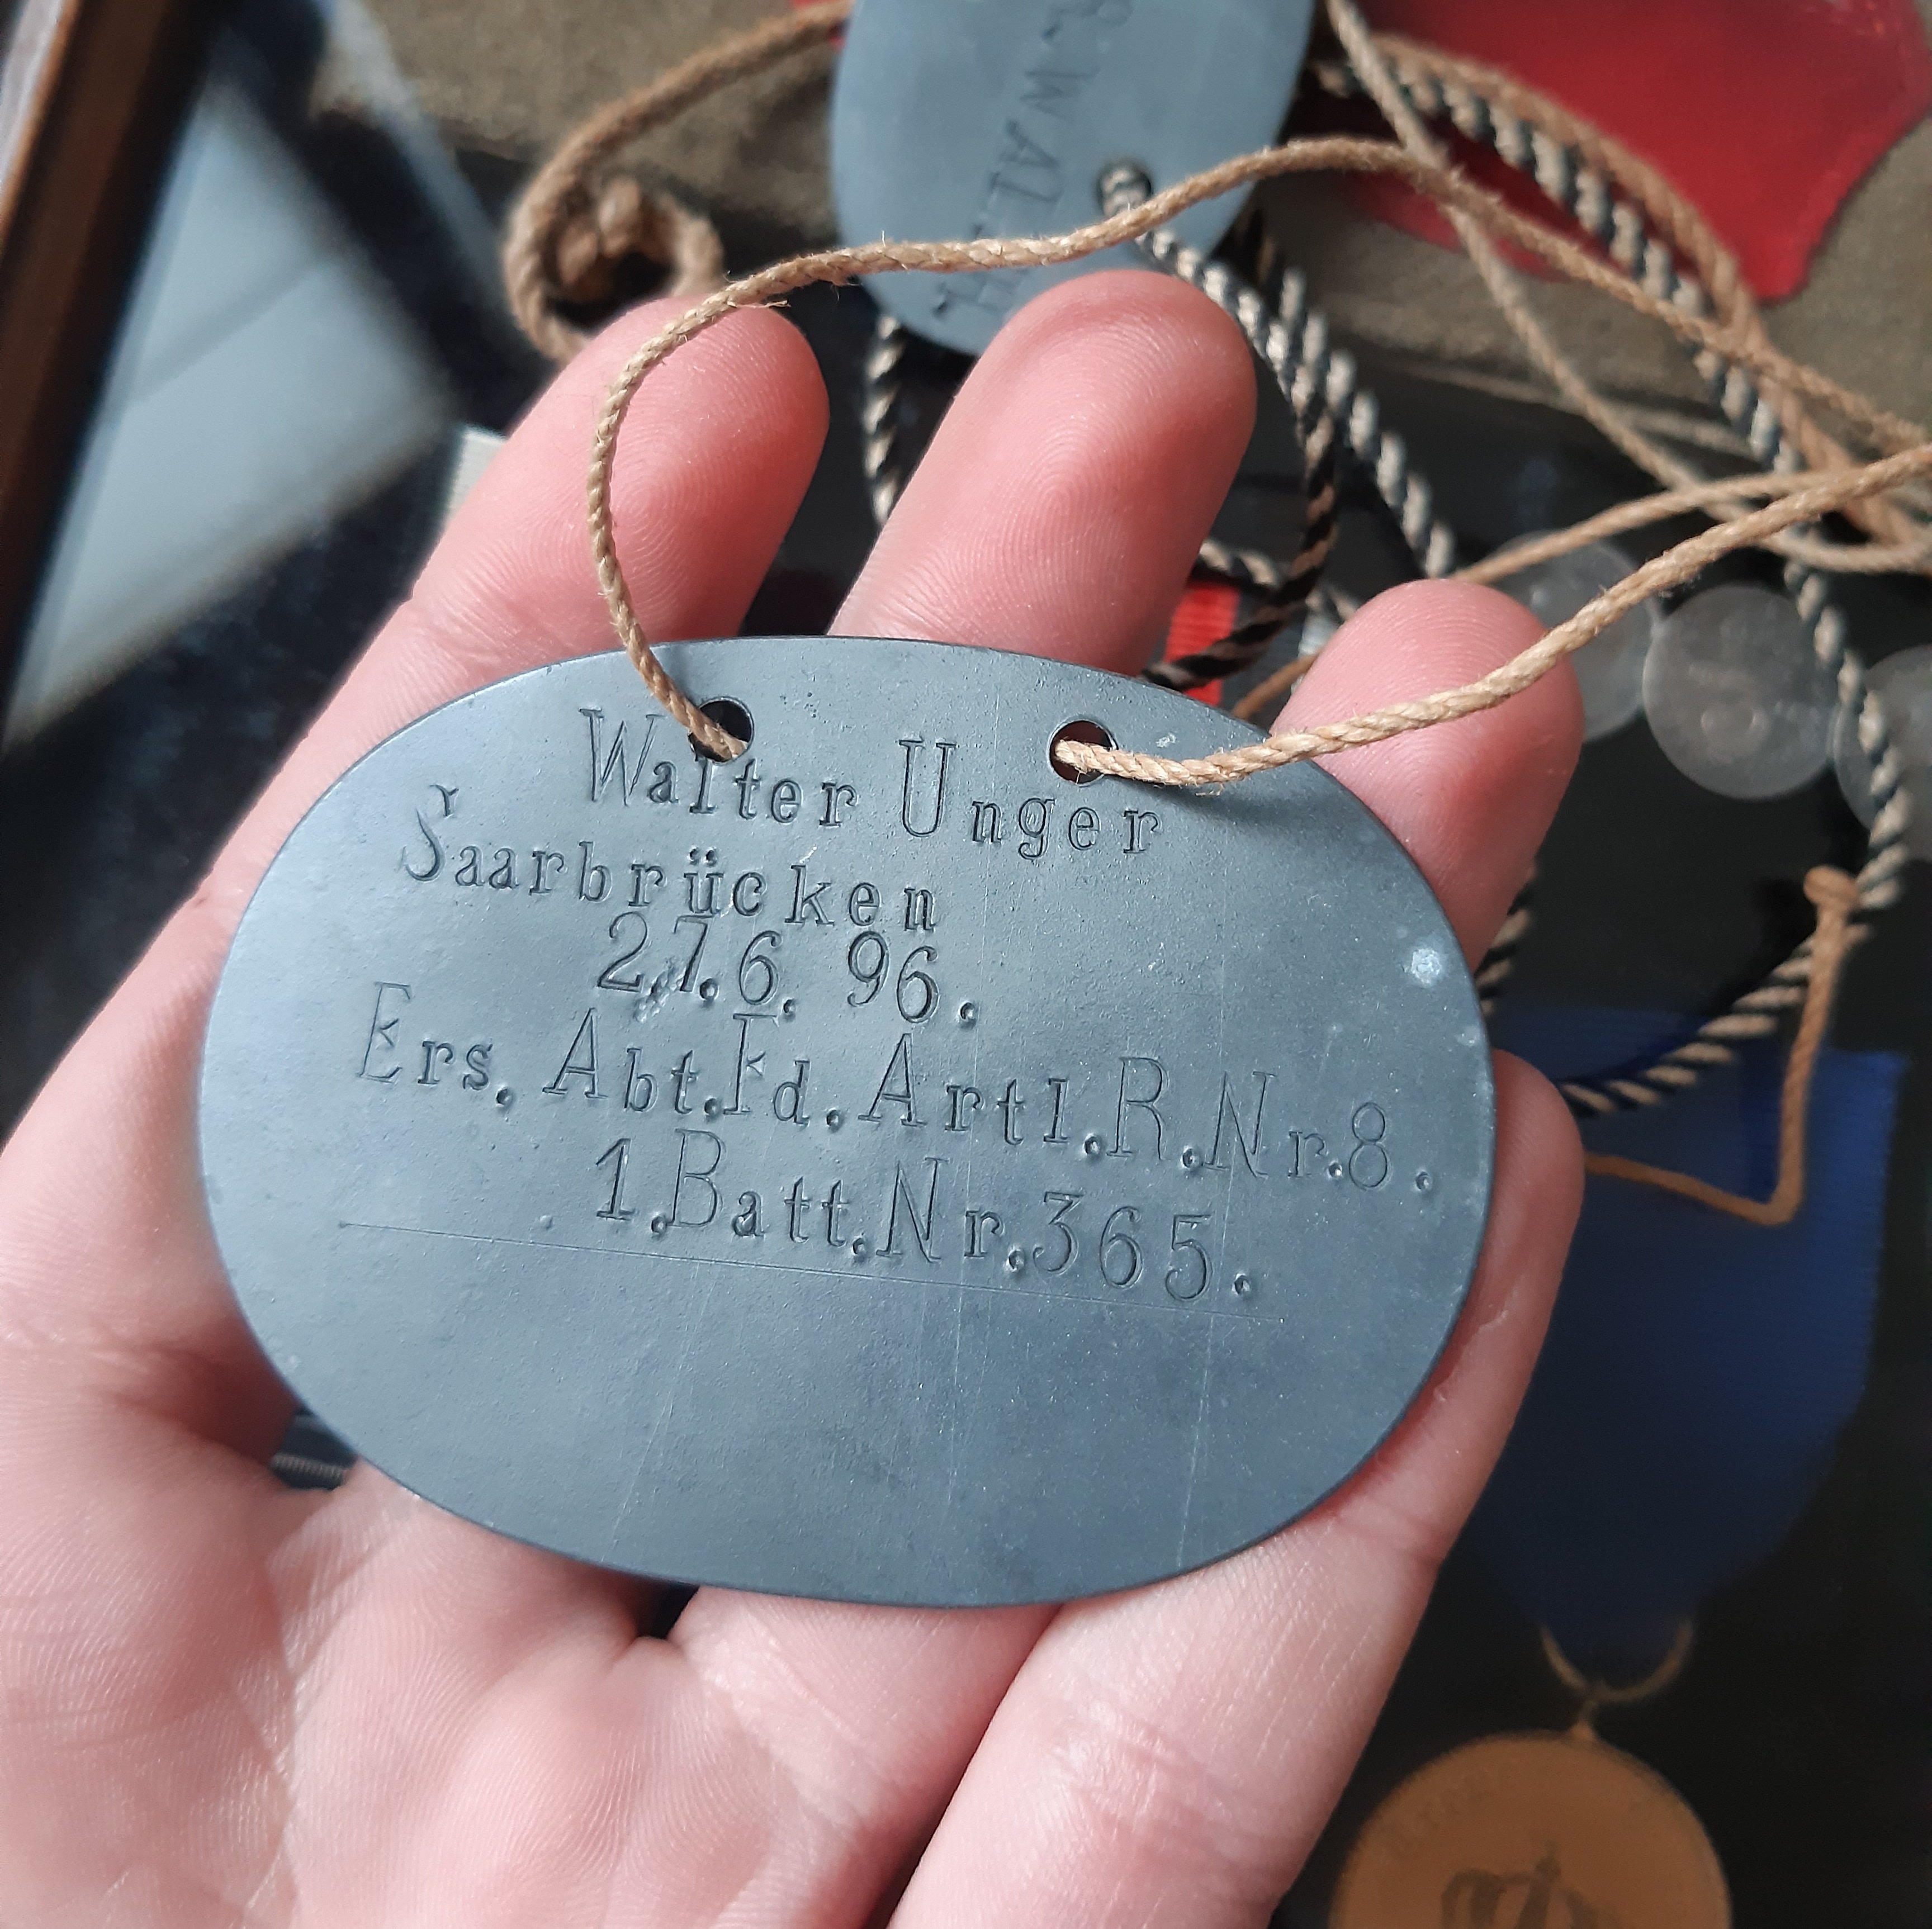
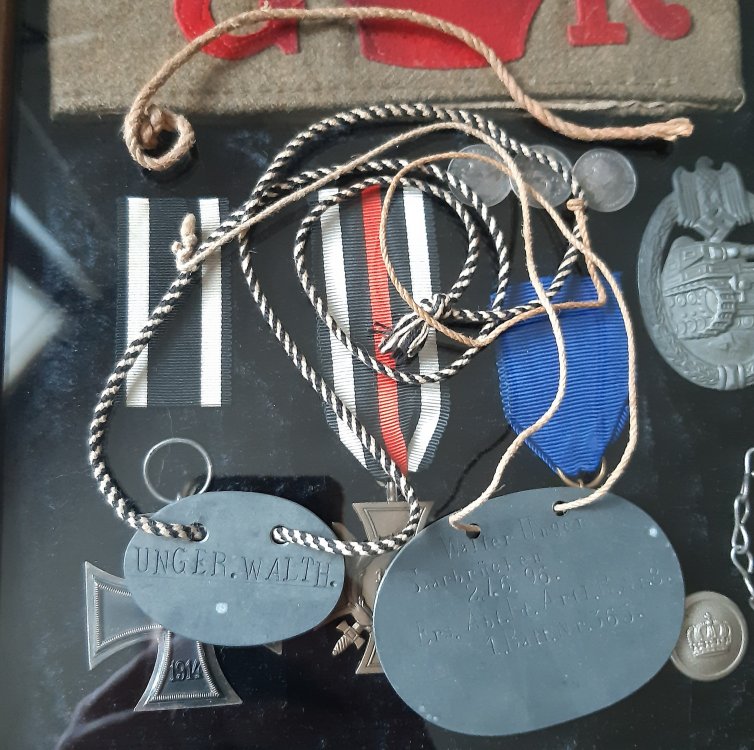
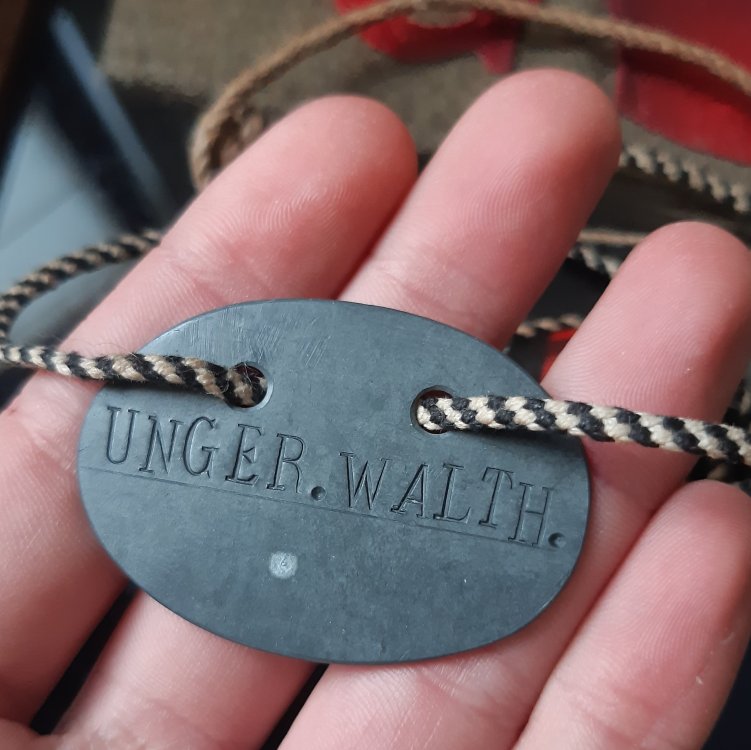
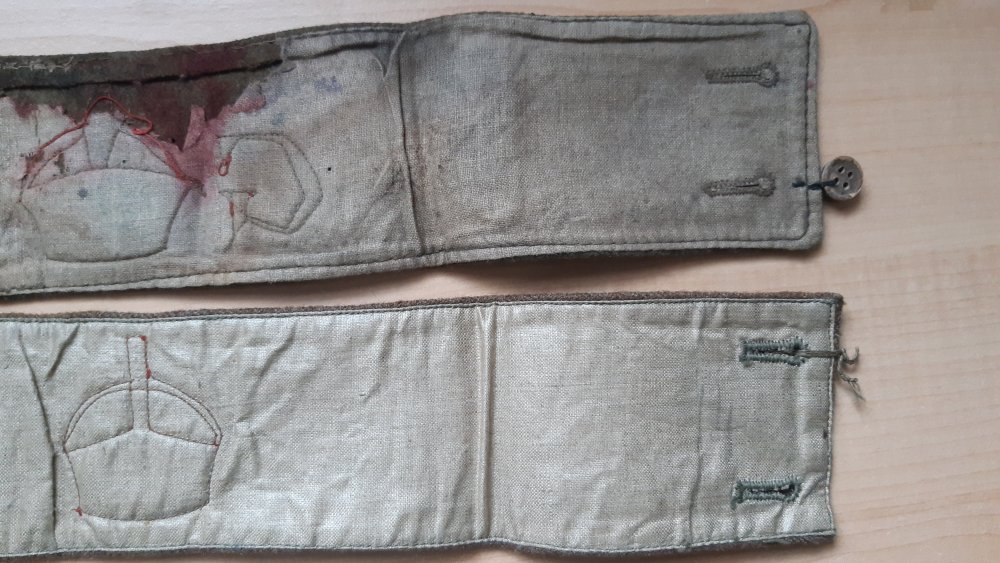
This is an interesting set of dogtags from a german soldier named Walter (or Walther) Unger. He was born on June 26th 1896 in Saarbrücken. So he would have turned 18 just before the start of ww1. The first dogtag is a model of 1878. It still has the original black and white string and it only shows his name. The second tag is a model 1915. It shows his name, place of birth, date of birth and his unit. It still has most of the original string, but it's not as long as it's supposed to be. It did come with a short piece of thicker string, but I'm not sure if that really belongs with it. Maybe an old repair that came loose again? I think it's really interesting to have these two tags together. The soldier probably kept his old tag when it was supposed to be replaced by the newer one. If anyone has any more information about this person, I'd be glad to hear!
 5 points
 -
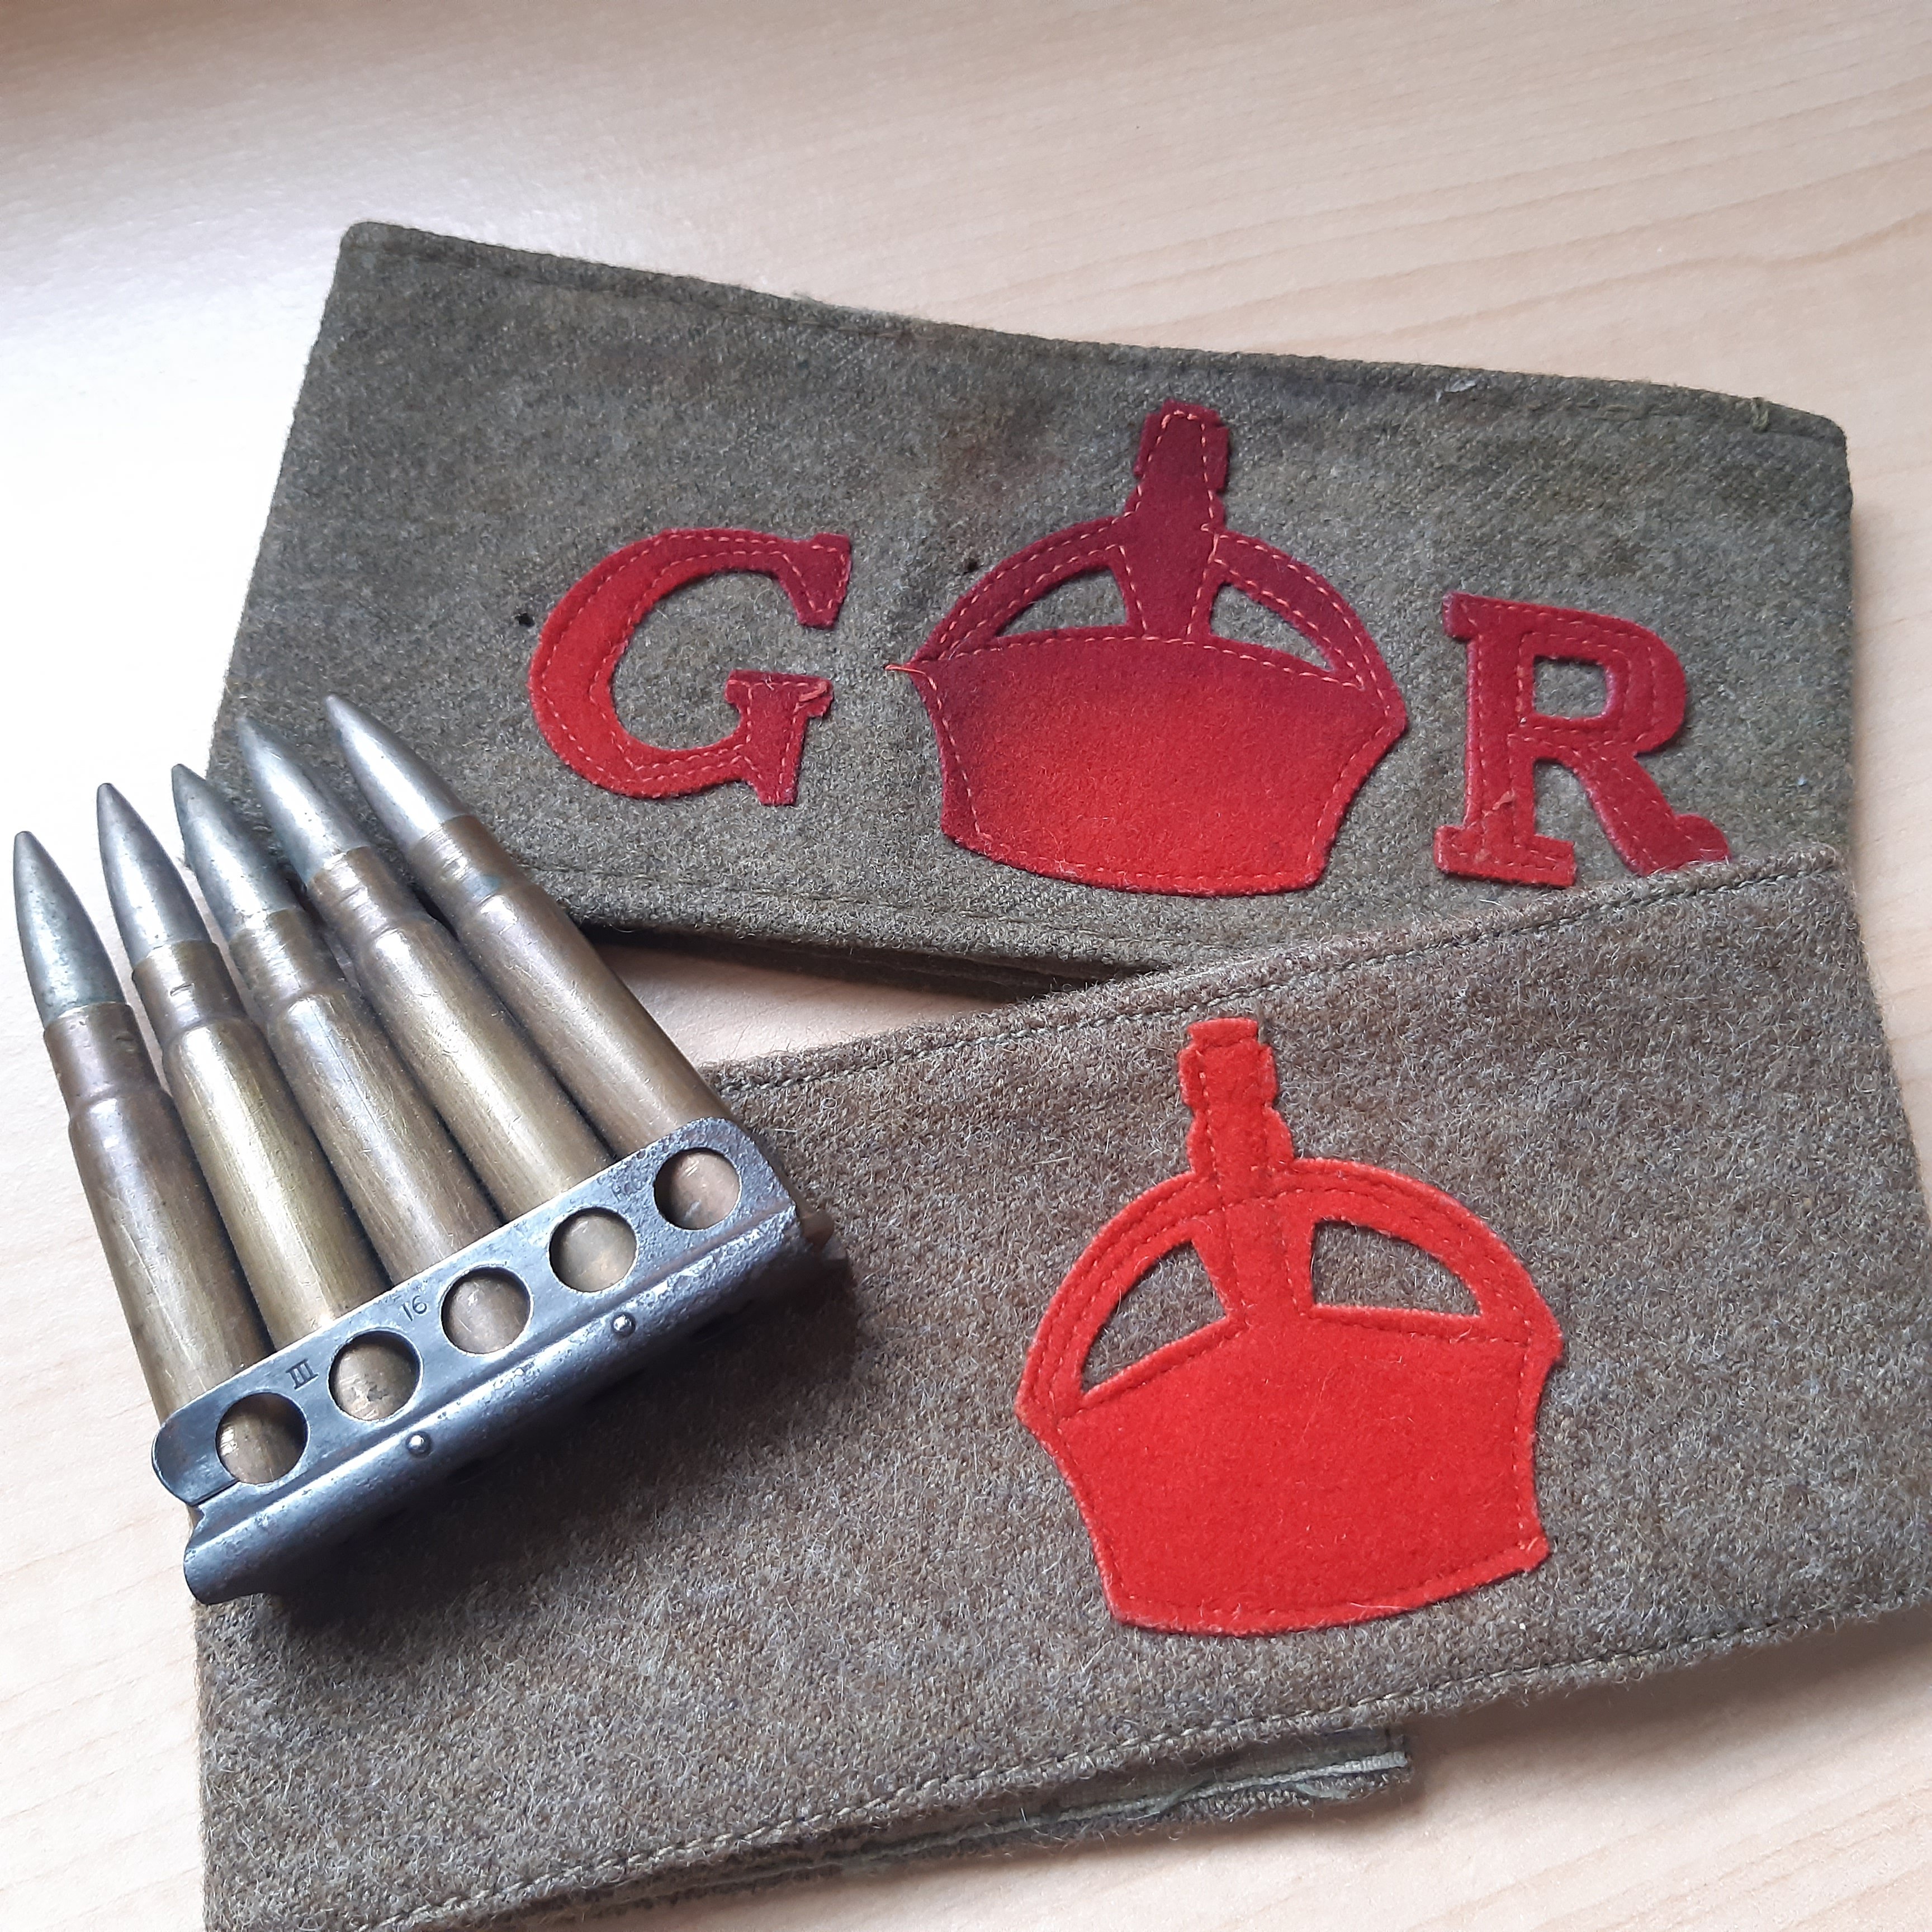
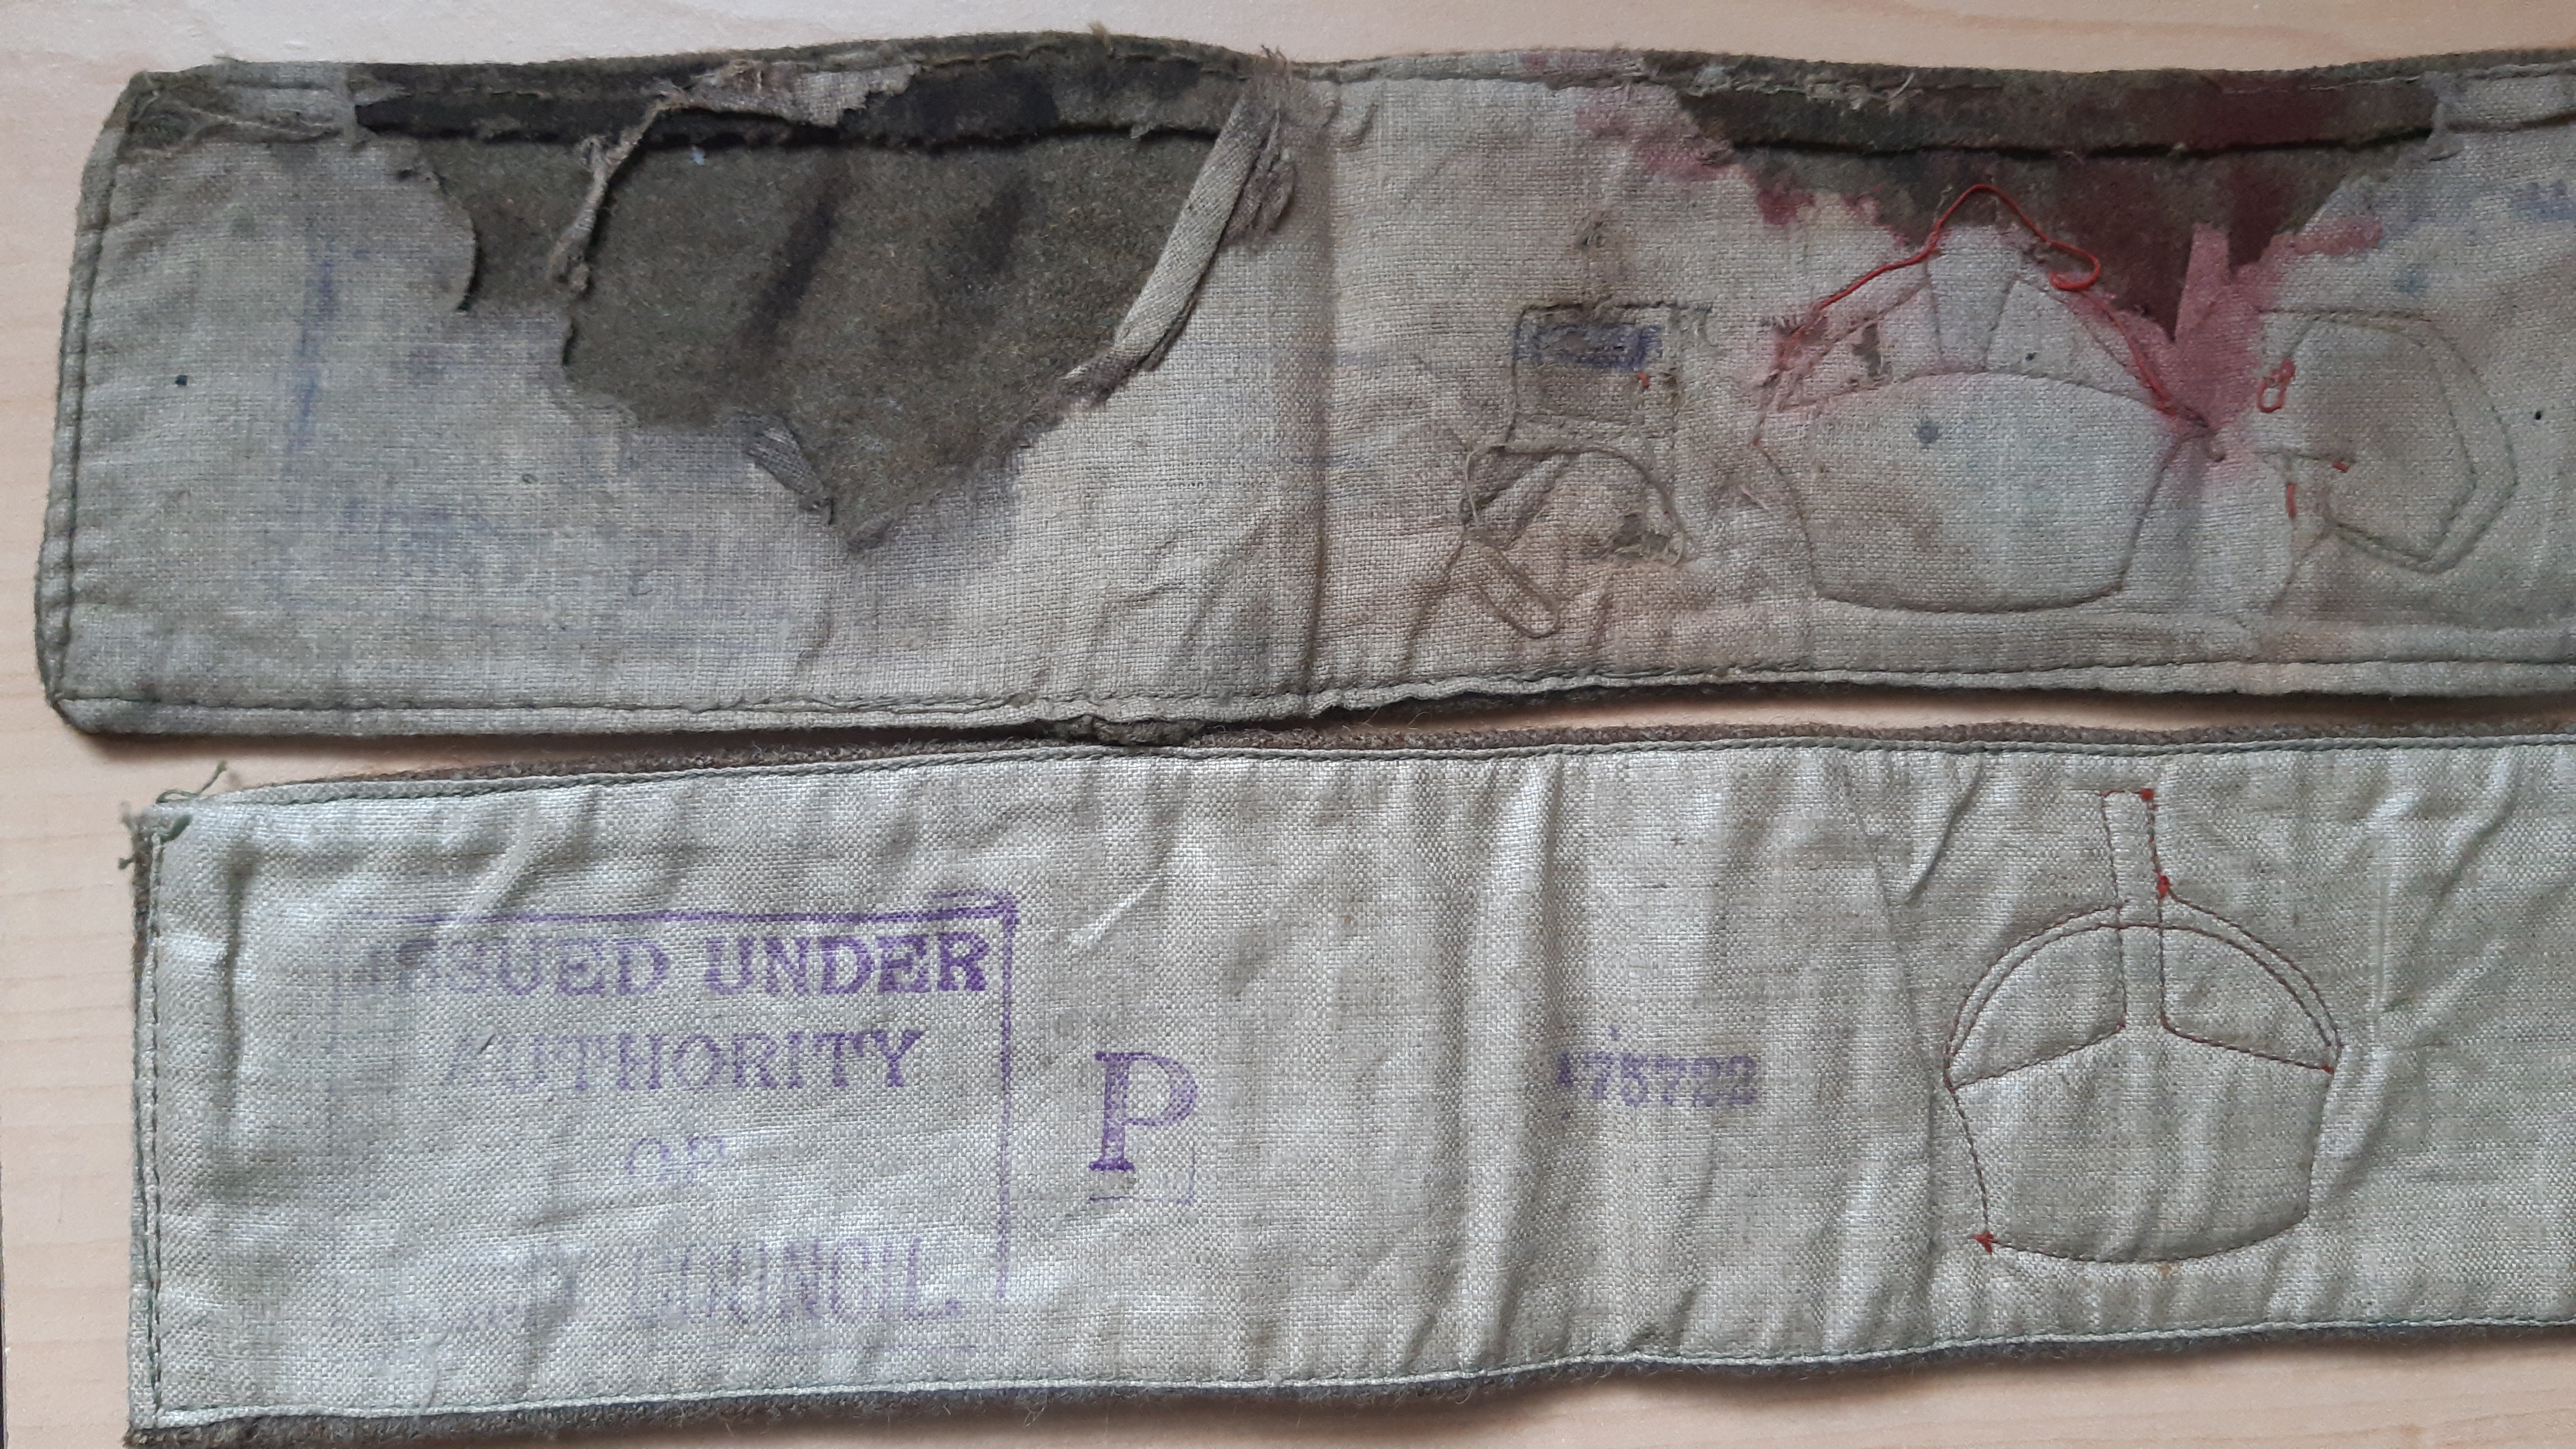
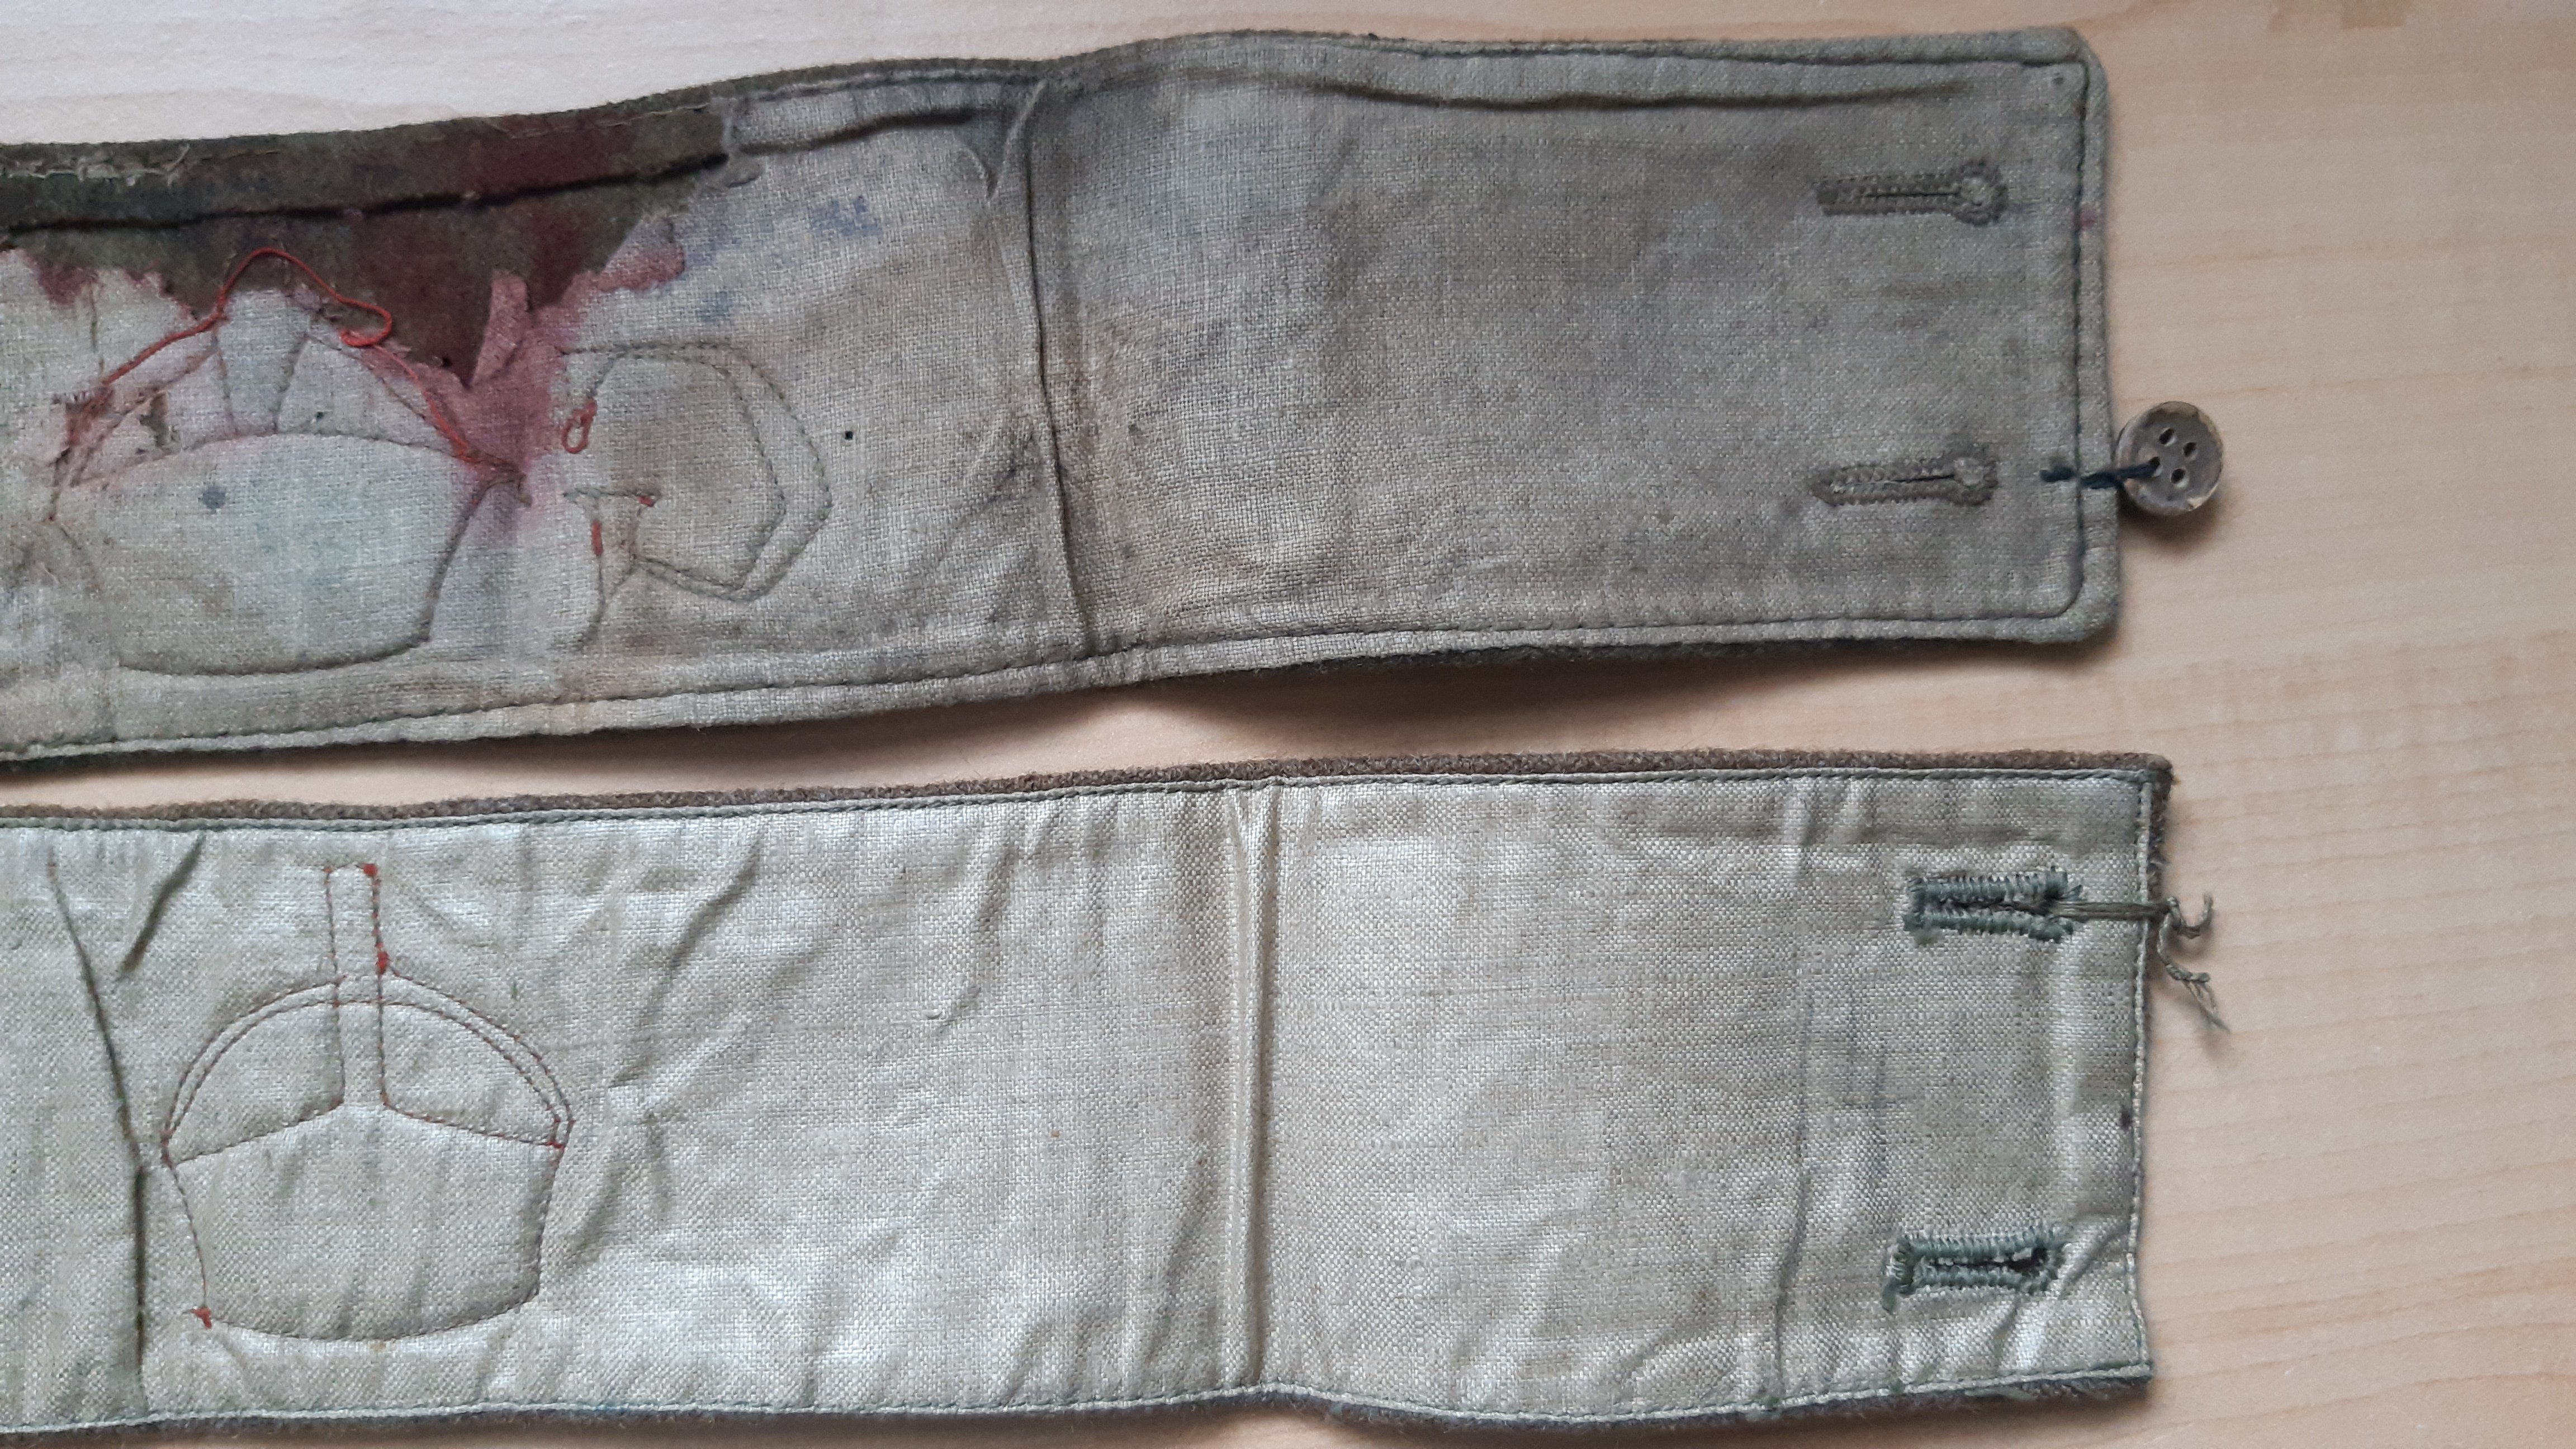
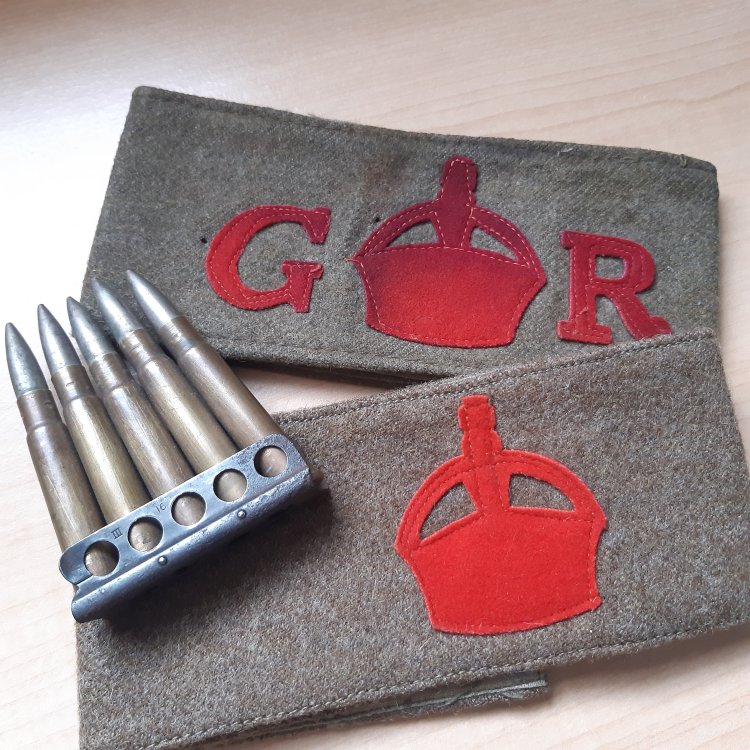
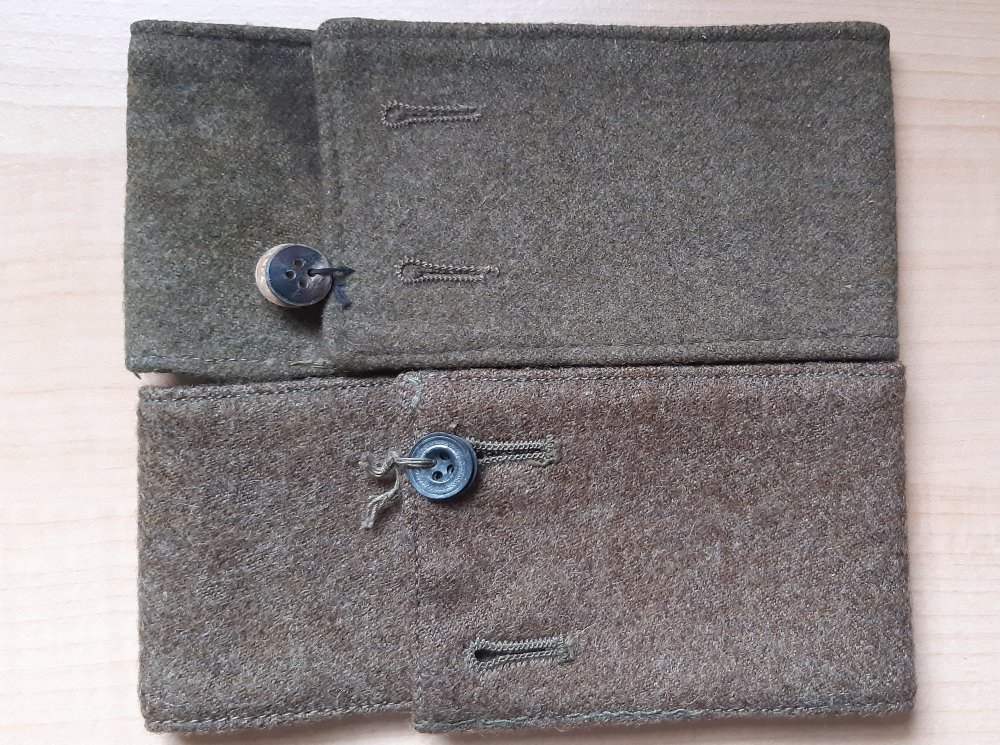
Here are two british armbands from my collection. One from the derby scheme and one from the volunteer training corps. The VTC one is in worn condition and has two period replacement buttons. The derby scheme one is in perfect unissued condition and still has the original zinc buttons attached with multiple strands of thread, exactly how it would come from the factory. Both are very nicely marked on the back.

 5 points
 -
5 points
-
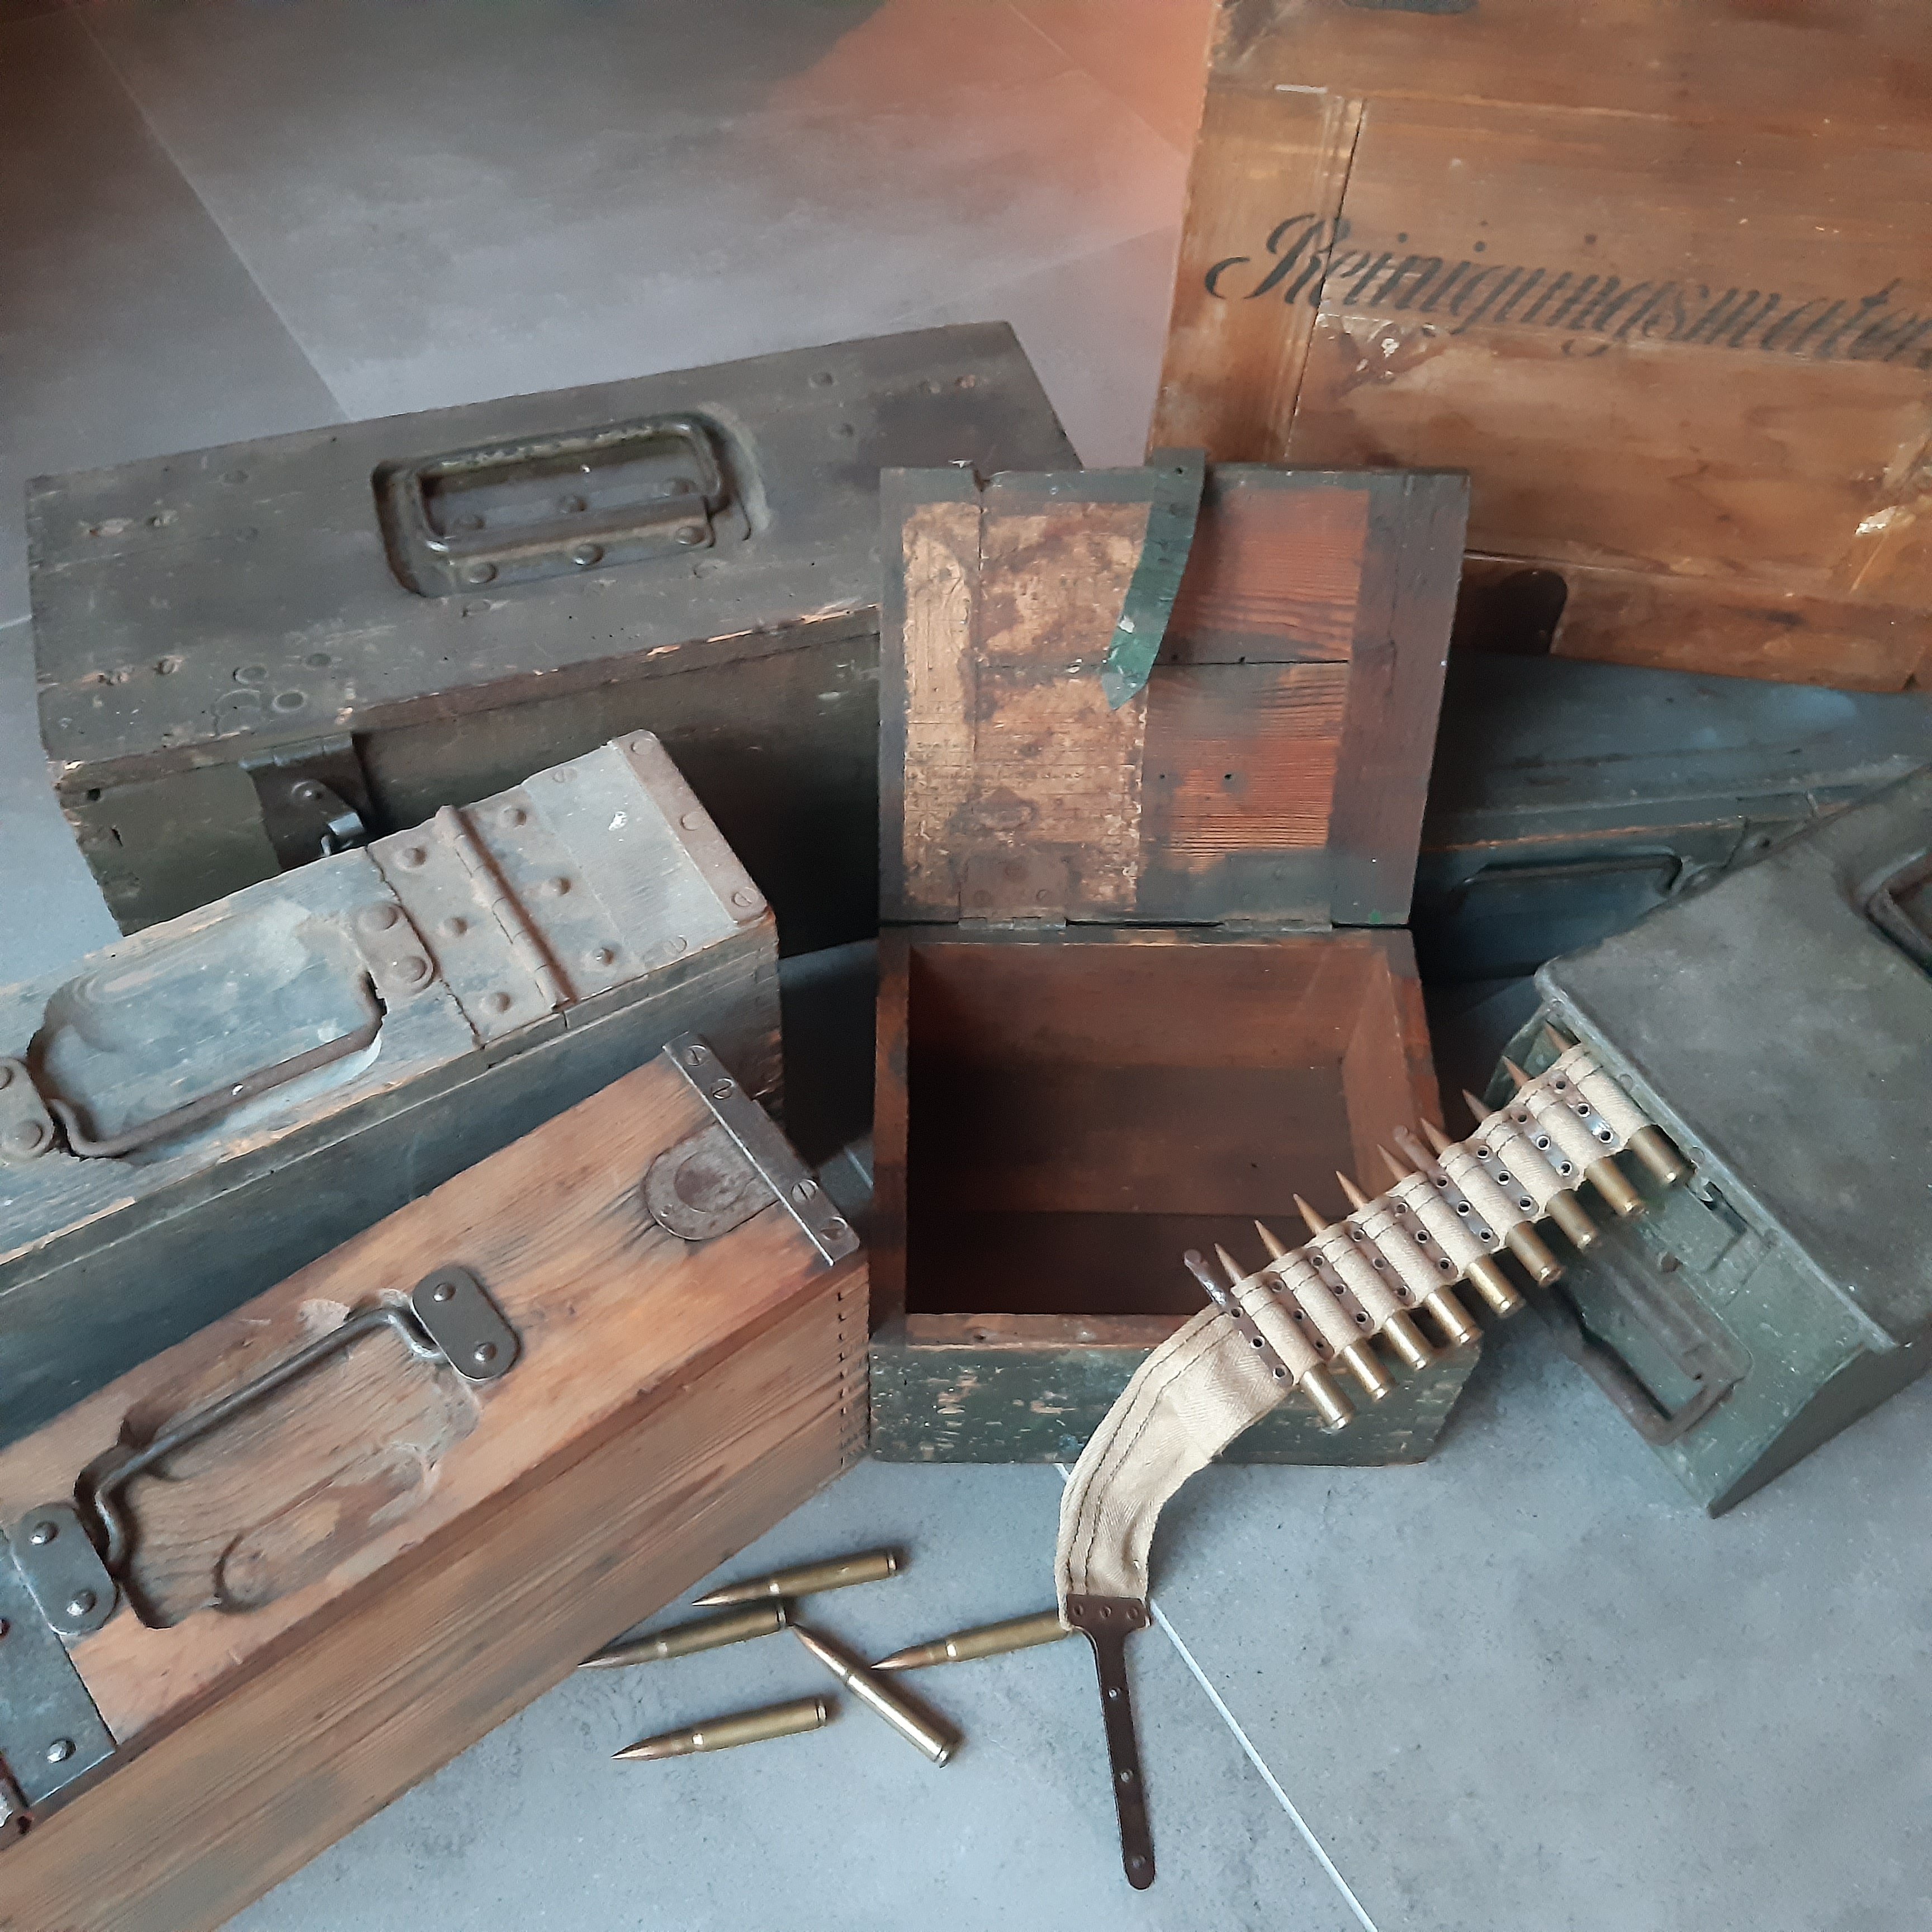
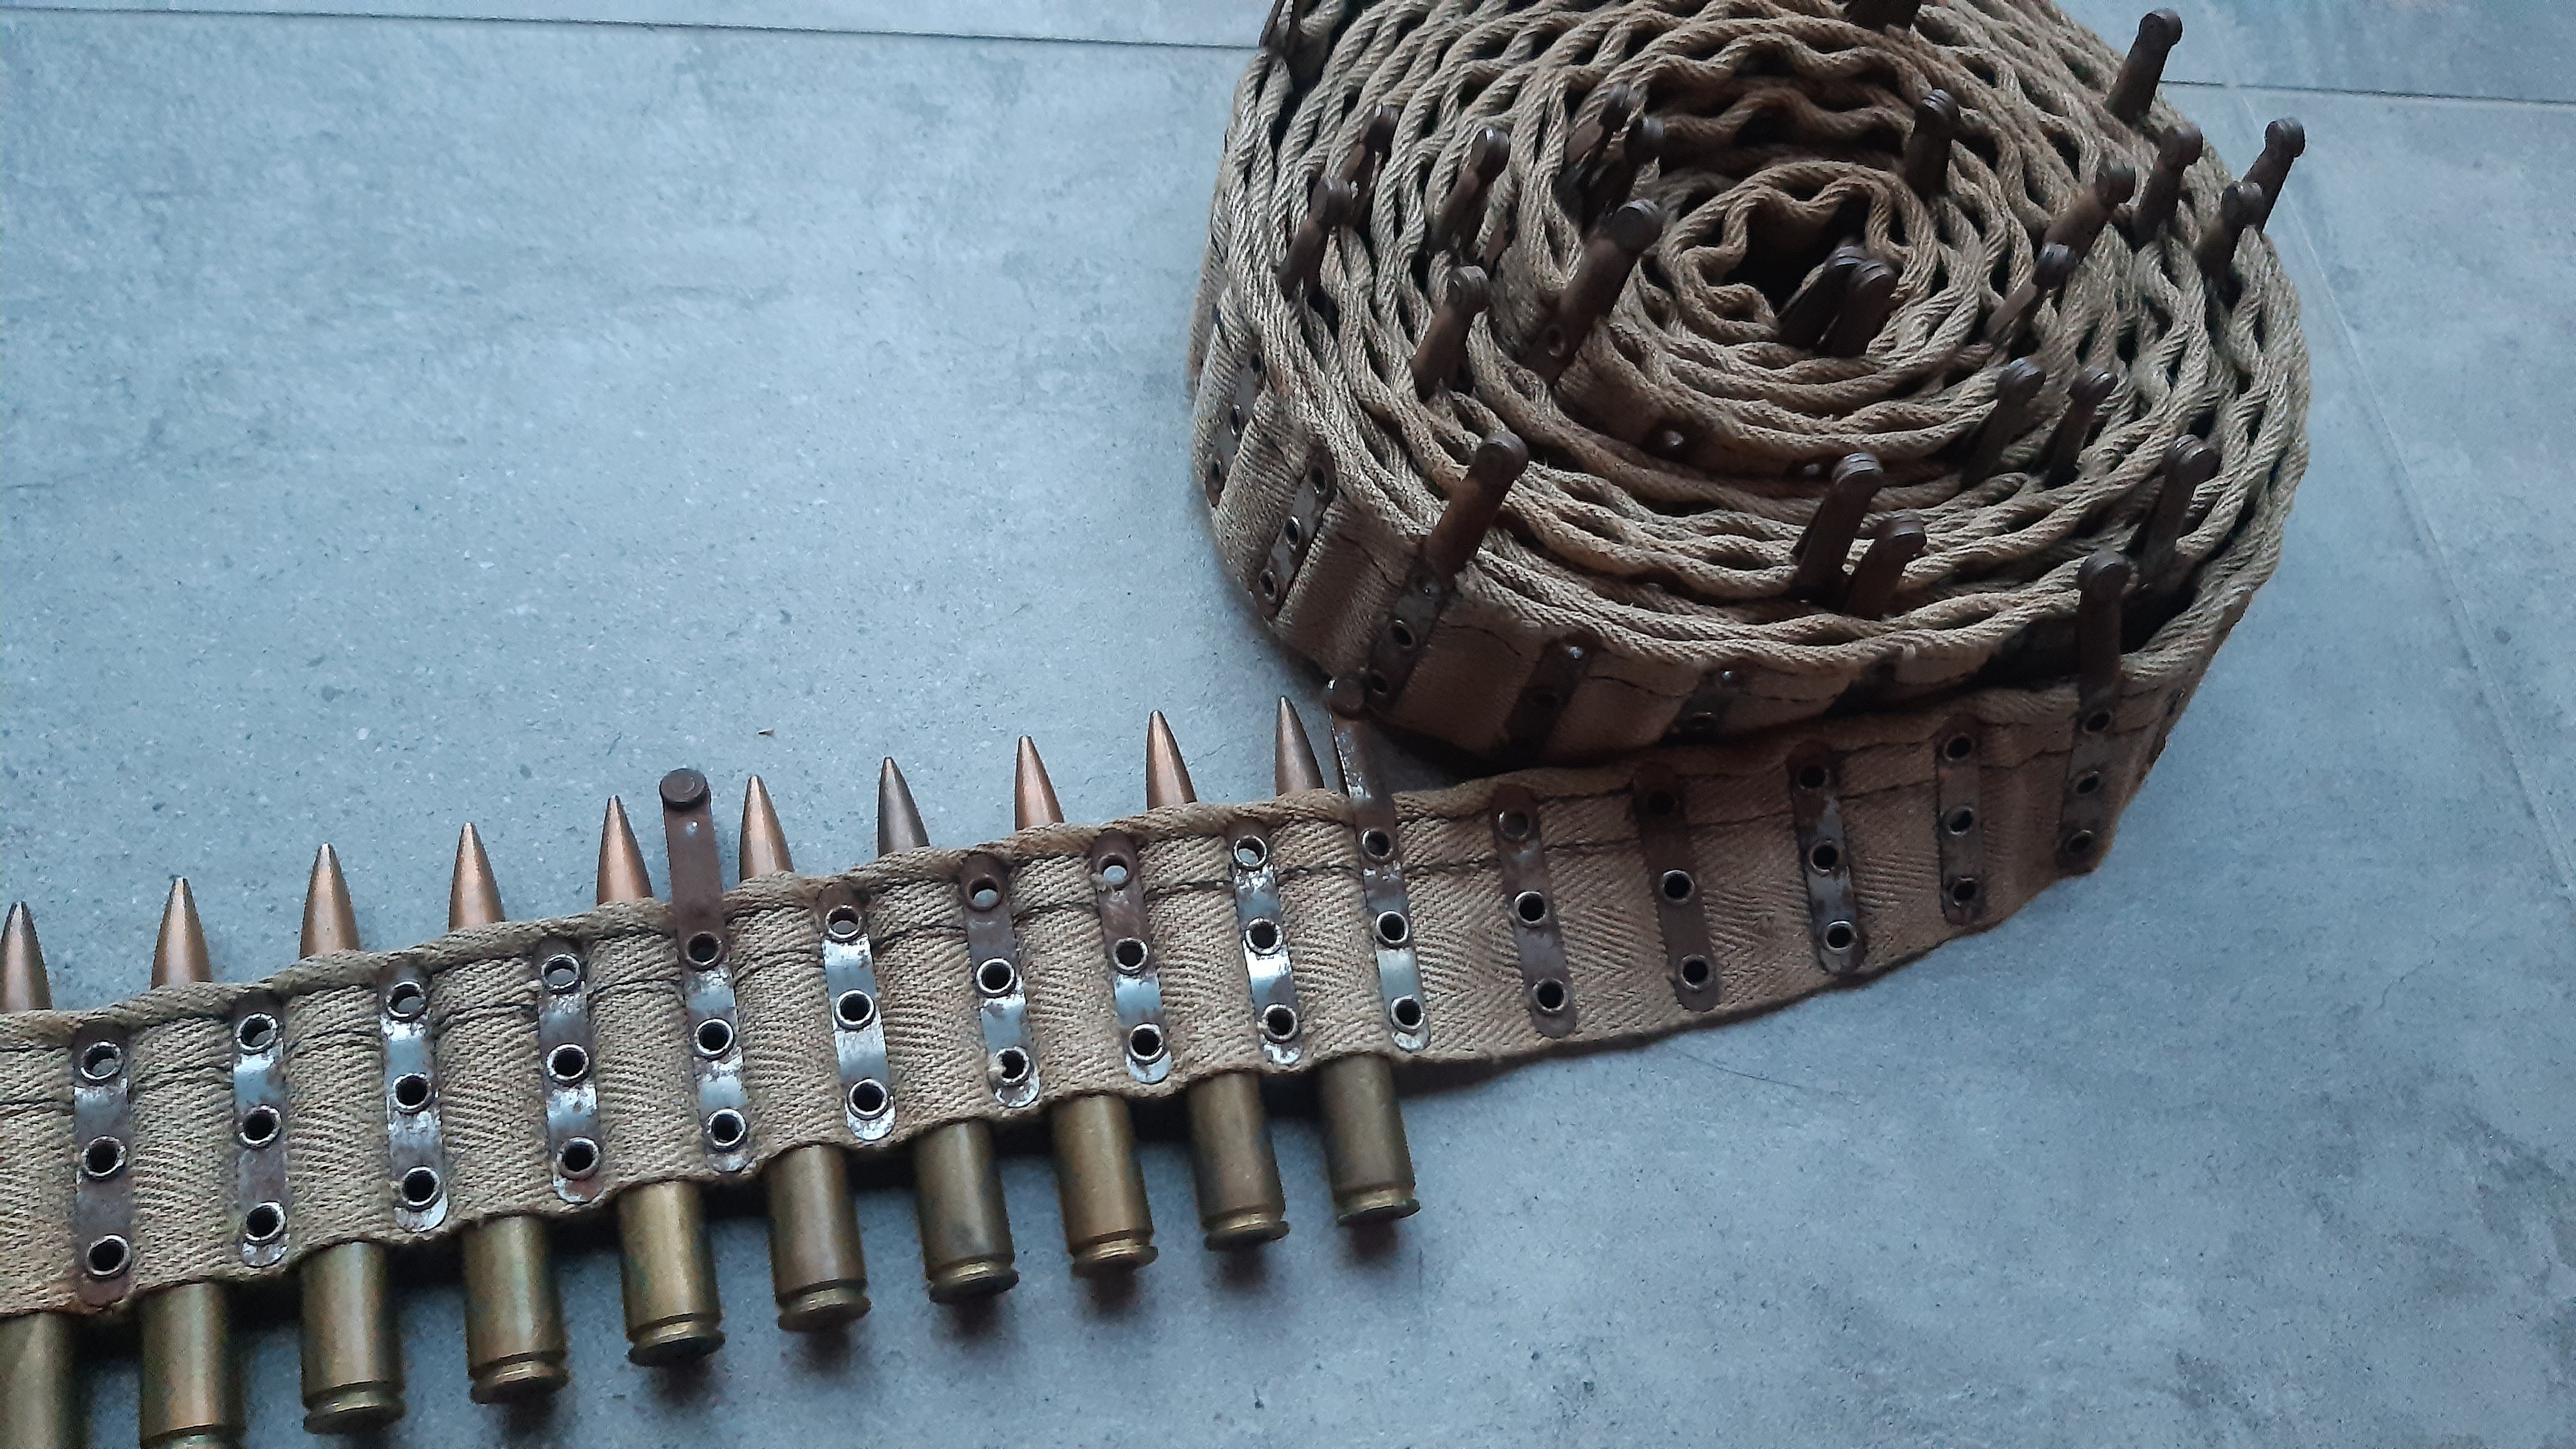
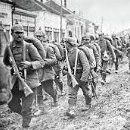
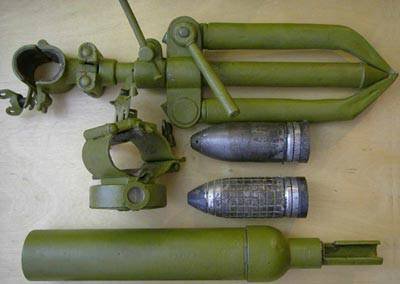
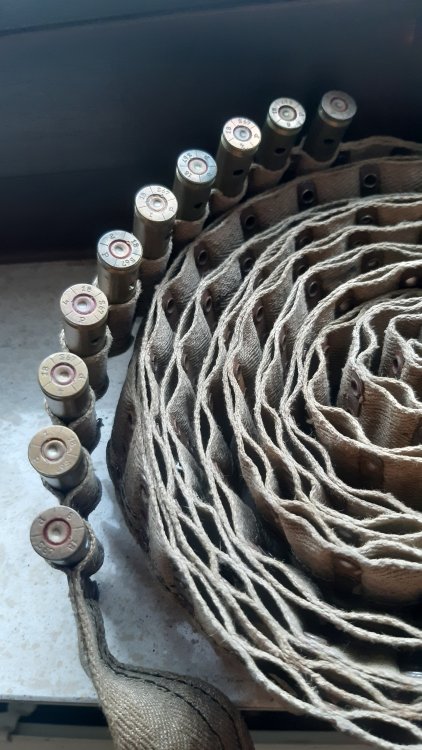
Hi everyone! This is my first time posting here on the forum, so I'll introduce myself. I'm Bram, I'm 20 years old and I collect all kinds of ww1 militaria. I'll continue sharing bits and pieces from my collection, but I'll start with some Mg08 and Mg08/15 related stuff. I have three standard wooden ammo boxes. Two of them still have a lot if original paint and are marked R. Görs & kallmann on the inside. They have some sort of metal shielding on the inside too. I got the third one for cheap, as it was repainted after ww1. I was able to remove all the postwar paint, but unfortunately there wasn't much original paint left. It still looks much better than it did before though. I also have one metal double ammo box also with a lot of original paint and a parking on the lid. The larger box in the back is a transport case for two ammo drums for the Mg08/15. It has a lot of original paint and it even has the original protective pads on the inside of the lid. The small box in the middle is for the hilfslafette. The inside of the lid still has the schematics for the parts that should be in there. The leather strap is marked 1917. The large flat box in the back that says 'Reinigungsmaterial' used to contain all kinds of cleaning materials for the Mg. It has a papercloth handle on the side. The ammo belt is also an original example. It isn't a full 250 round length anymore, but it's still a nice and rare piece. It's nicely marked and made in 1917. All the rounds in the picture are dated 1916 and 1917. They are all deactivated because I can't own live ammo where I live. Hope you guys like it! Greetings, Bram

 5 points
 -
Hi John R., Thank you for your donation of 75.00 GBP. We look forward to improving the forums with your donation. Thanks Treasure Bunker Forum4 points
-
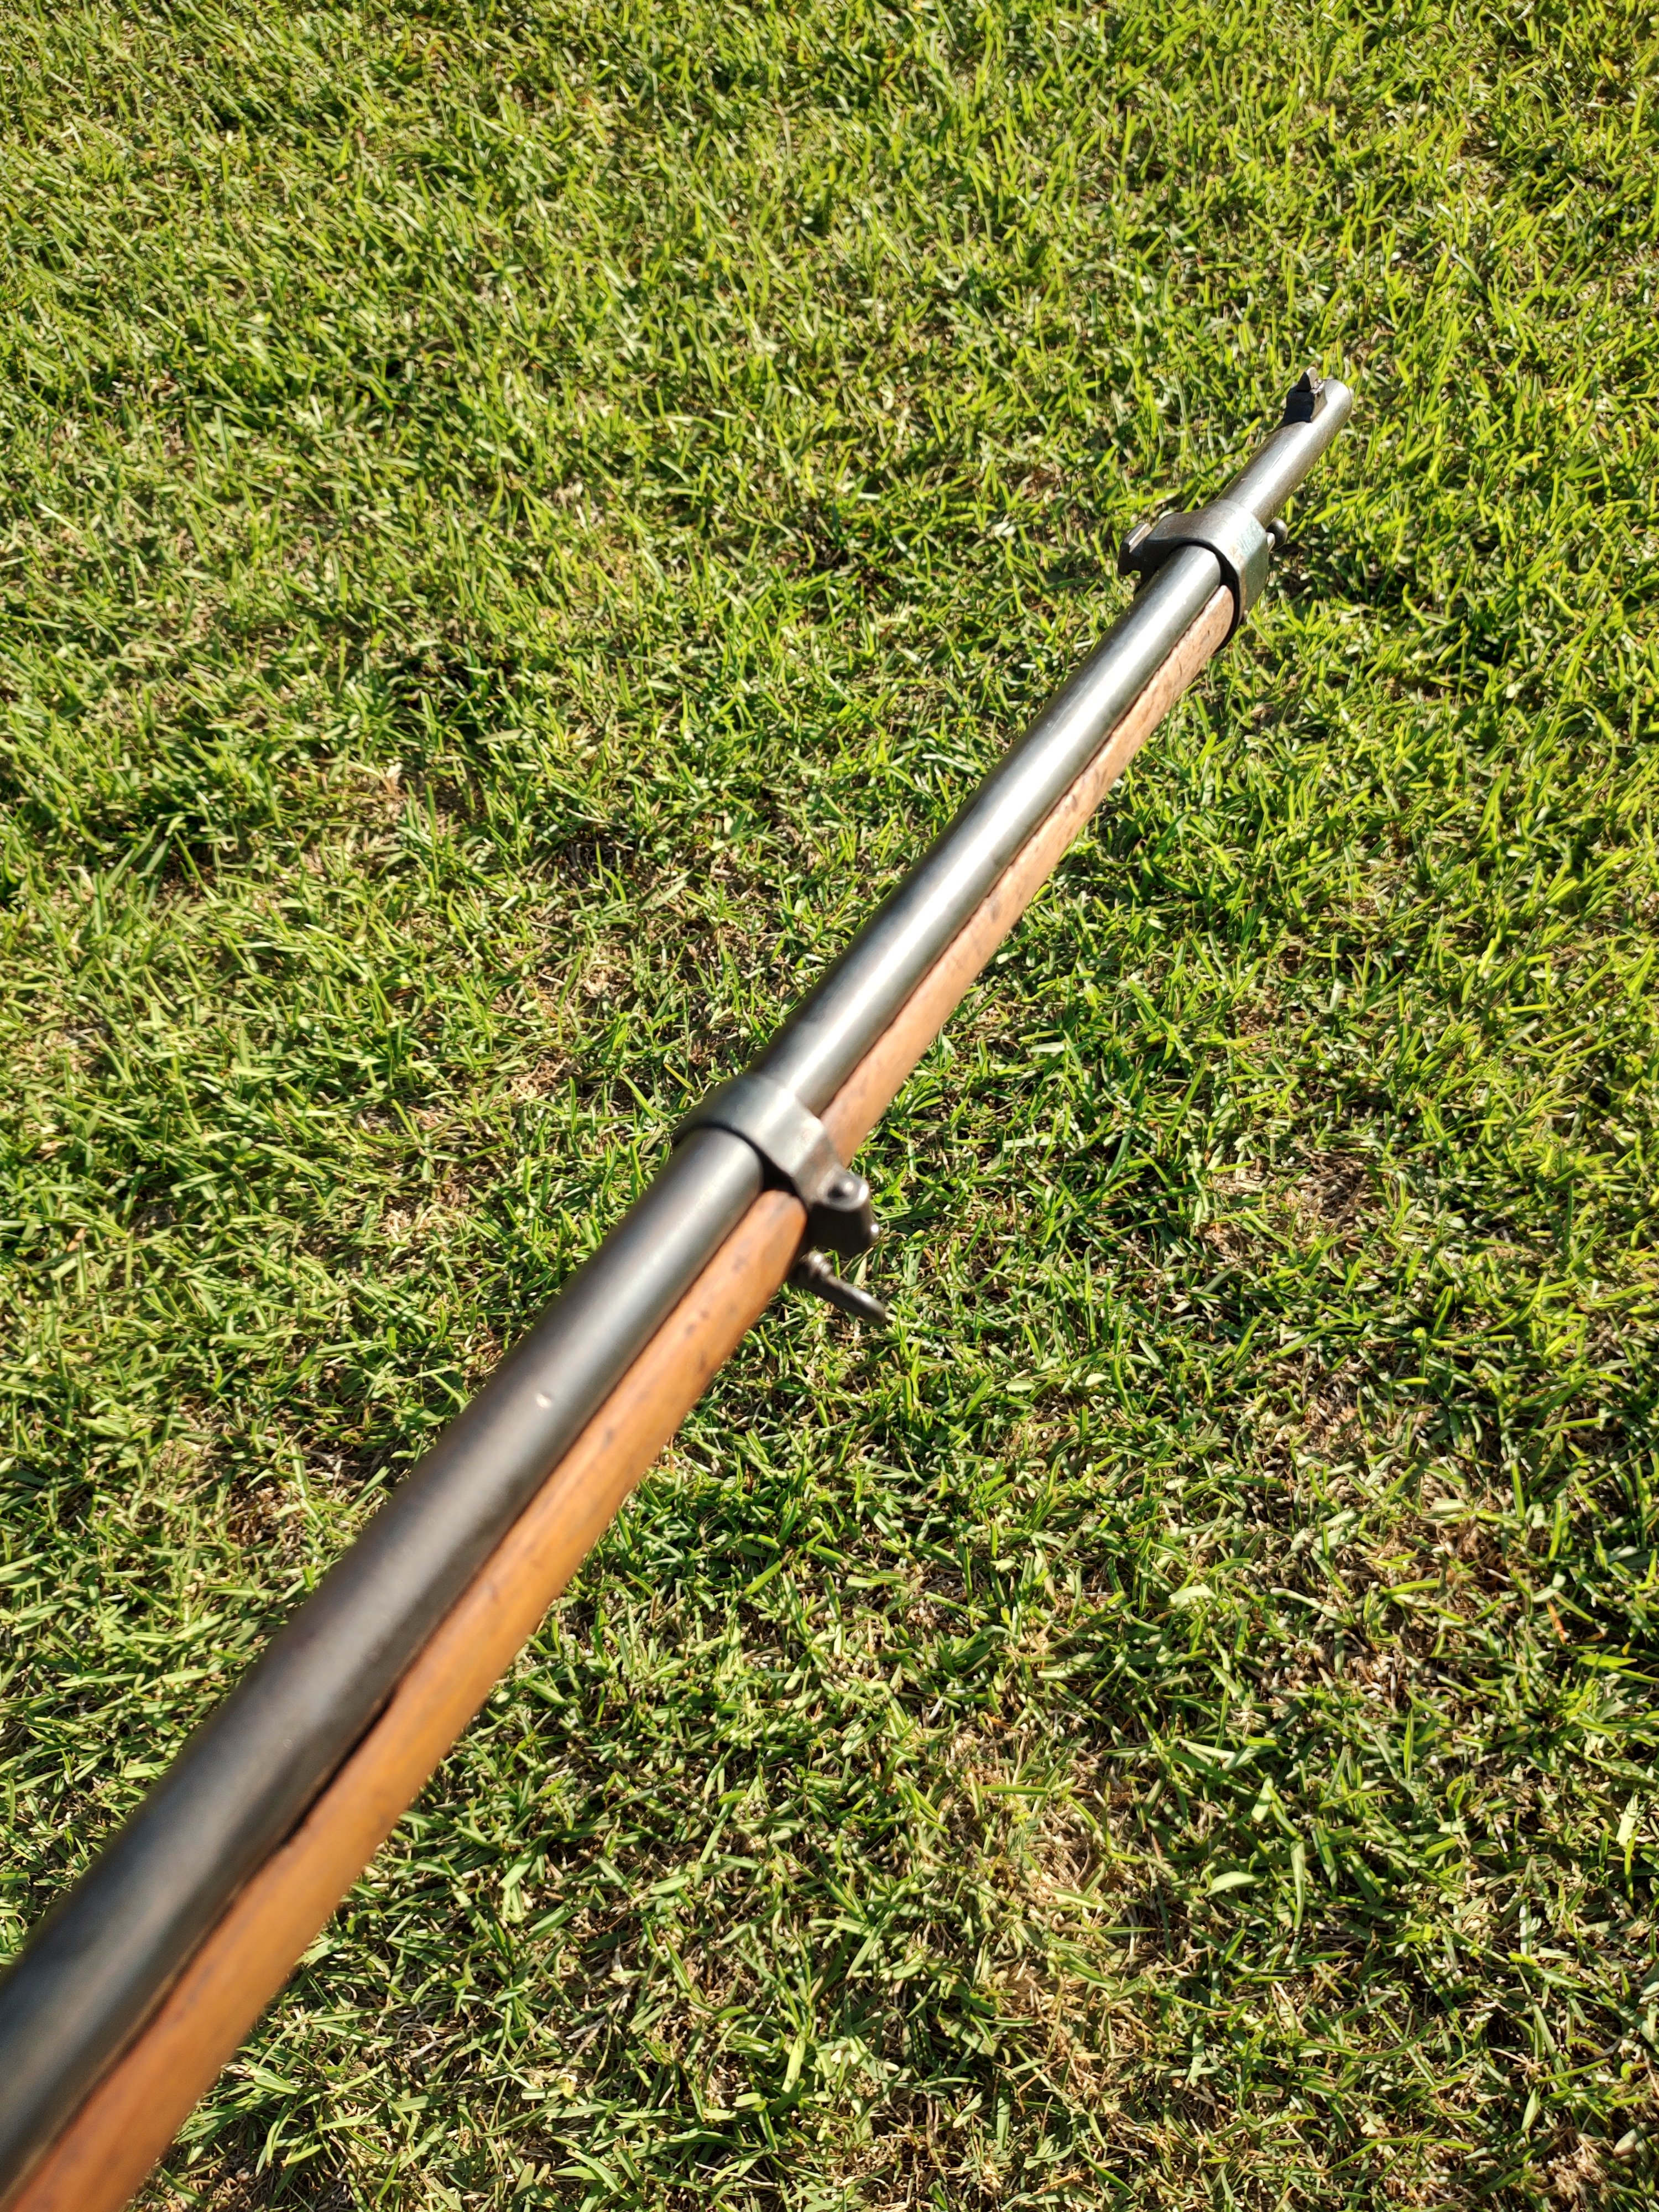
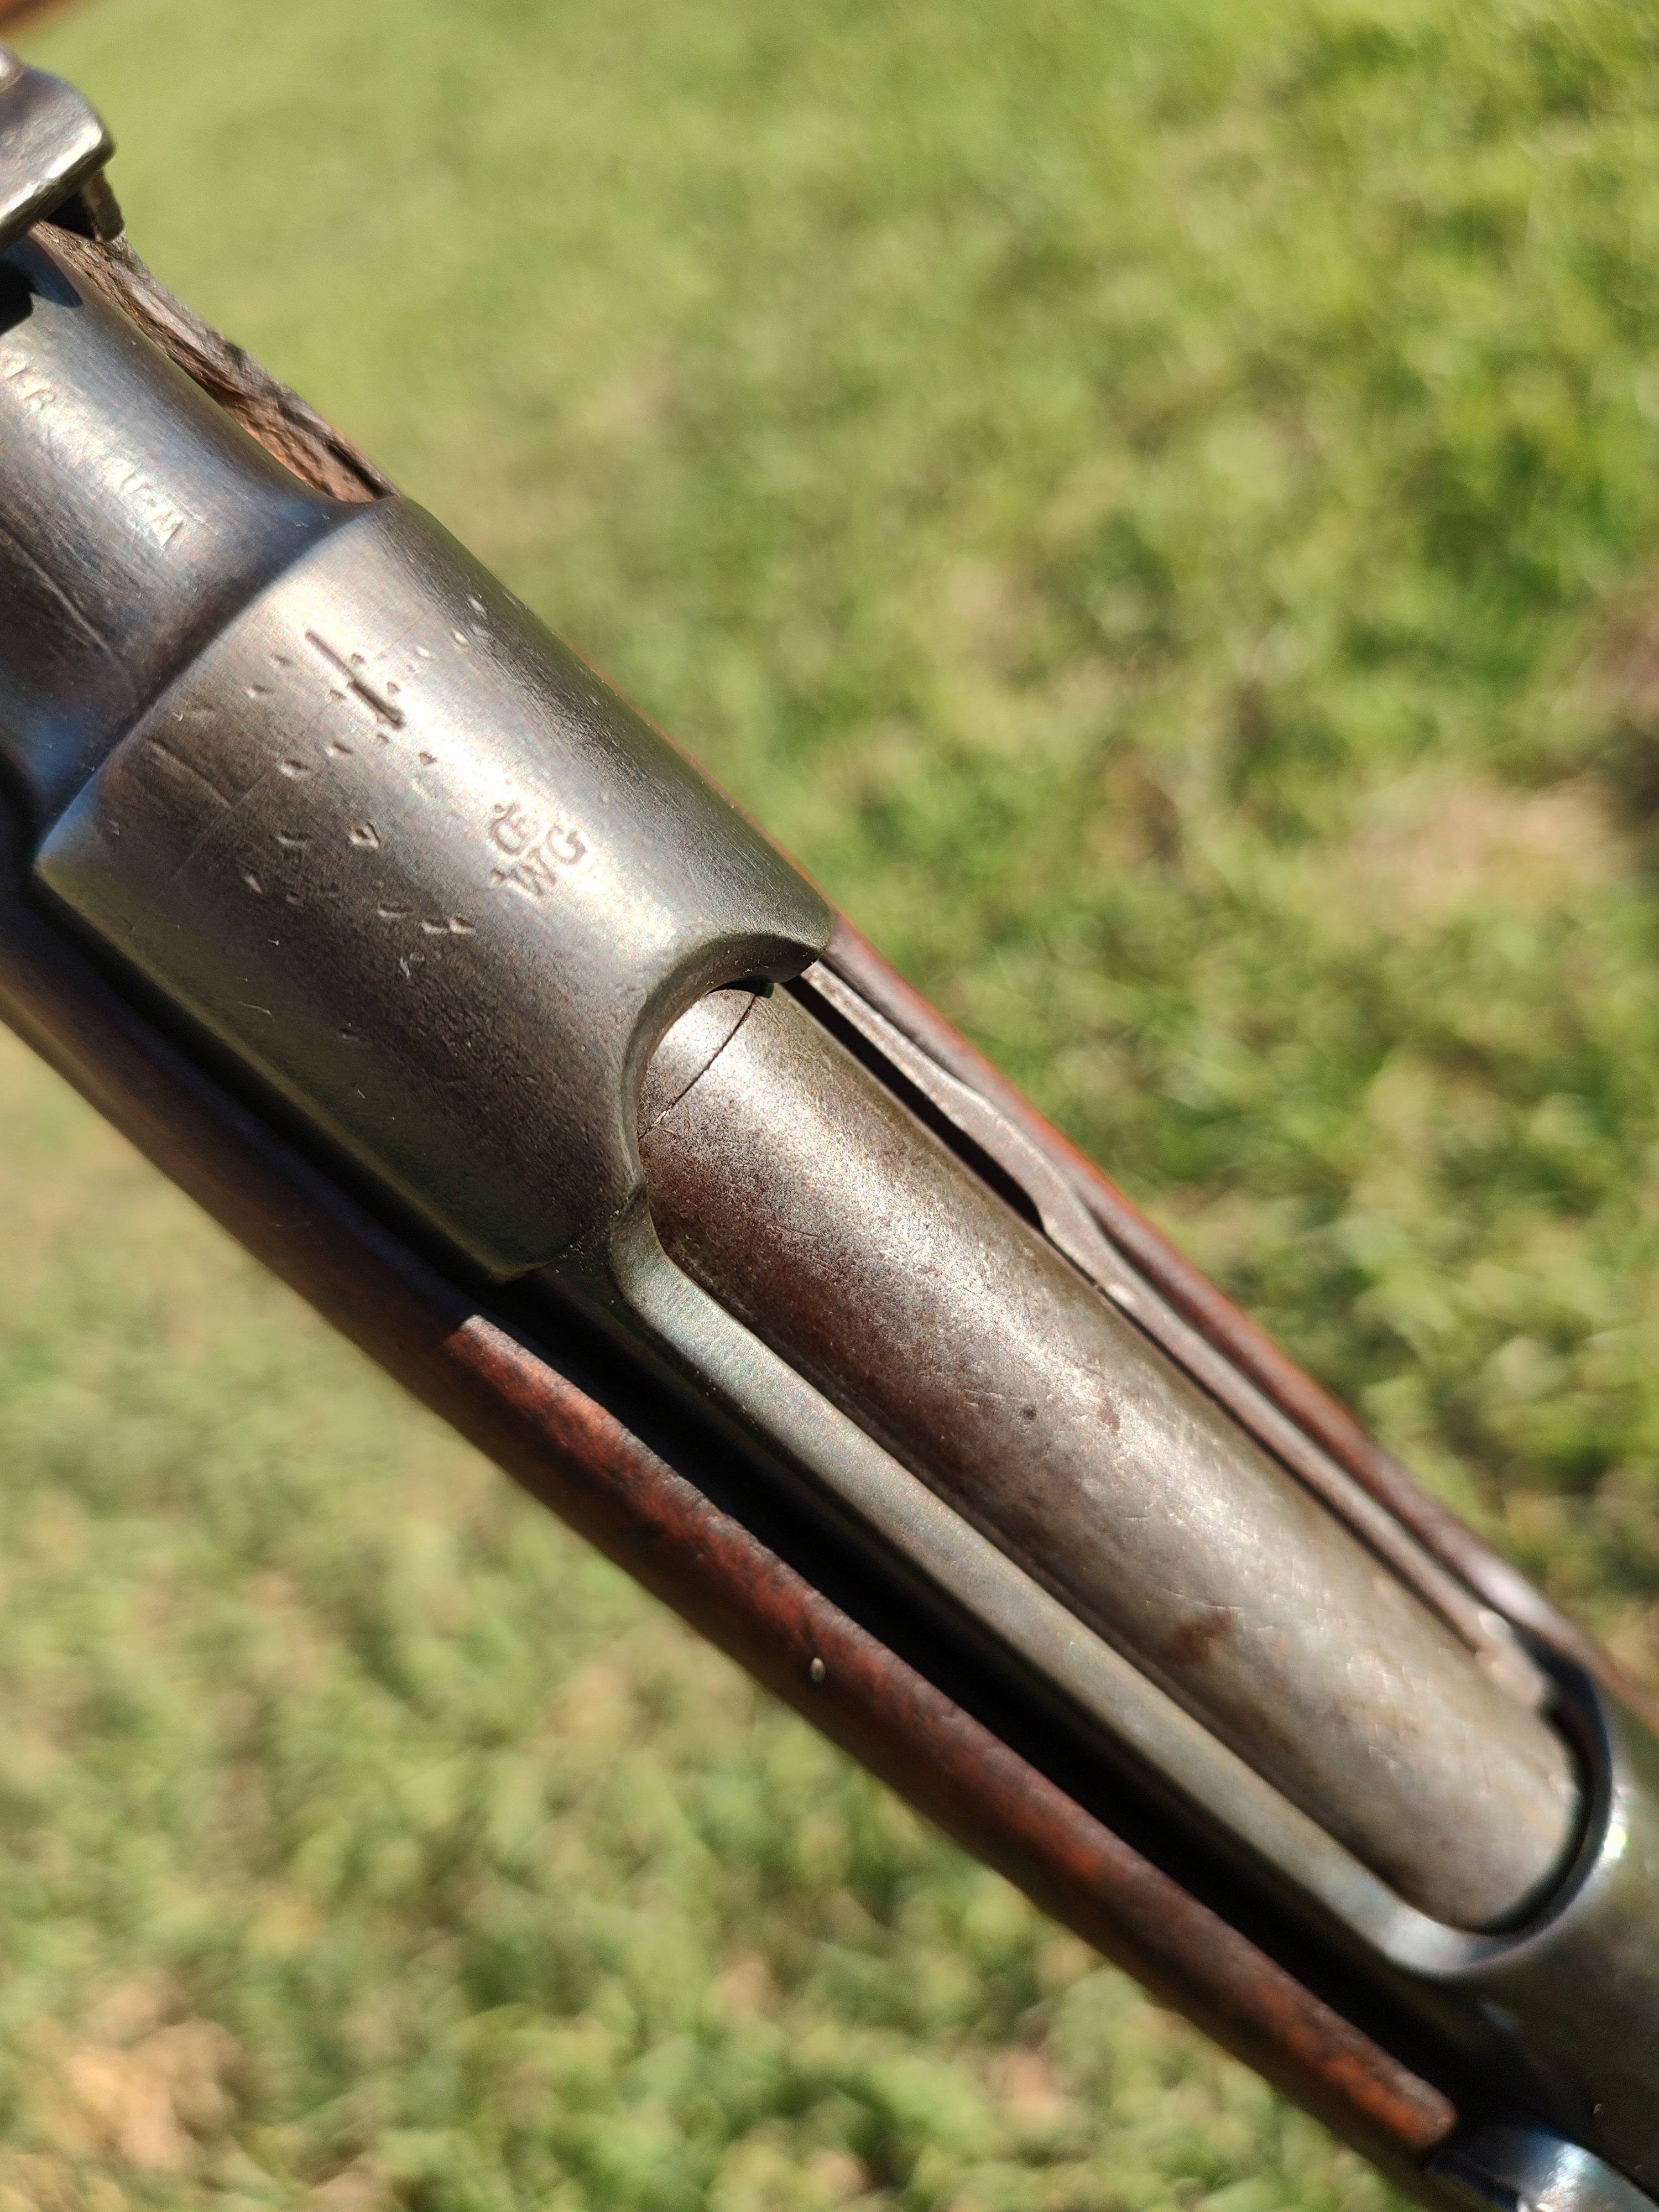
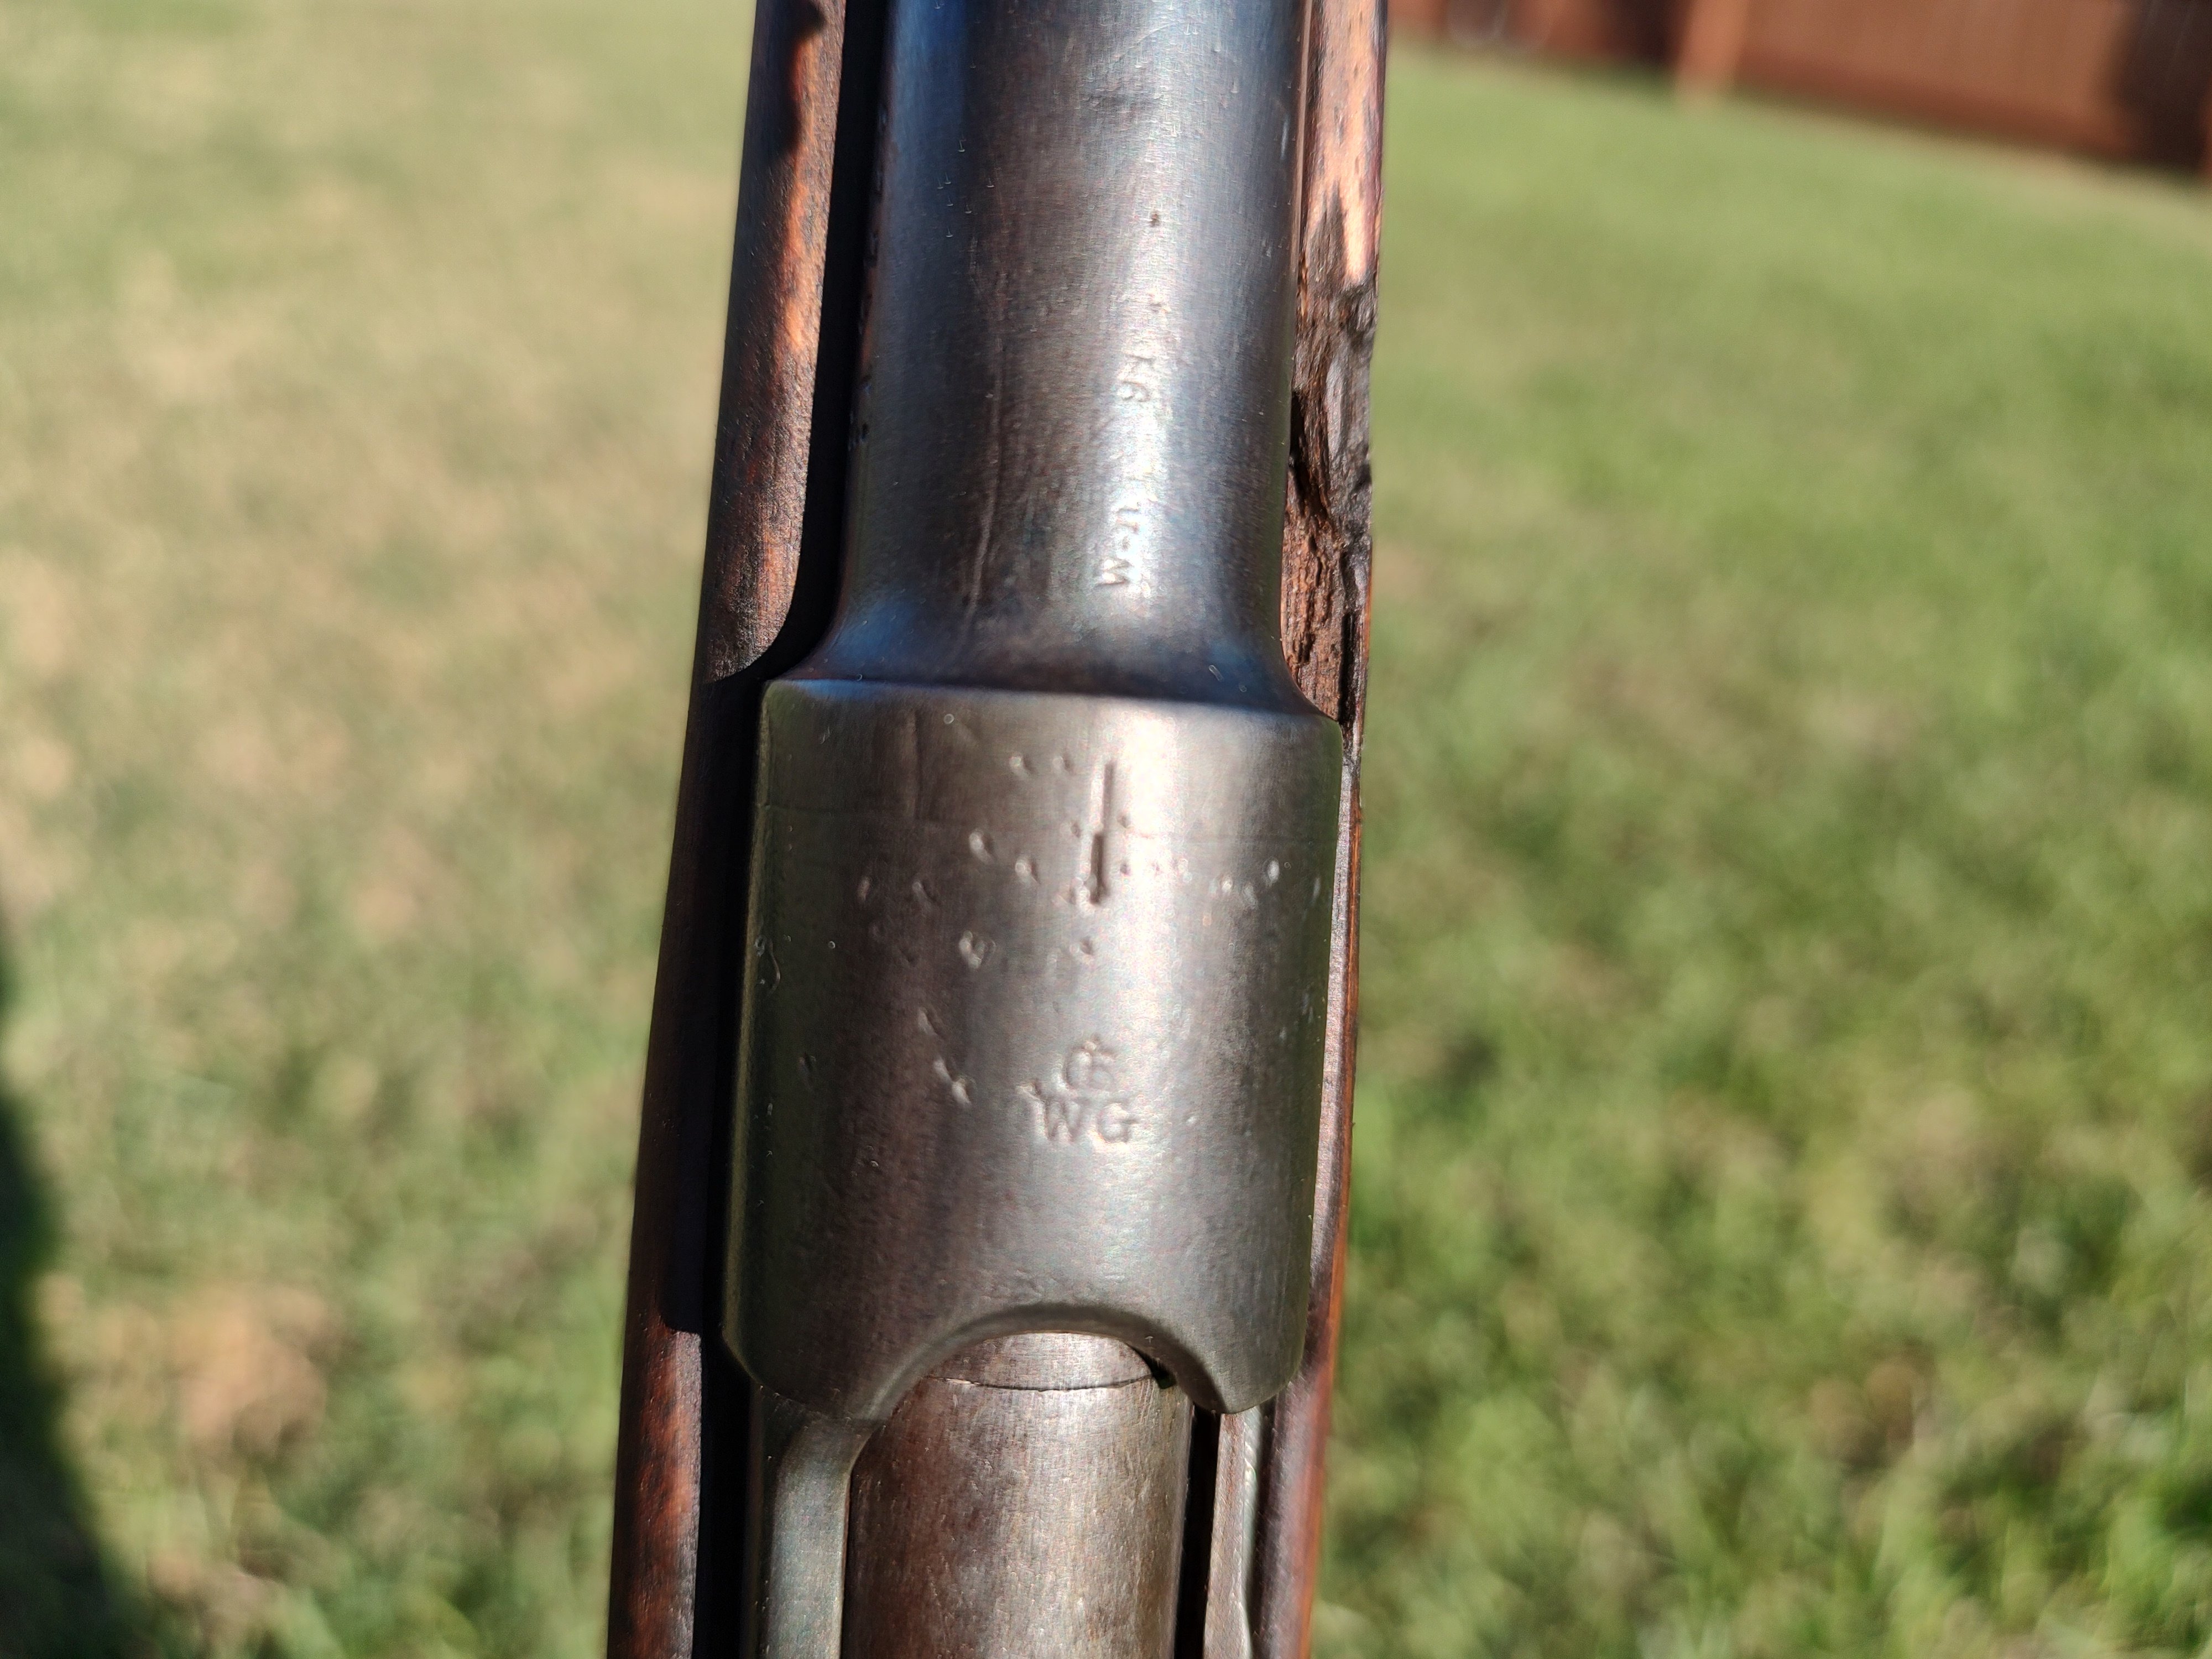
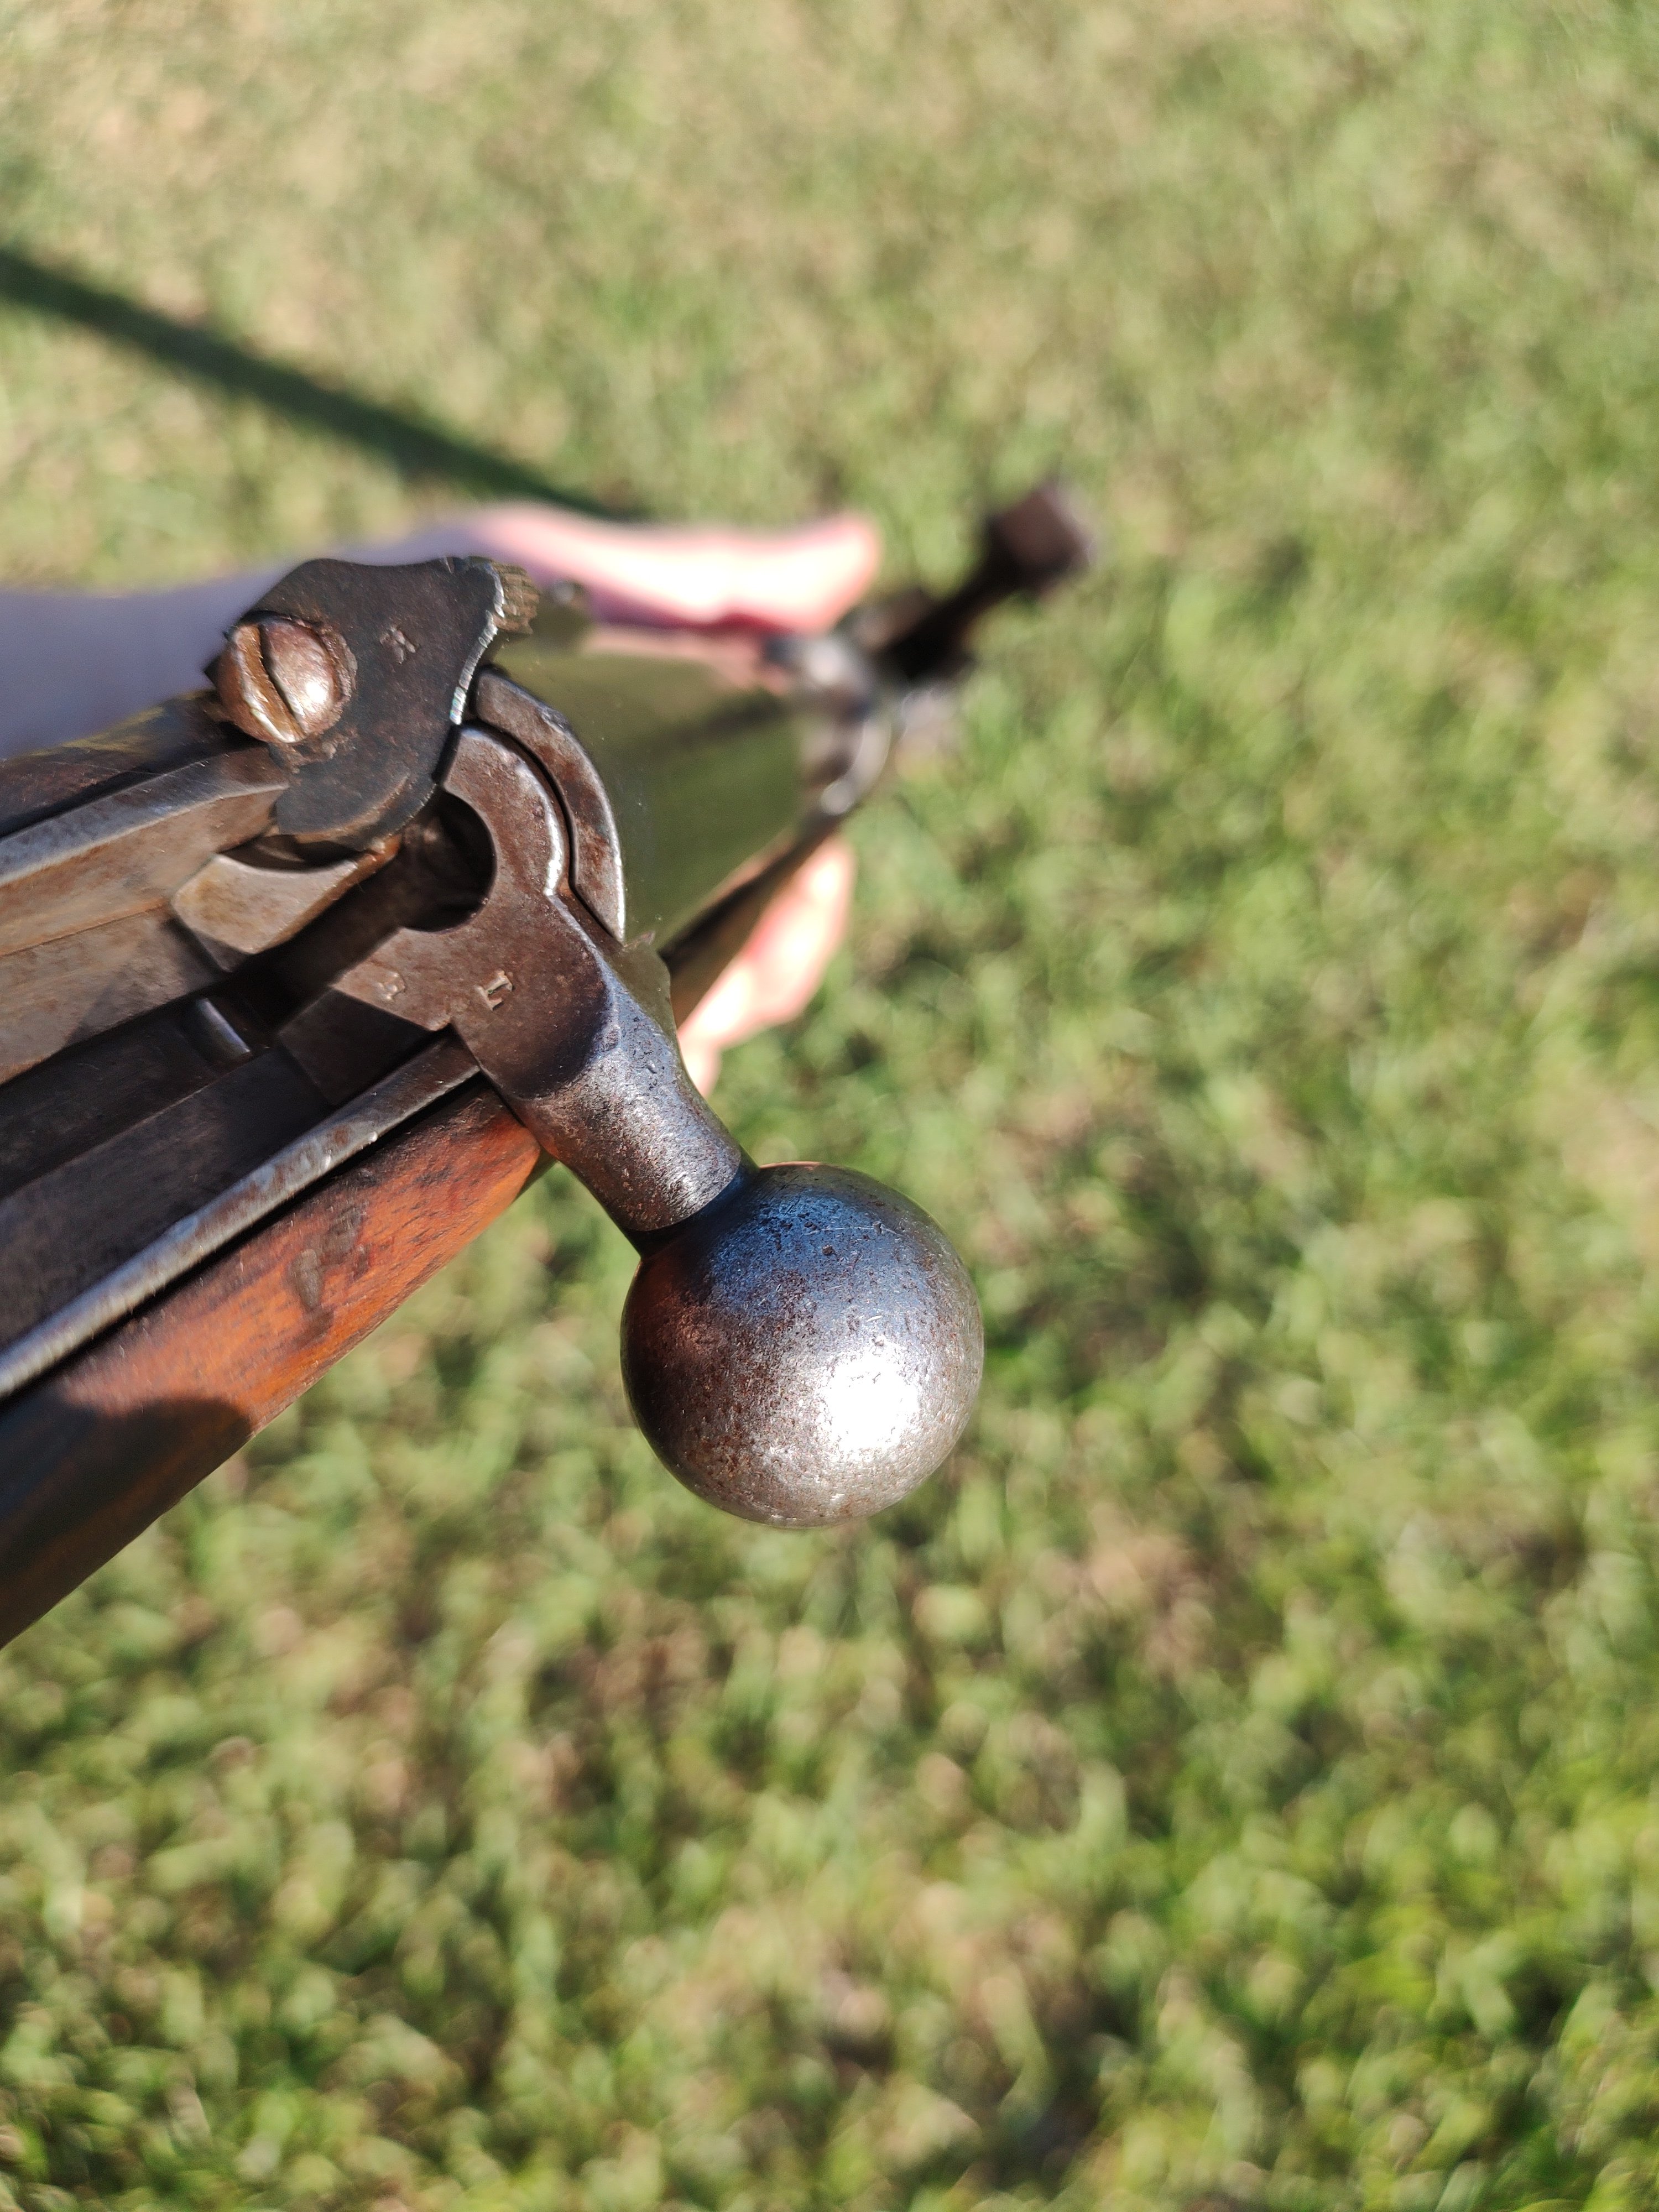
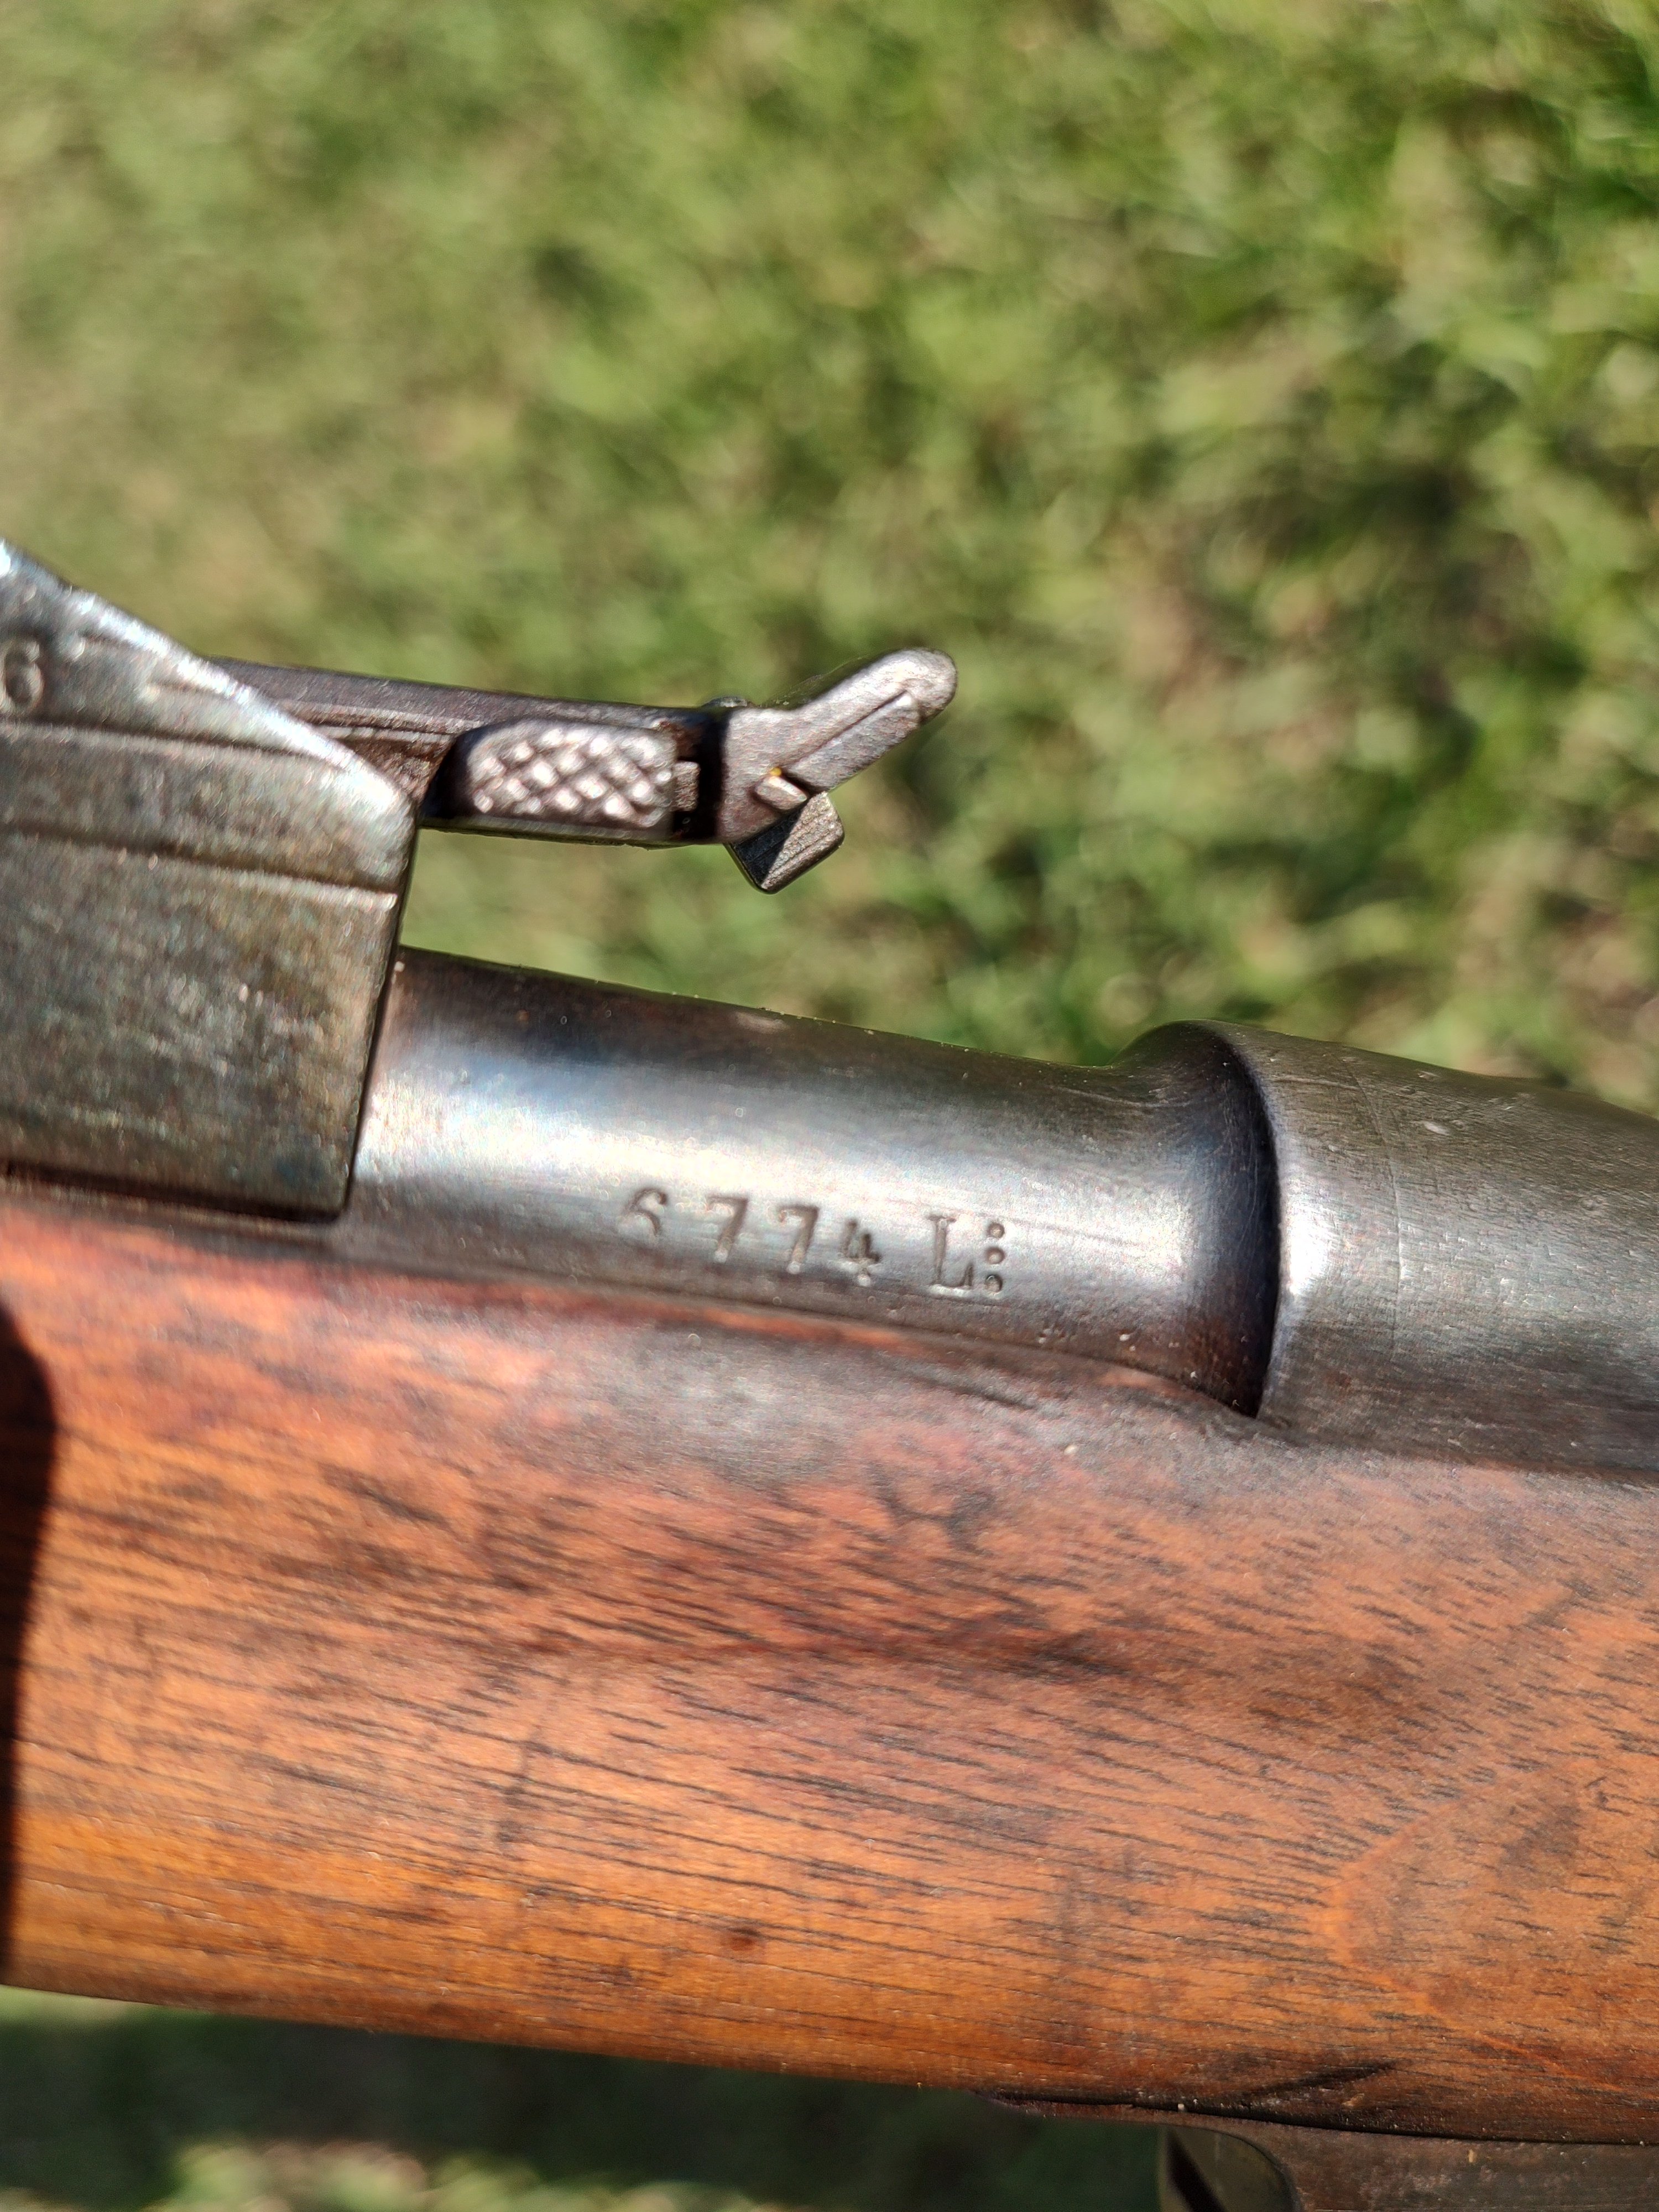
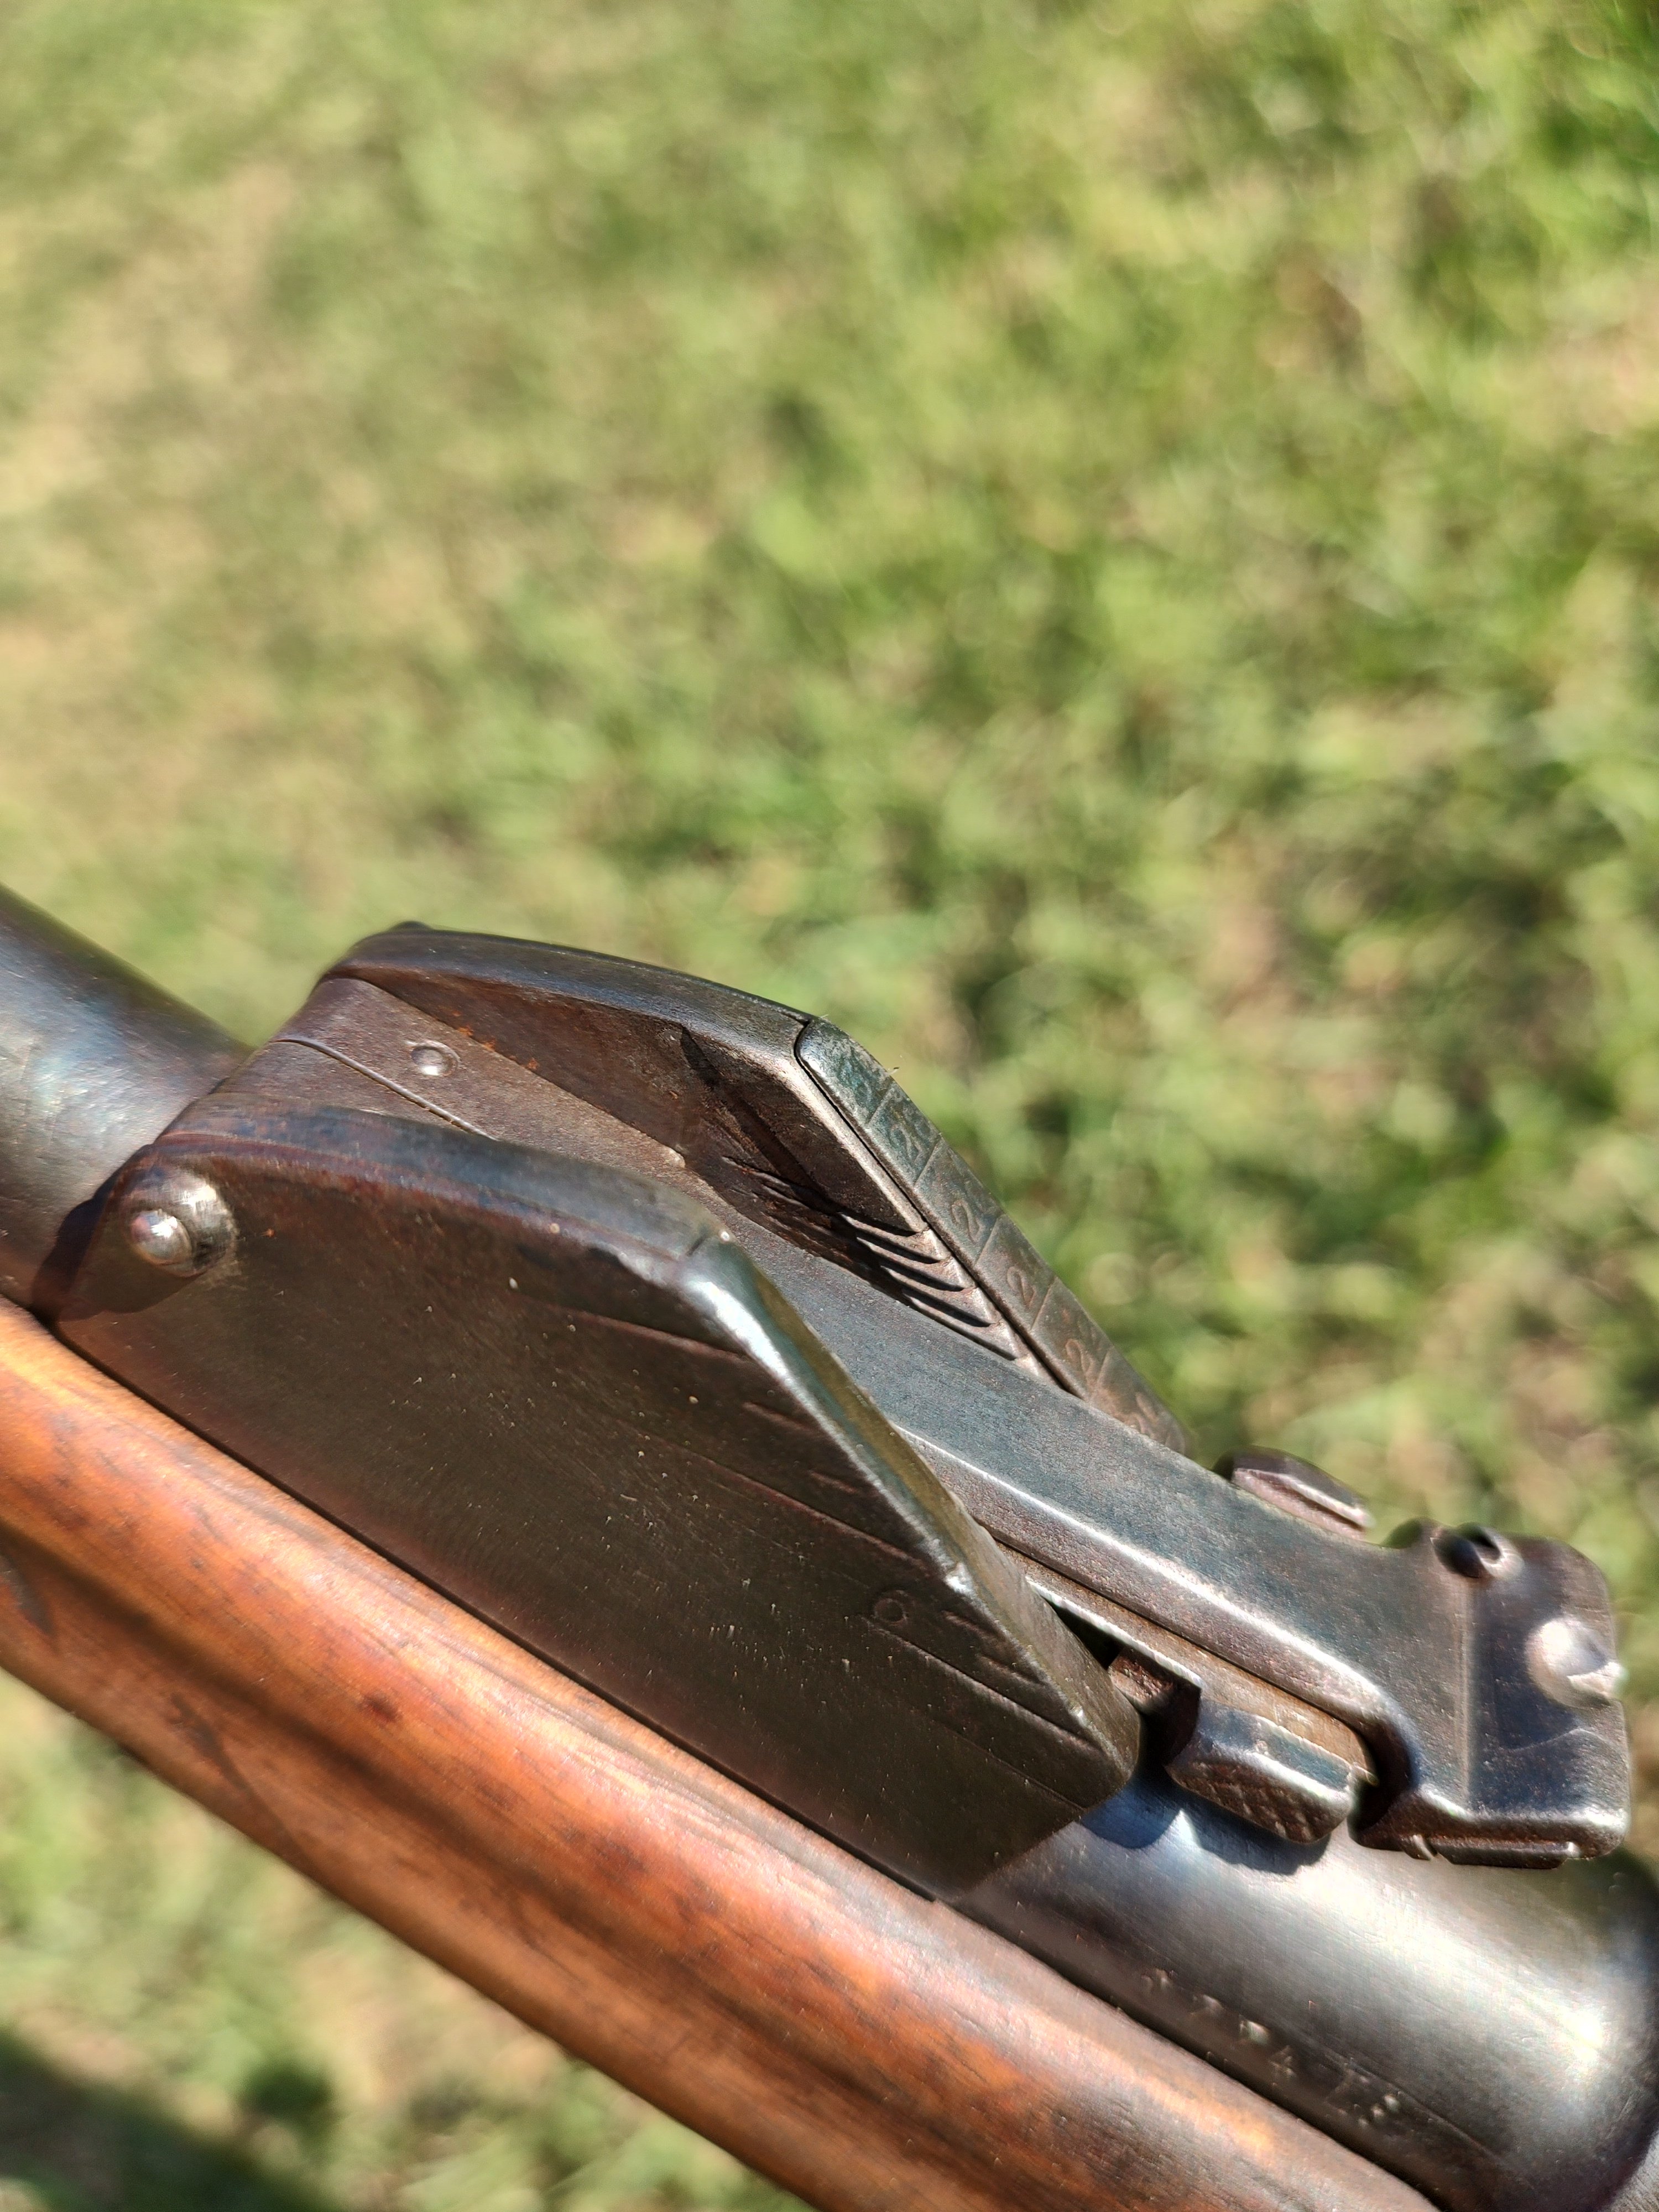
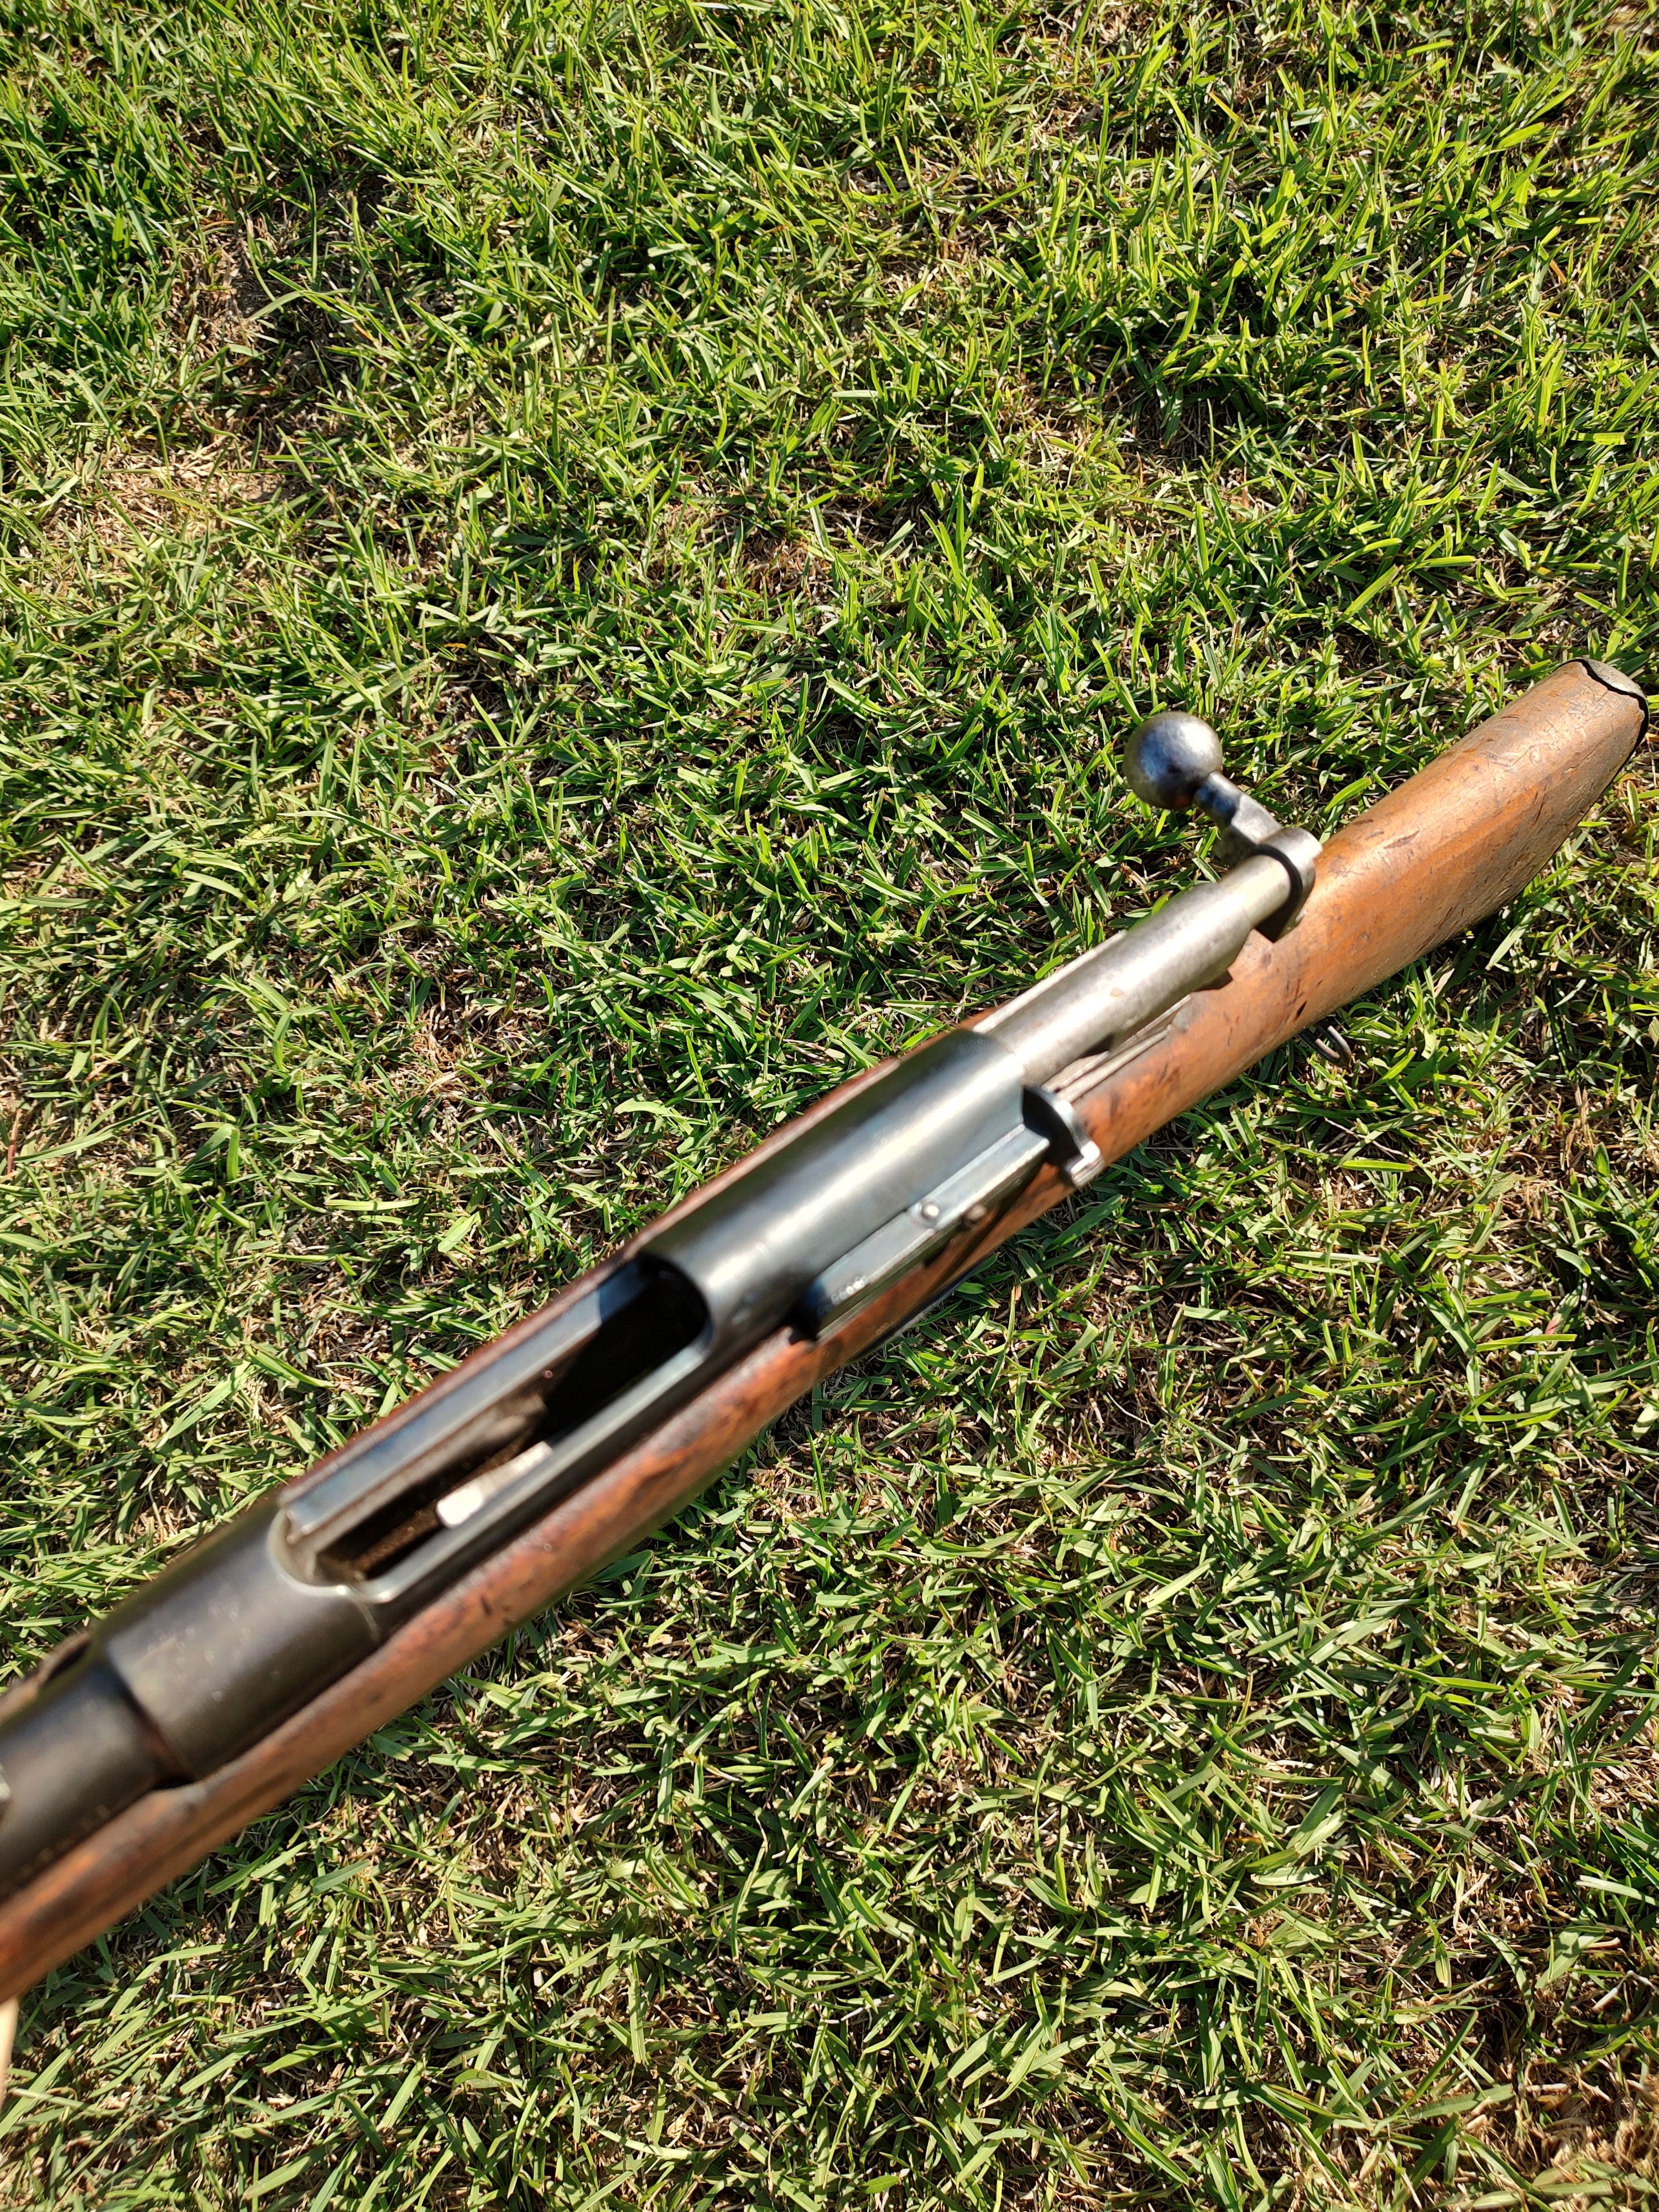
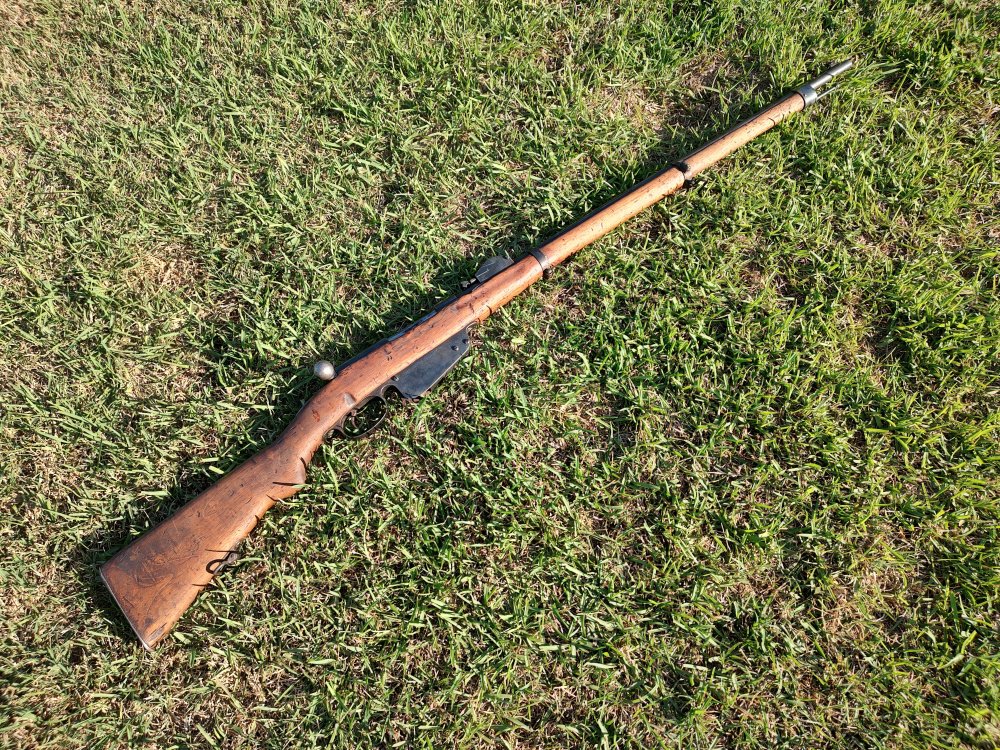
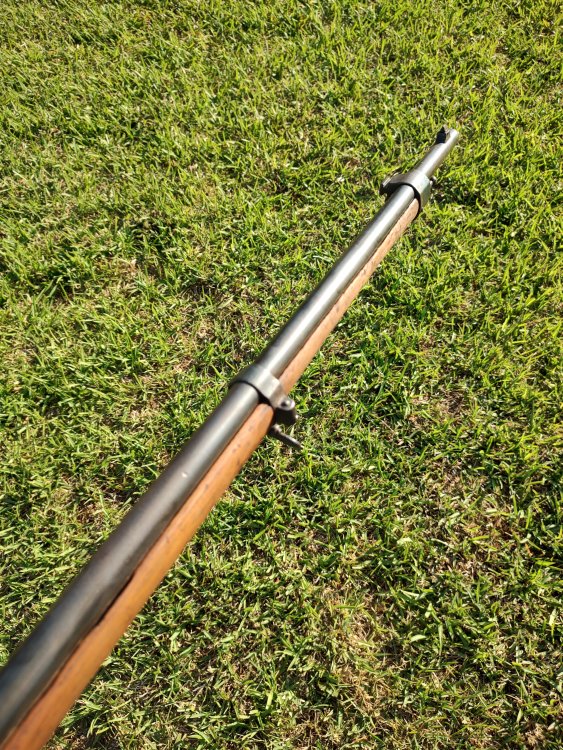
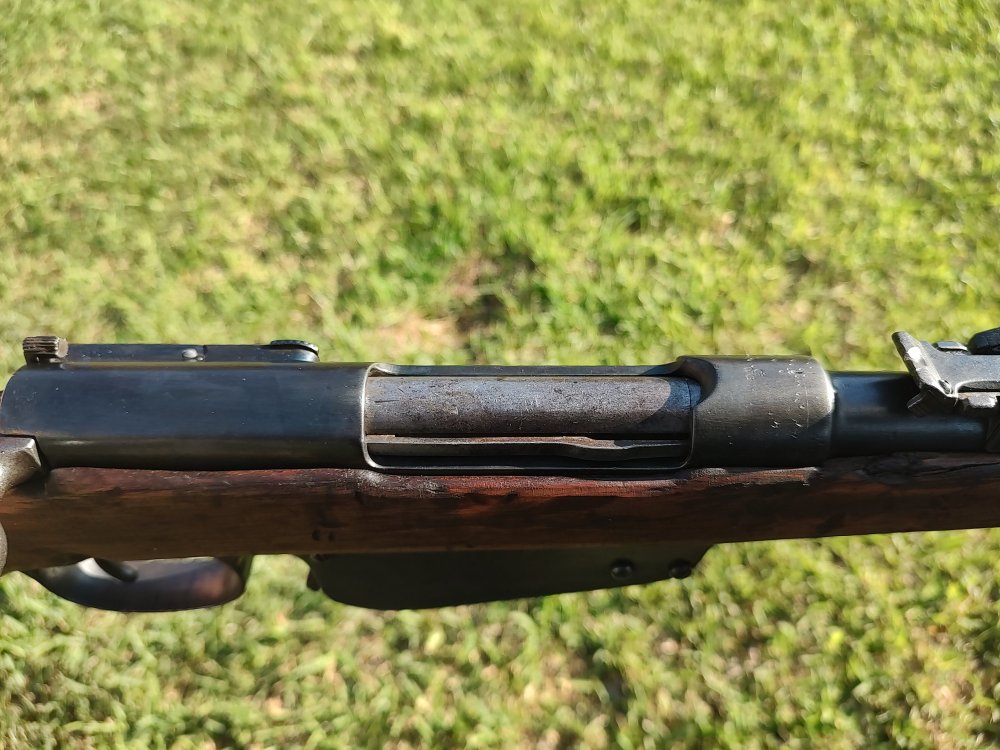
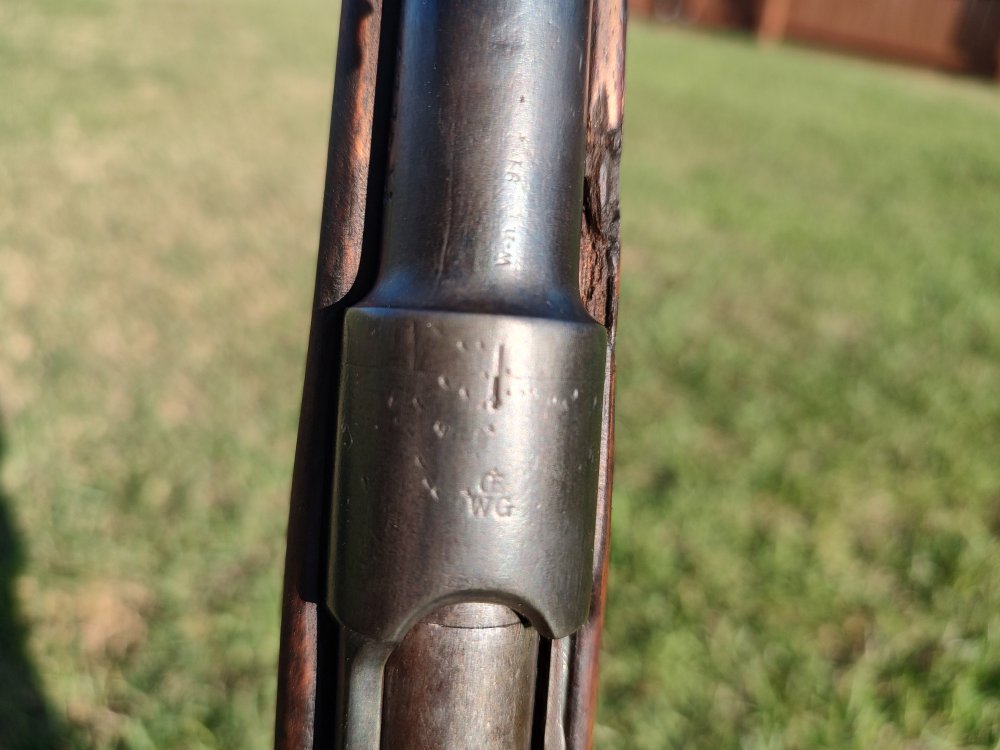
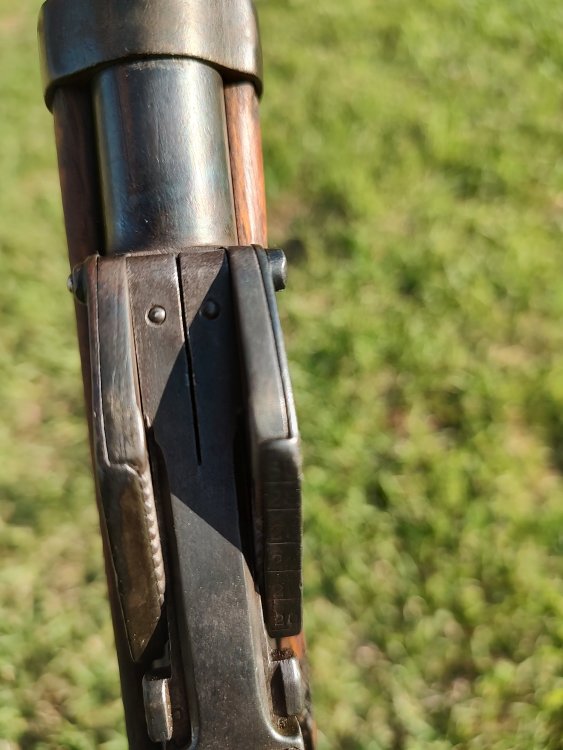
Here is my new Mannlicher 1890 Rifle or Infanterie Repetiergewehr M88/90. In 1888, the Austro-Hungarians changed the contract on their model 1886 rifles, mainly due to the French introduction of the smokeless powder Mle. 1886 Lebel. This involved moving away from the 11 x 58R cartridge to the 8 x 52R cartridge. The M88 was further upgraded to fire the new smokeless powder M1890 ball cartridge. The rifles that were modified for this were called the M88/90. This is a straight pull bolt rifle, and it is a very simple design with very few parts for disassembly. Some of the changes made to for the conversion to the new smokeless cartridge was adding a more narrow and shallower magazine, as well as a rechambered barrel and sight modifications. The barrel is stamped W-n 91 and marked OEWG. The rifle is about 50 inches long, and weighs 8.9 pounds, with a 5 round capacity magazine. Slightly over a million of these rifles were produced and like many other nations, these were also pulled out of storage for rear echelon units to replace massive losses at the front. This rifle at some point made it to Africa as it has the AOI stamp on the buttstock. This was a RTI gun, and was quite filthy and worn, but I cleaned it thoroughly and got it looking decent once more.


 4 points
 -
All: I just finished reading all the posts, what a great exchange between everyone. A big 'THANK YOU' to to Kenny Andrew, Fritz, Gildwiller1918, Eddieq, Urkund1939, Ycvu, and Phantom for sharing their knowledge with others. The ones asking the questions and the ones providing the answers make the Forum great. Best regards, John R.4 points
-
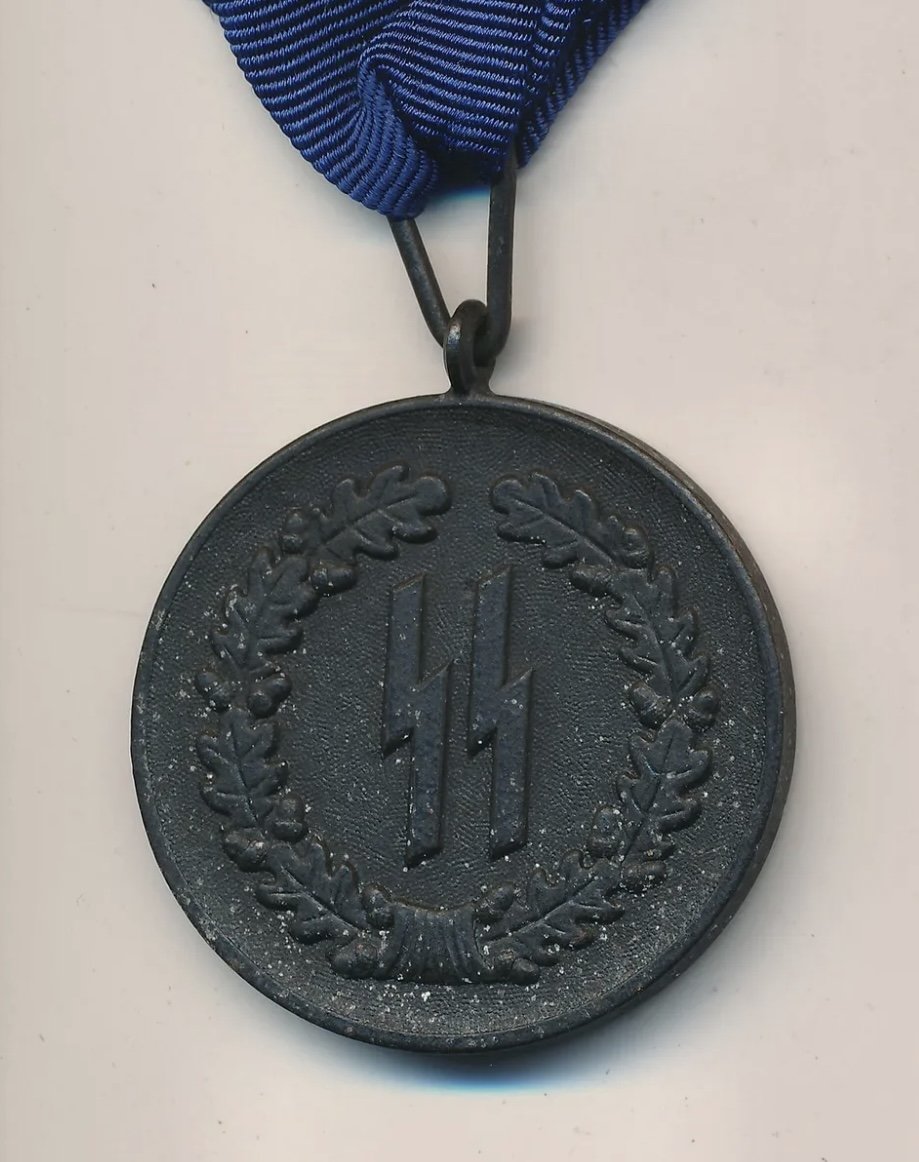
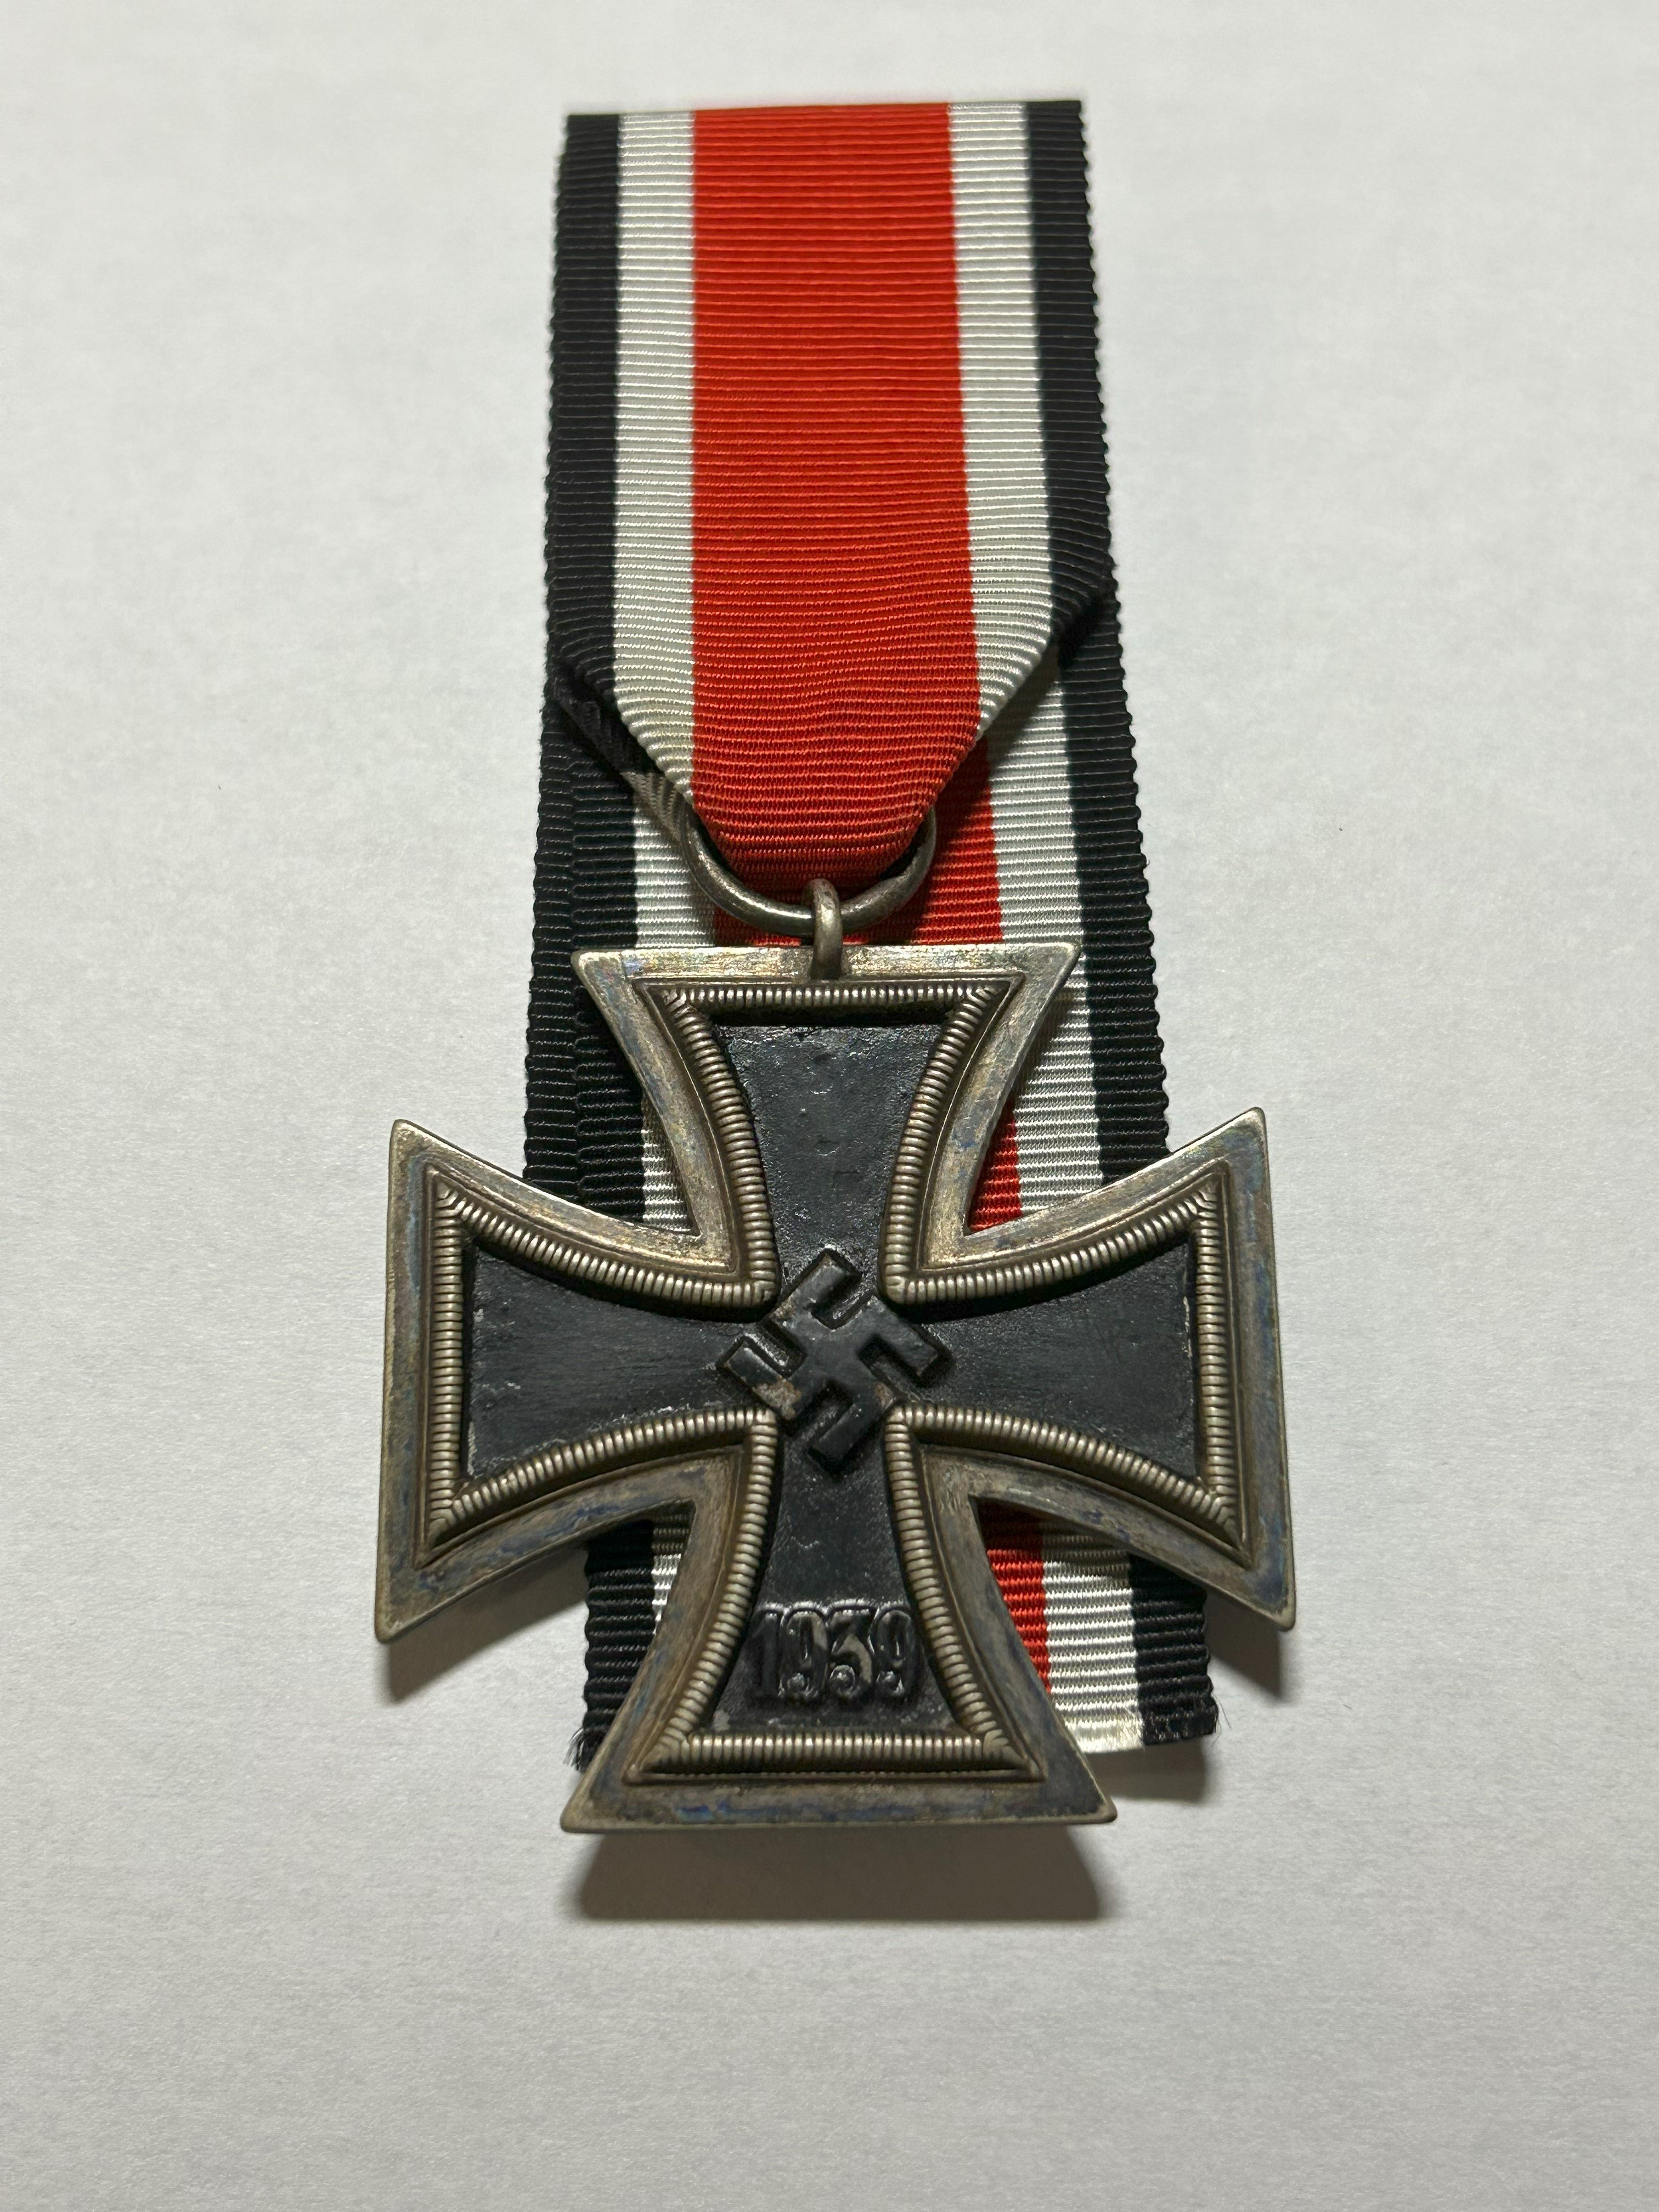
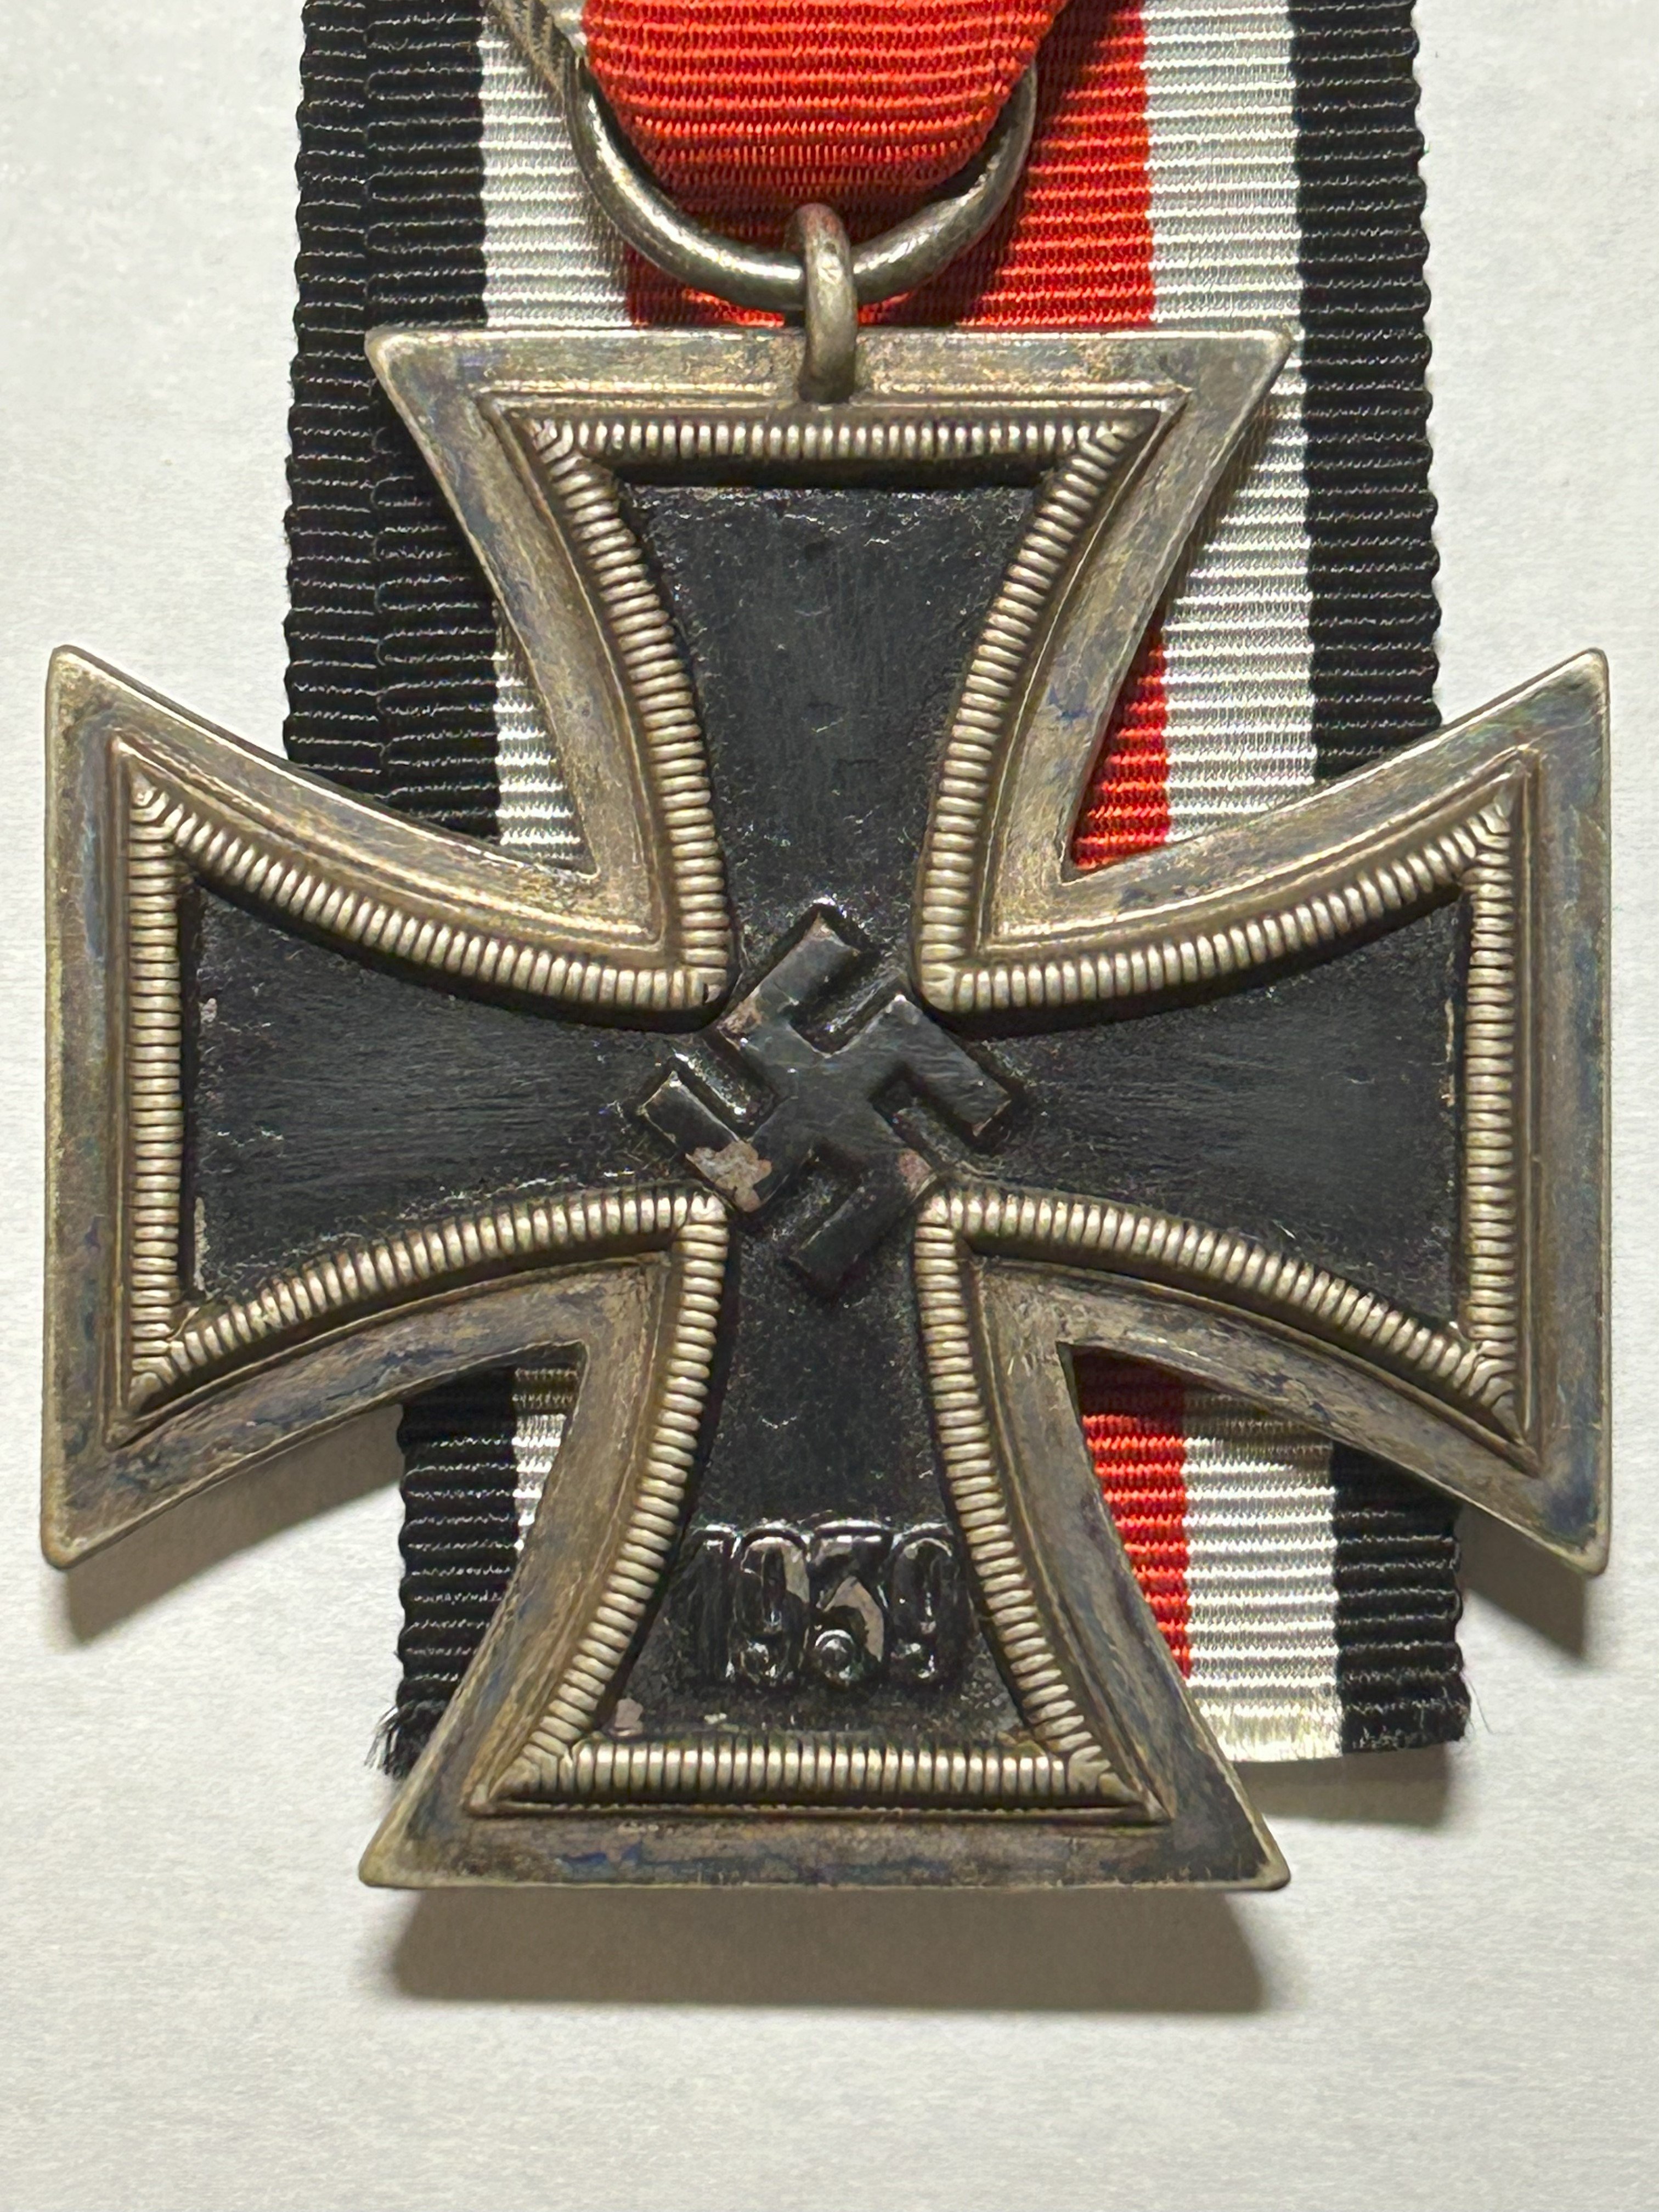
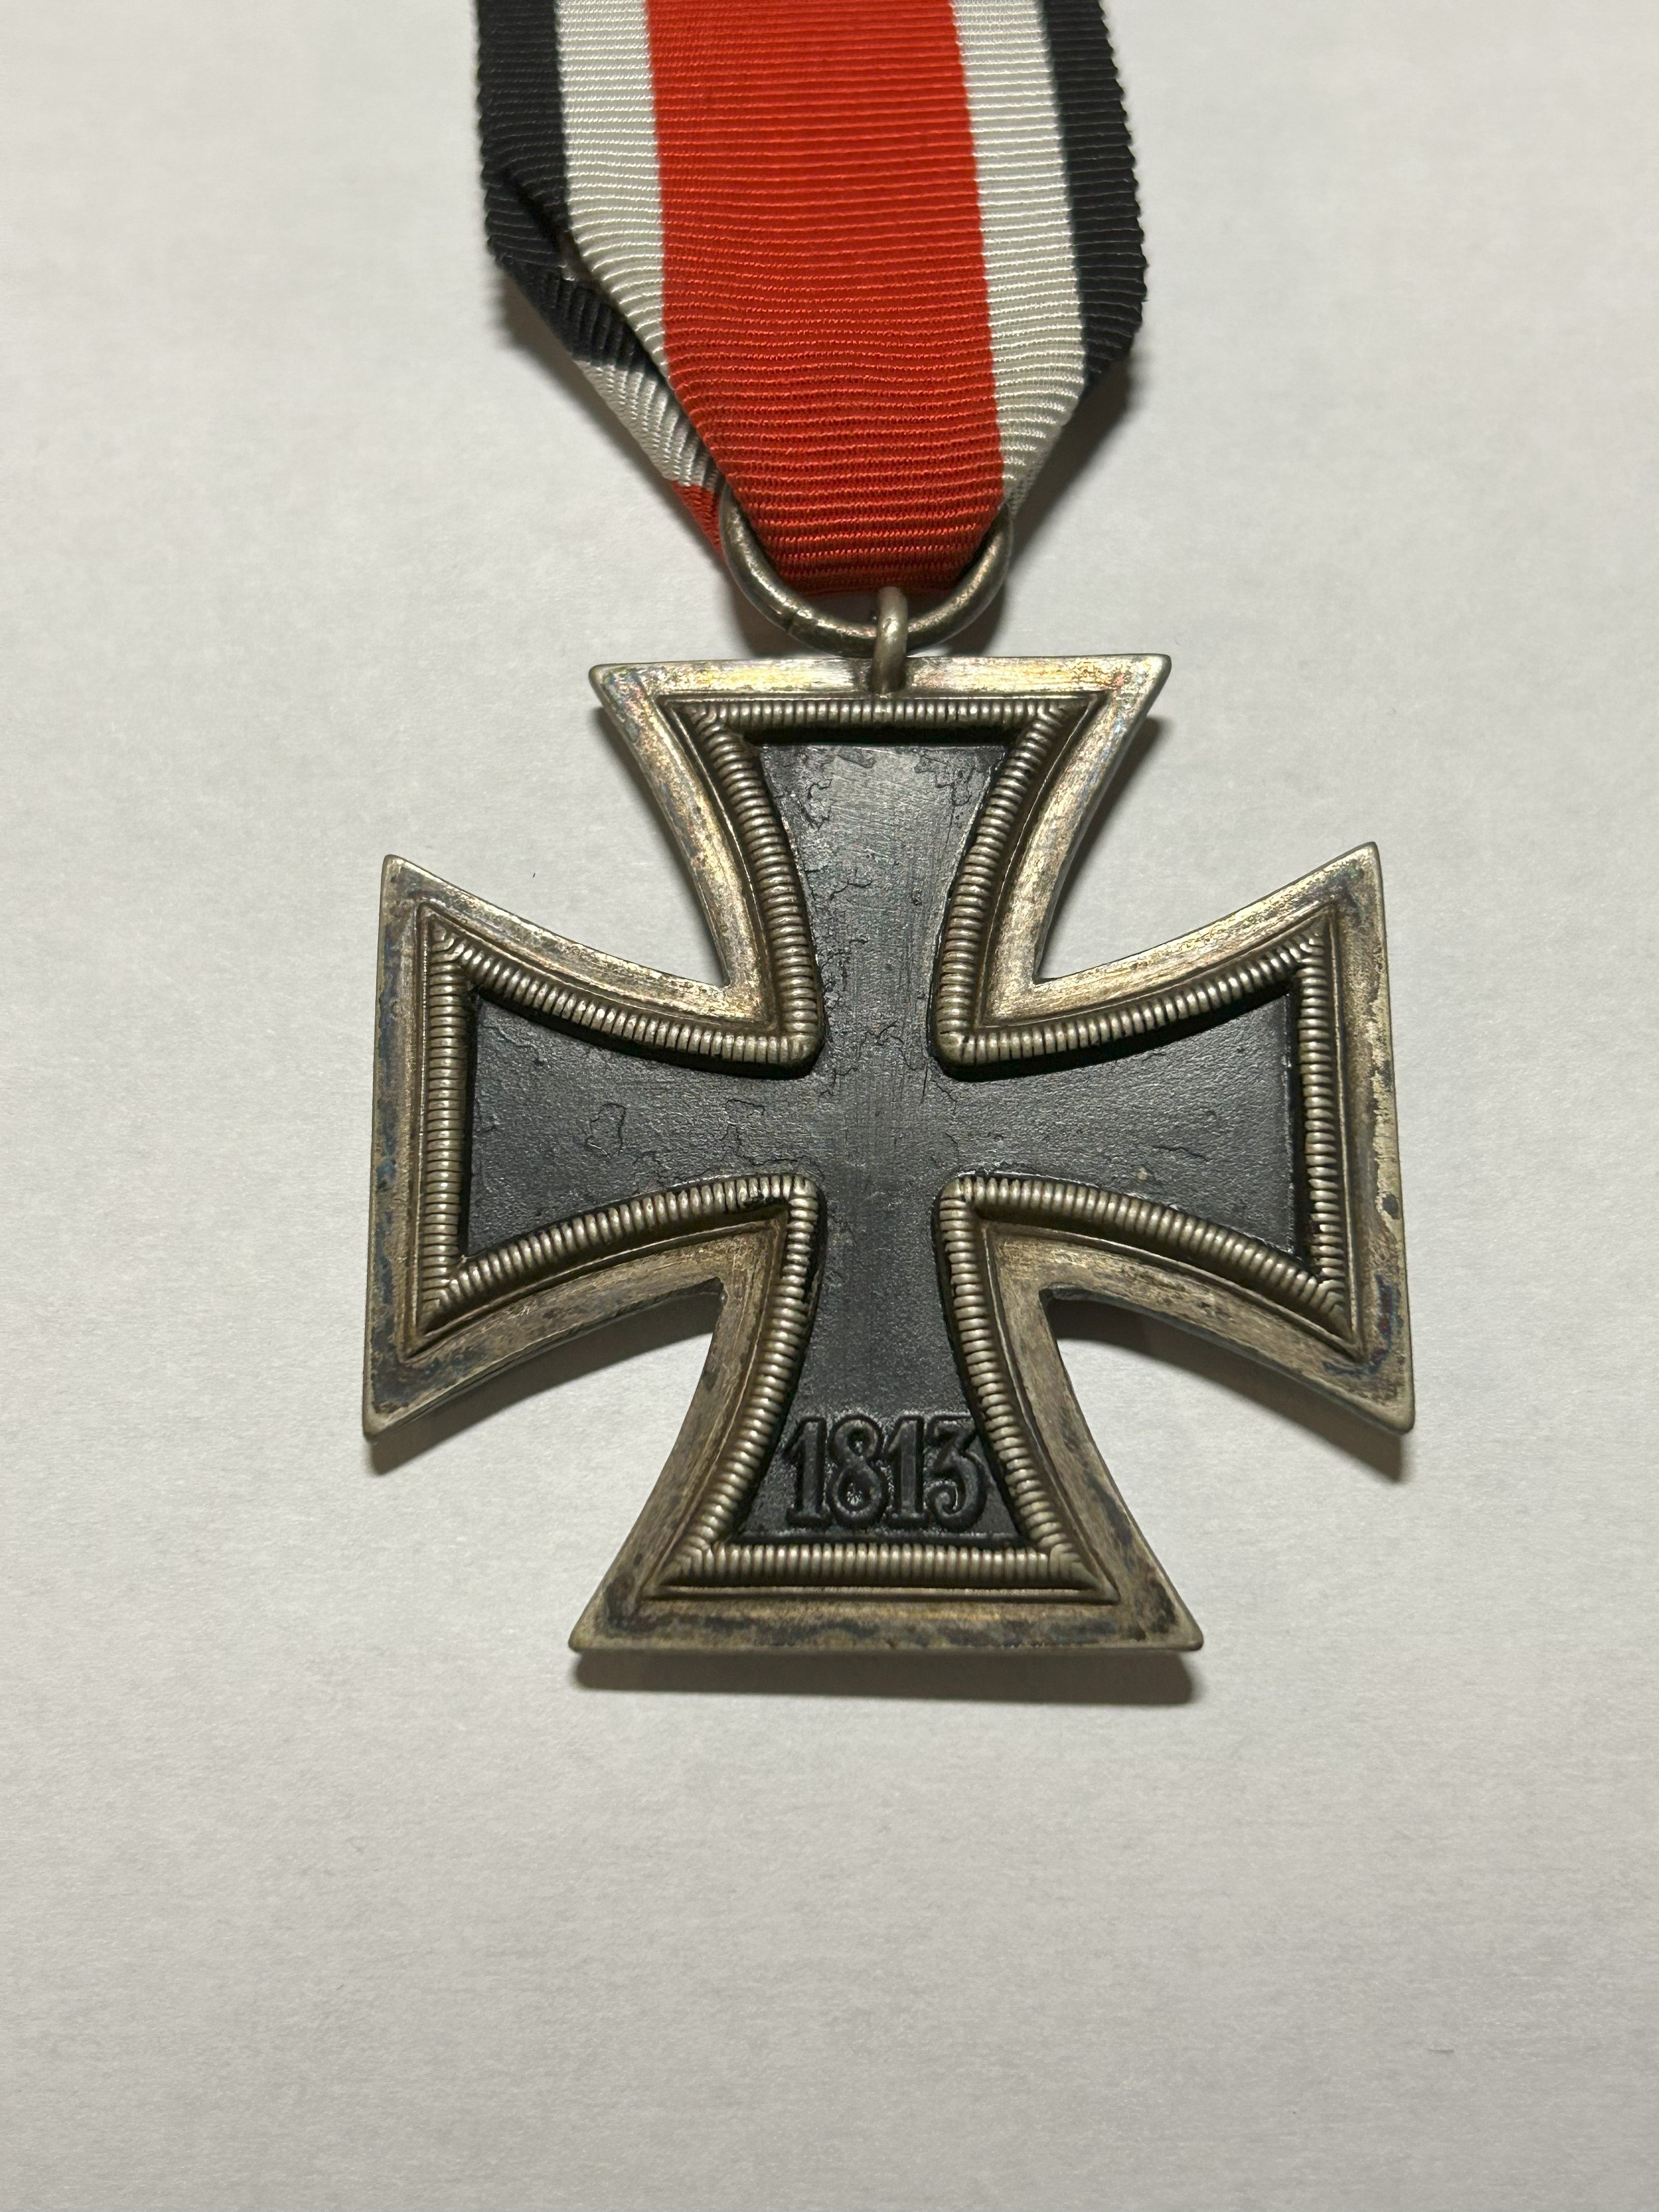
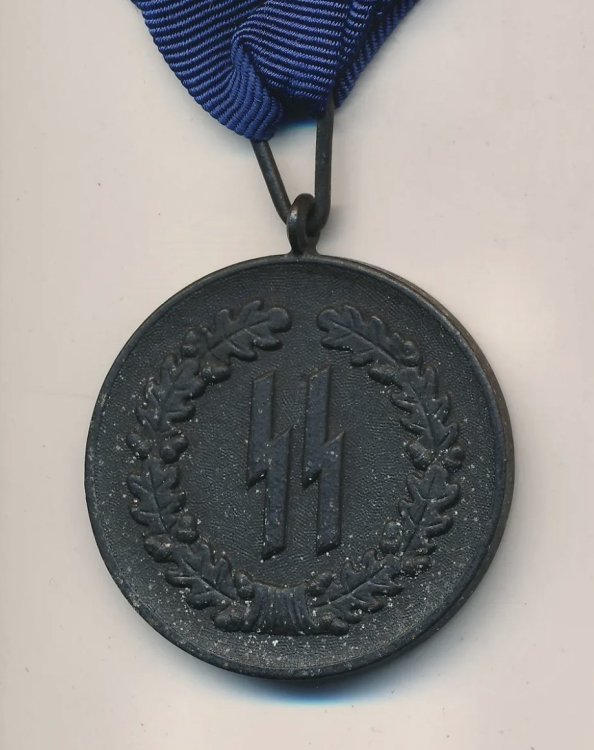
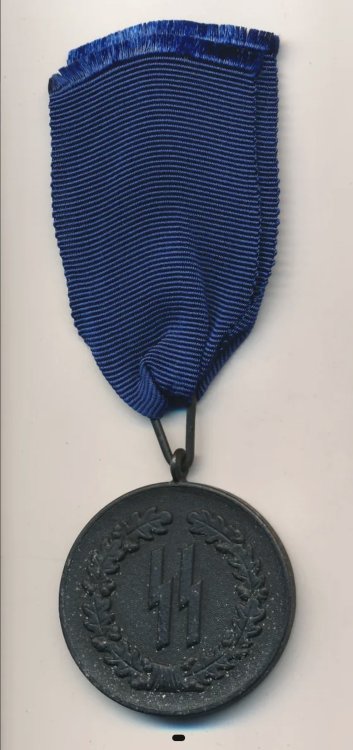
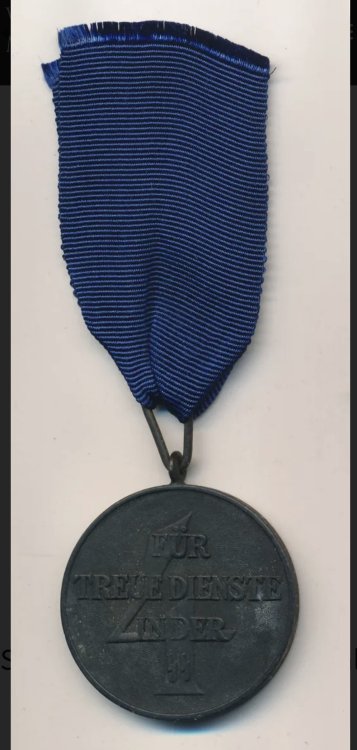
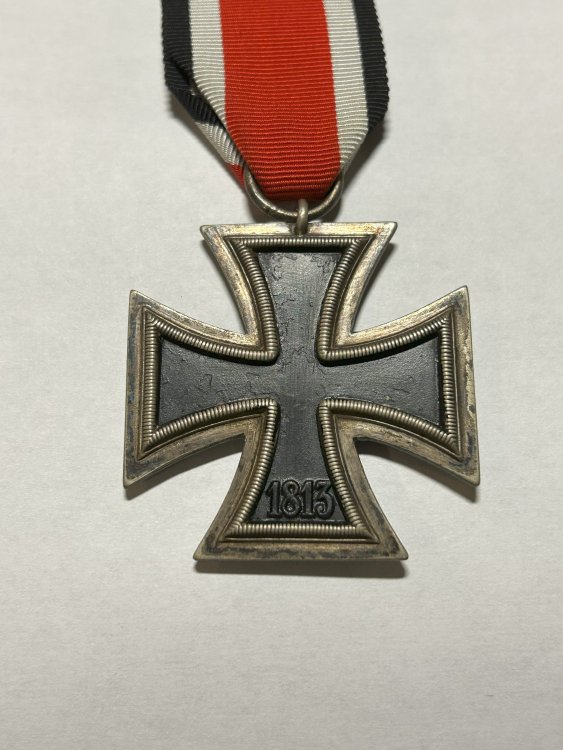
Thoughts on this medal please
 4 points
 -
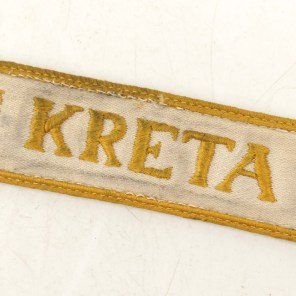
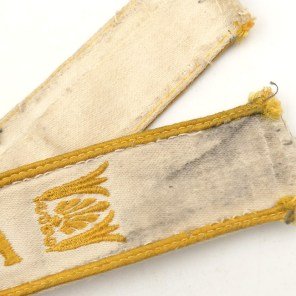
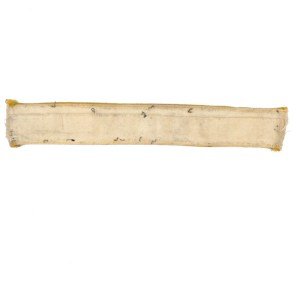
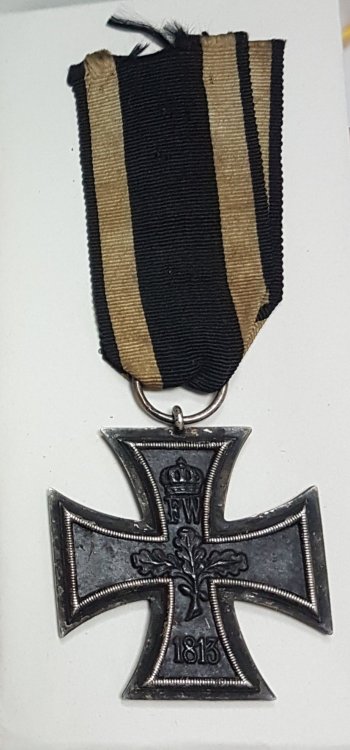
Thoughts on this please gentlemen
 4 points
 -
Shortened but looks original4 points
-
Thanks! Yes, I still have quite a bit more stuff I'm going to share (bayonets, some german equipment, inert grenades...). I'm taking a few pictures every now and then and posting them here.4 points
-
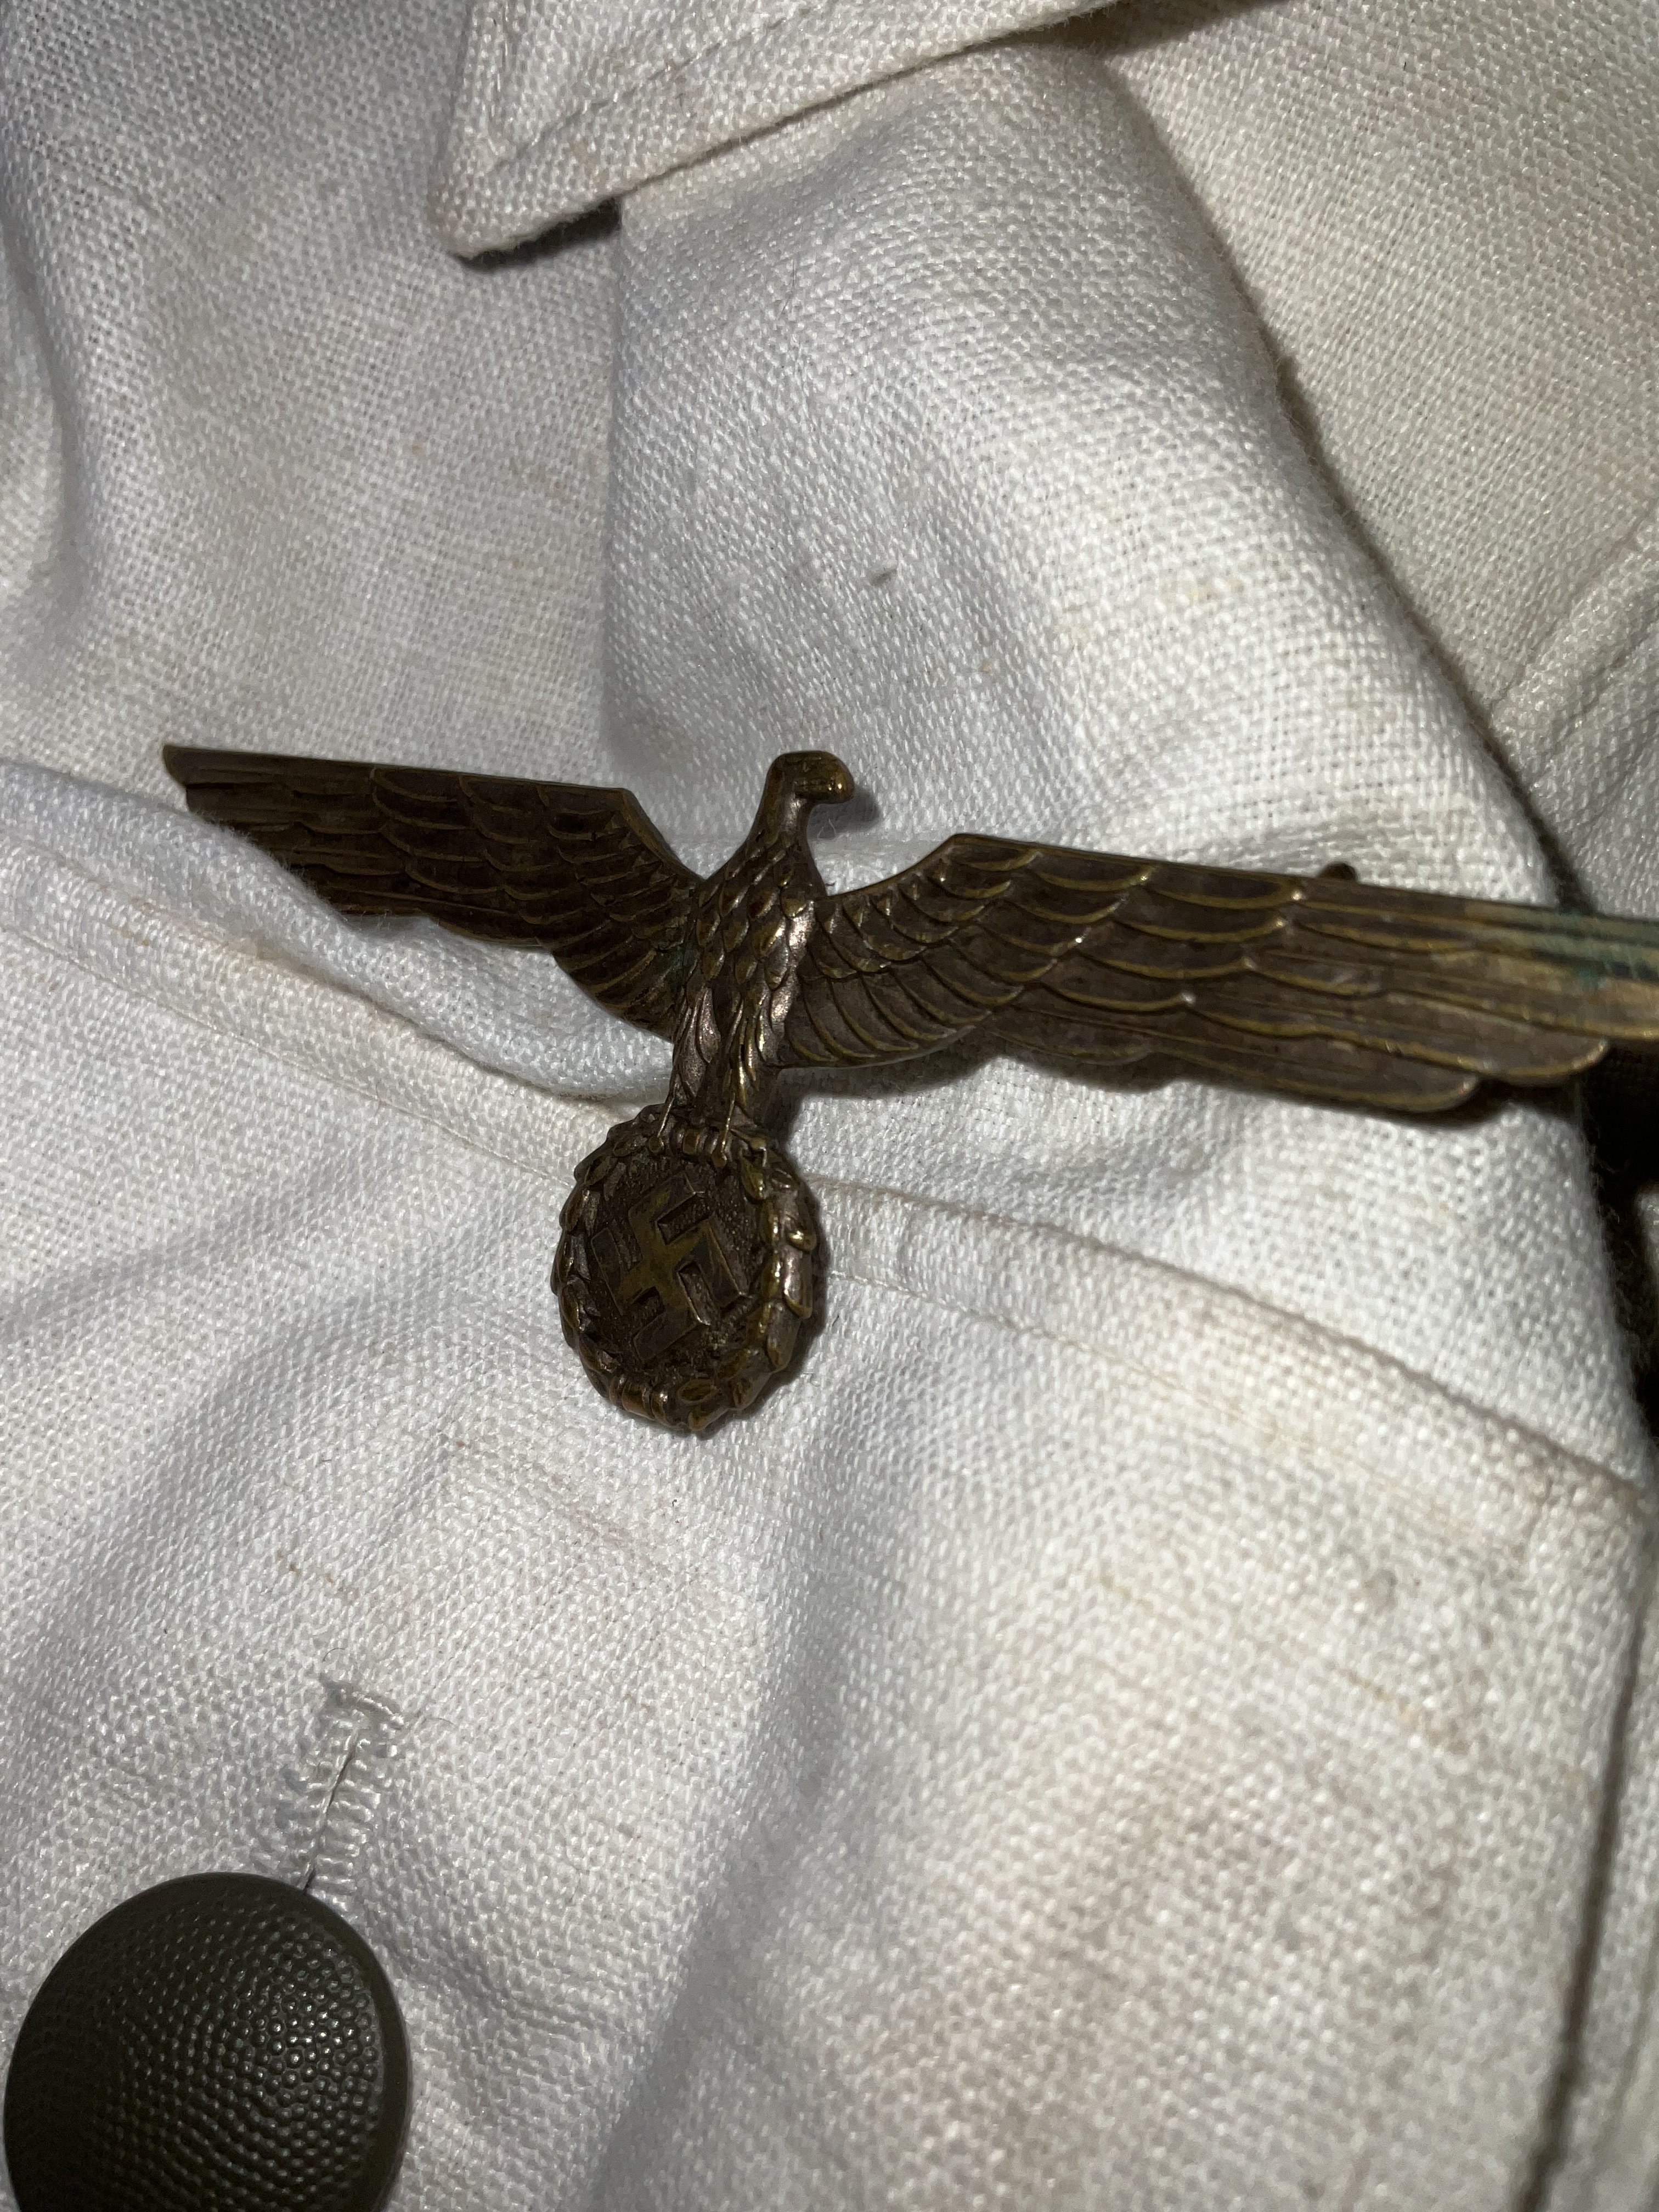
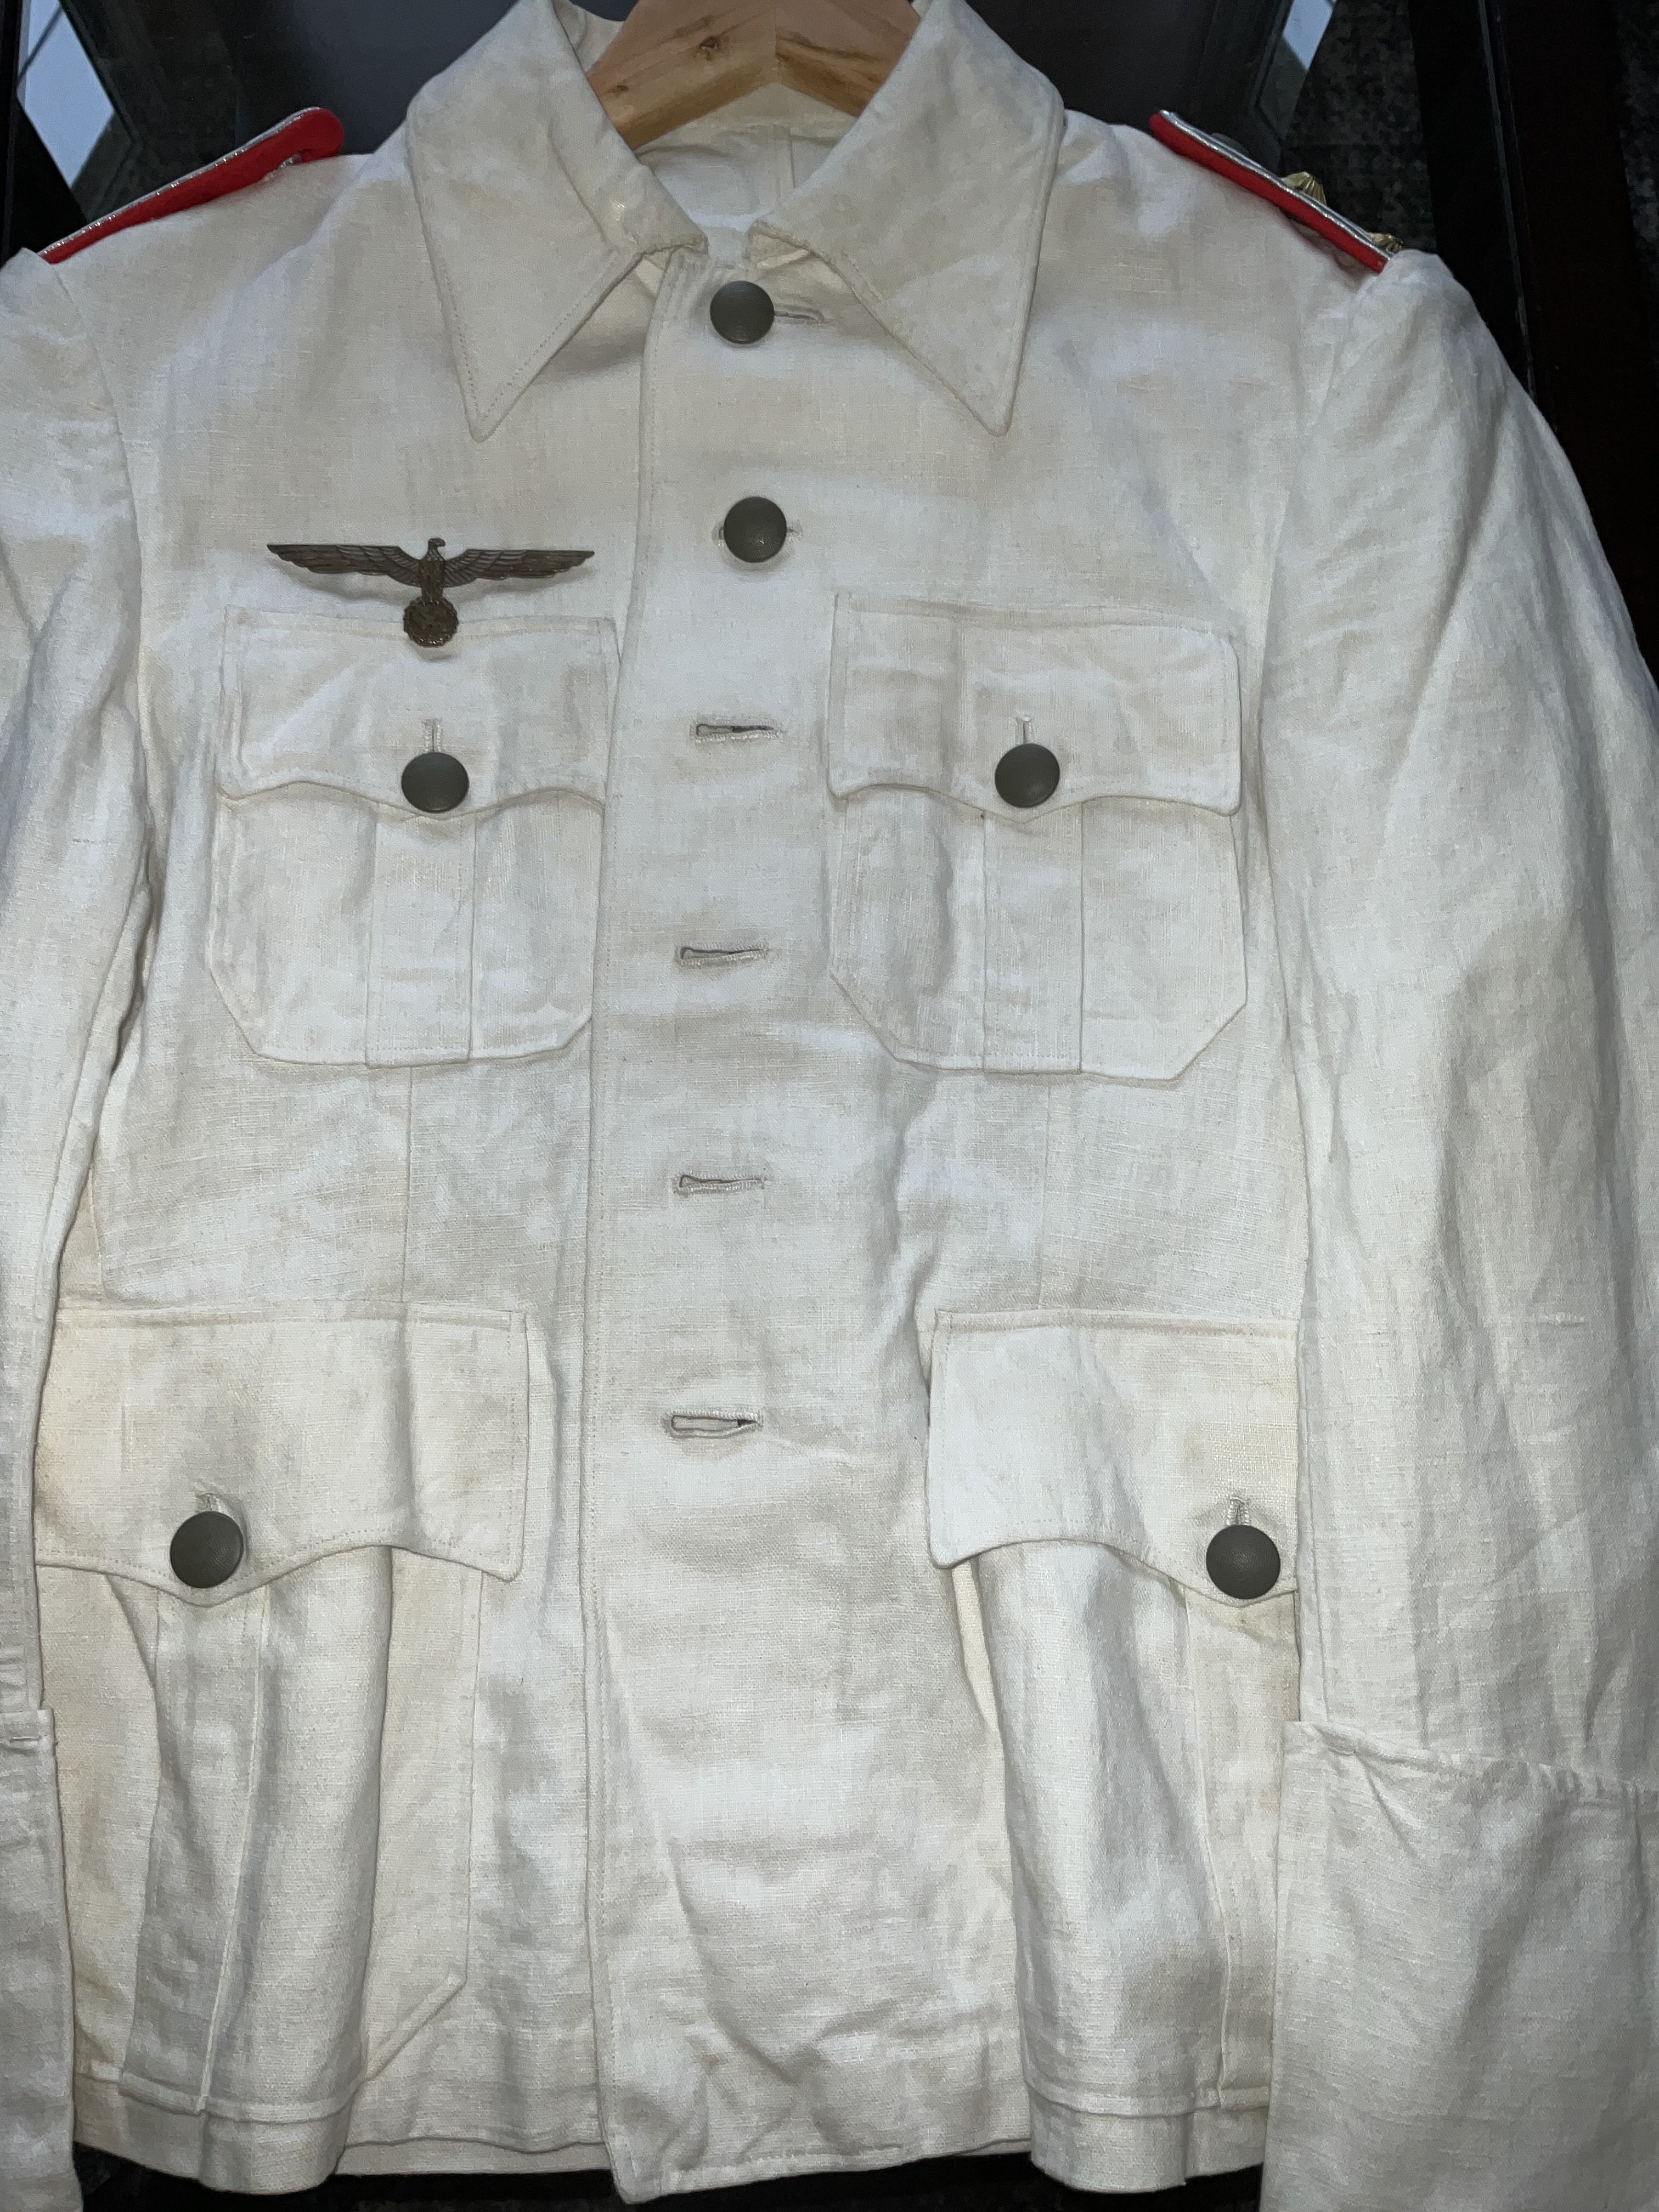
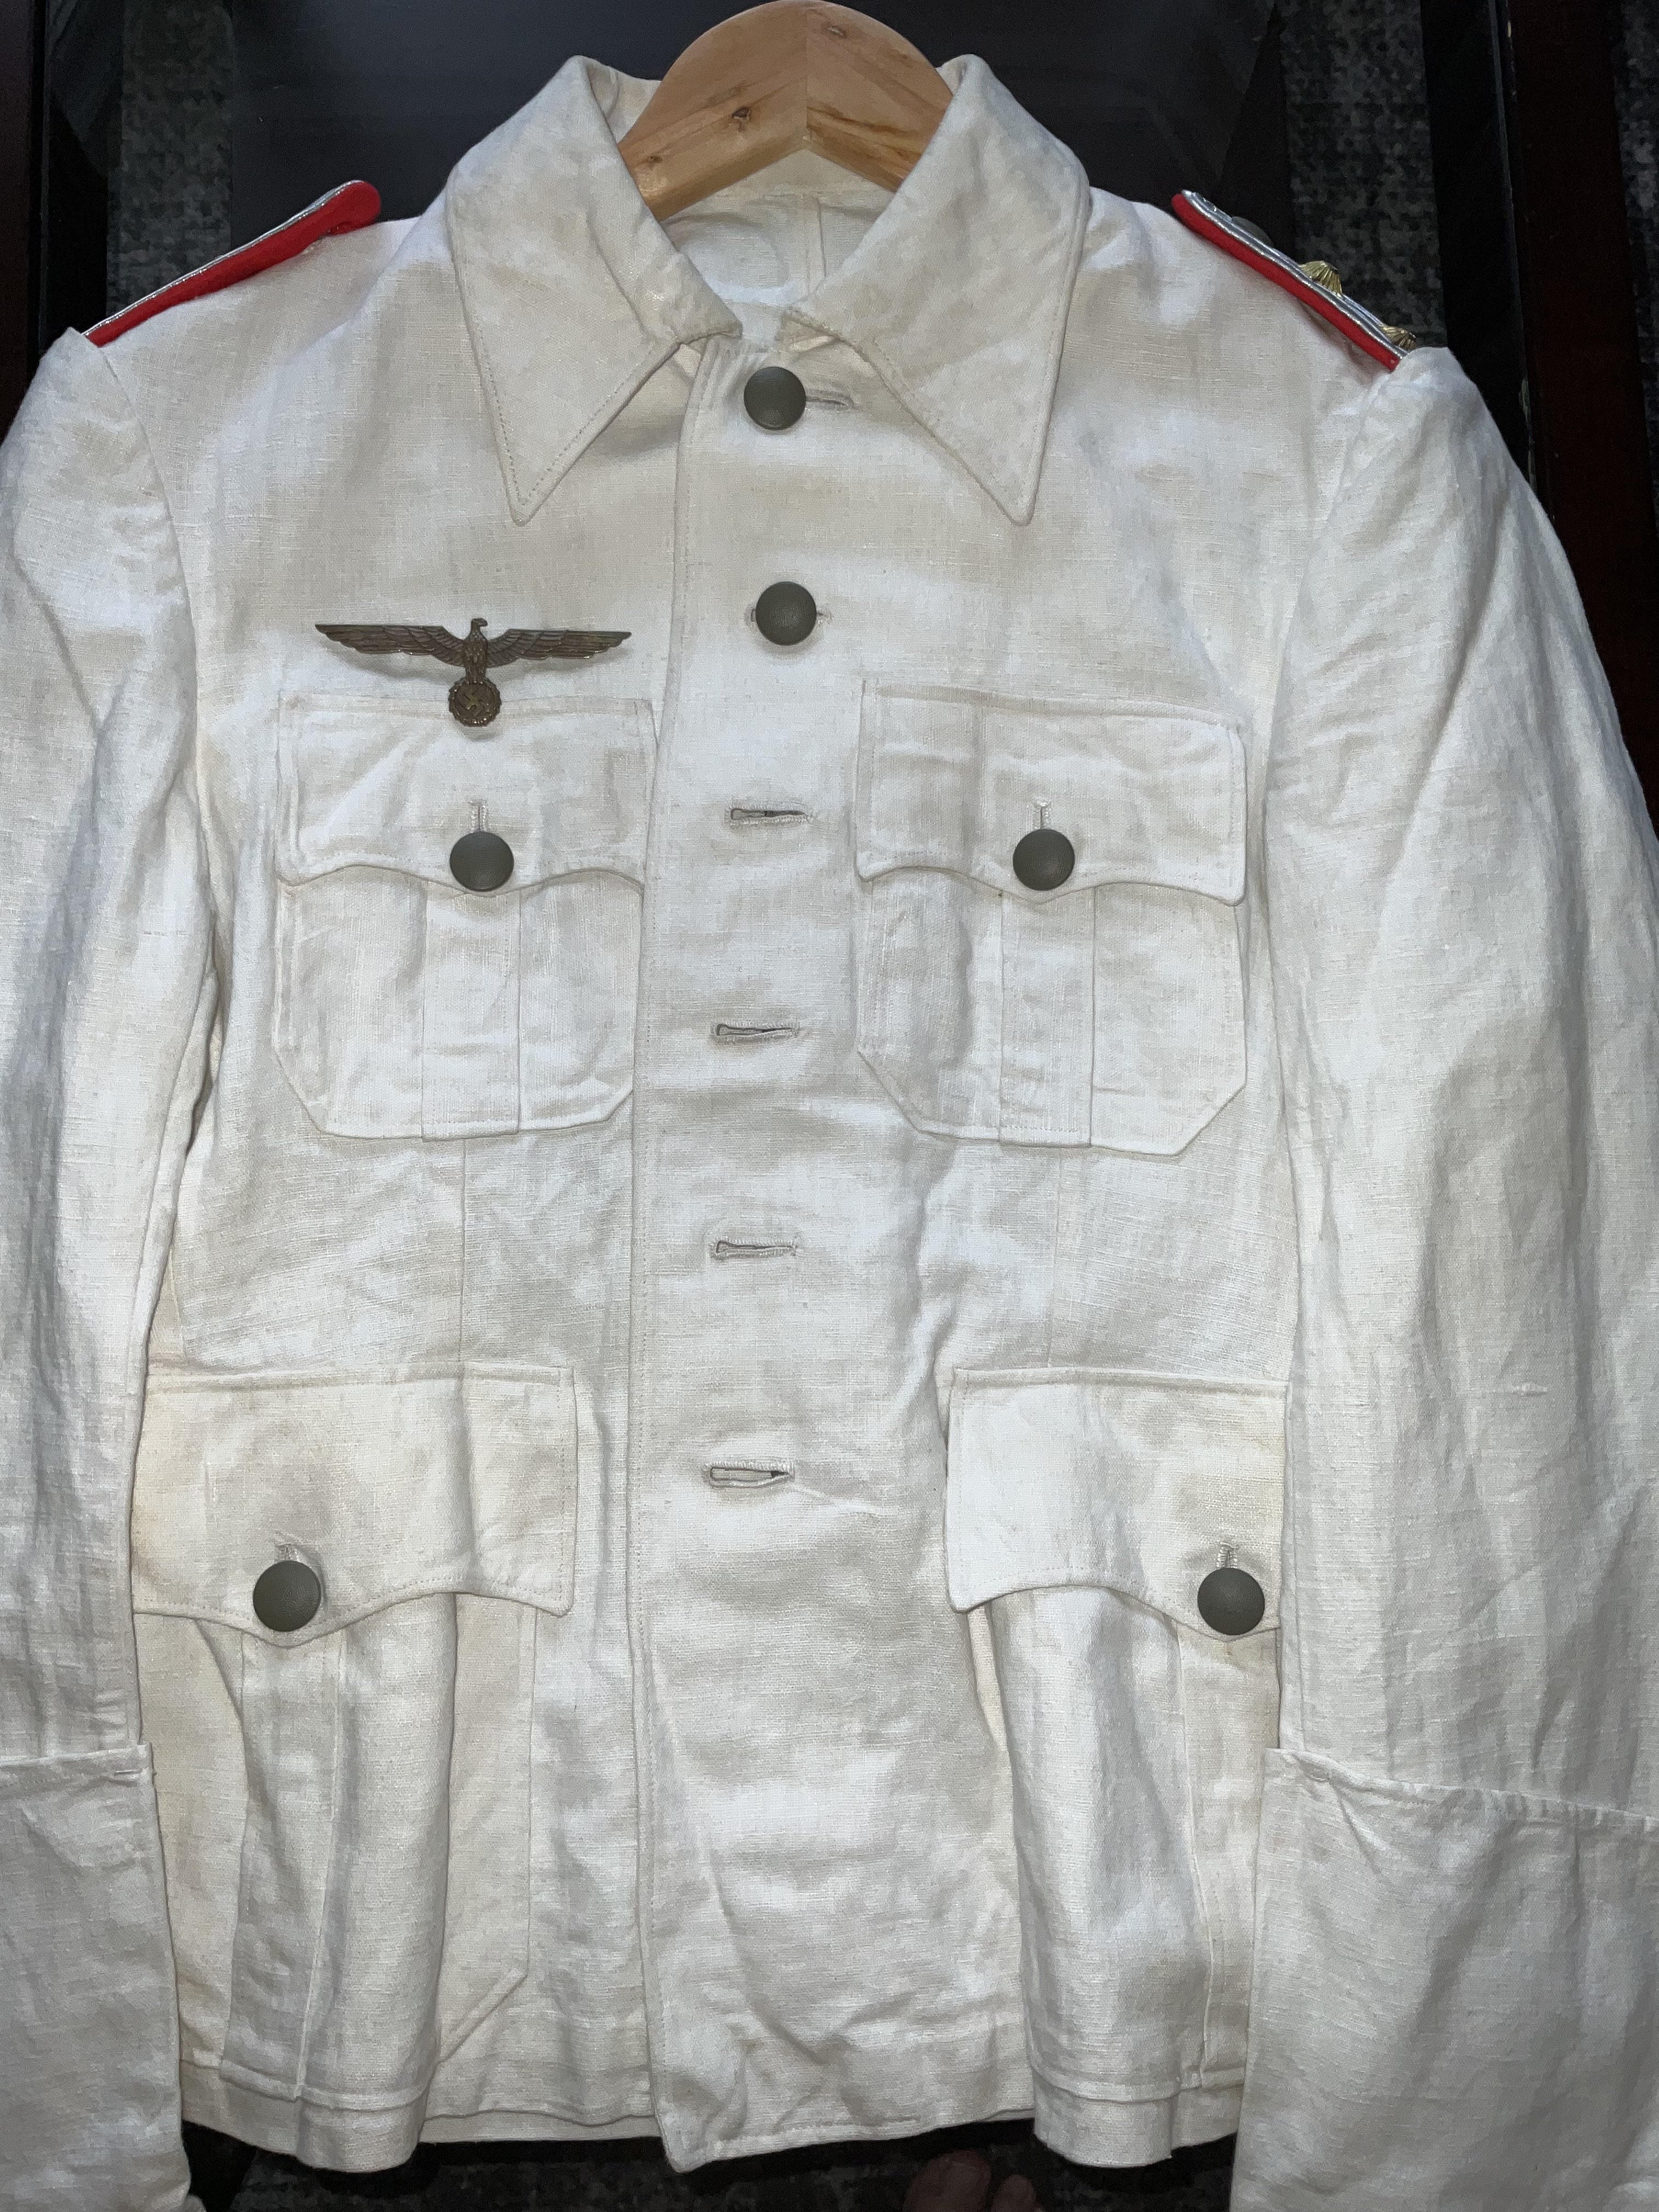
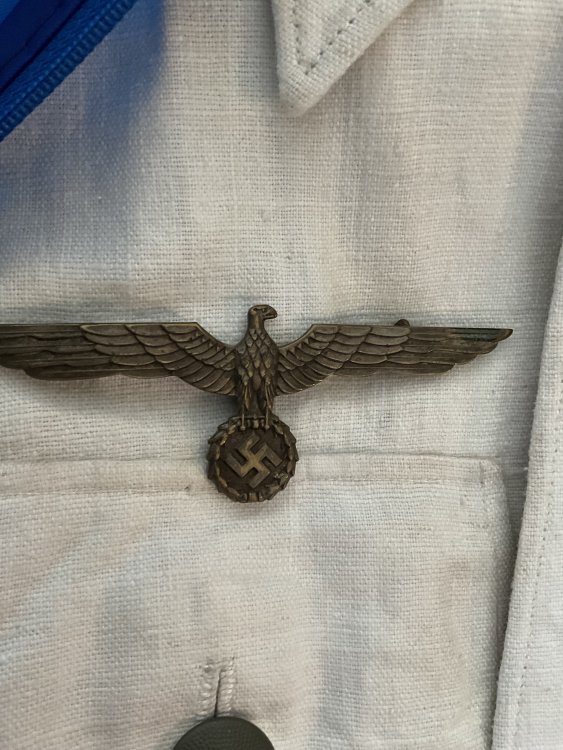
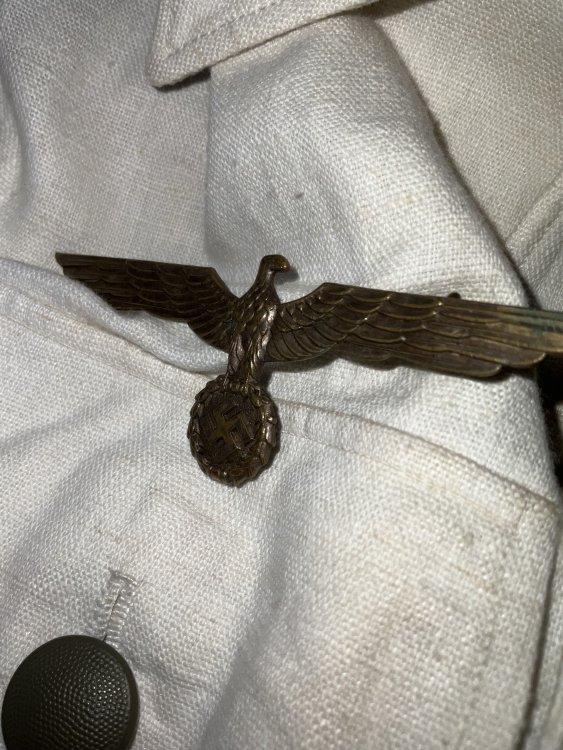
Opinions on this summer tunic eagle- KM or heer?
 4 points
 -
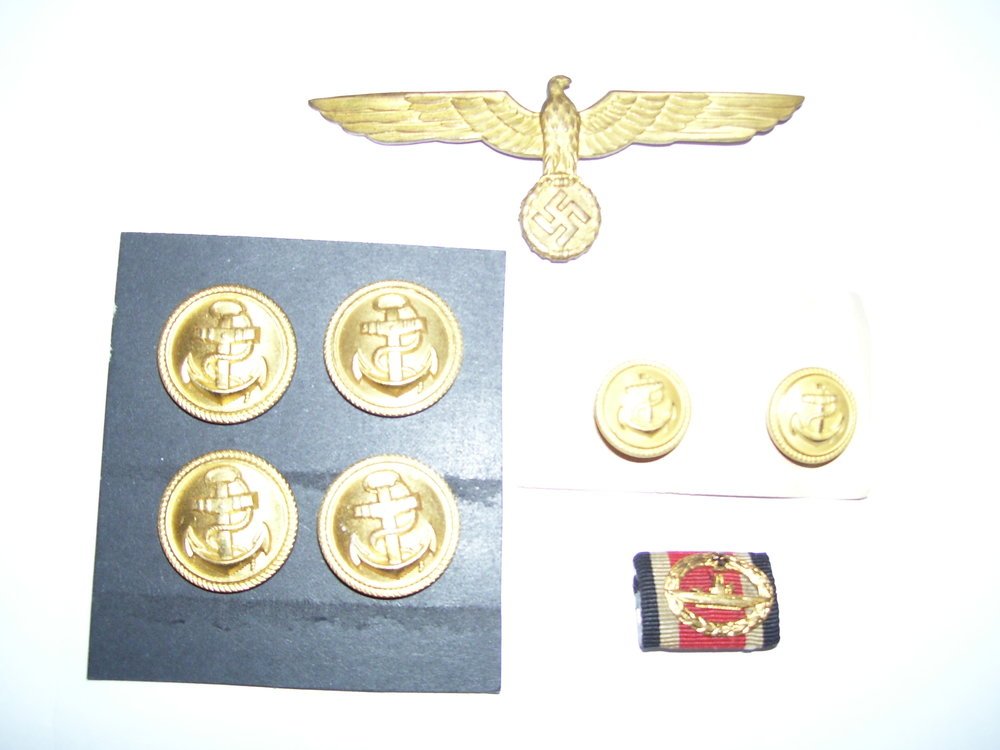
Looks like tarnished silver to me, if it came on that jacket, it should be silvery. By the way, the buttons on that jacket are not qute right, they belong on the fieldgrey tunics, they should be bright aluminium Gilt Tombak, Kriegsmarine Silvered Zink, Heer
 4 points
 -
Could be Kenny with lots of patina.4 points
-
Looks silver to me4 points
-
Bronze/ Goldish


 4 points
 -
Thanks! I'll try.4 points
-
You'll have to file the inside of the strap fitting a bit
 4 points
 -
Any tips on how to mount a chinstrap on a m16?Got one and it's pretty hard to get the repro strap on it.4 points
-
Thanks Xcvu! Yes, I tested the core and everything and it seems to pass the tests. The core is magnetic, the frame is not, and it does seem to be a multi-piece construction. Not sure how to judge the sharpness of the swastika since it's got some wear to it, and the colour between the chipped swastika and the frame look similar given the tarnishing, but it's difficult to tell. It's tough, I've done lots of research online about these crosses over the years, but I haven't had the chance to handle many that I know are real, so I'm definitely still finding my feet in terms of recognizing all the details and knowing what to look for. It's great to get the input from those who have much more experience with these things.4 points
-
I'm not a big expert on ww2 ek2's but I don't think there is a big difference between these and their ww1 counterparts. Try checking if the core is magnetic it should stick and then try checking the silver frame it shouldn't be as reactive as the core and you can feel the difference. Also the swastika's edges should be sharp and not dull. On your cross you can see that the color of swastika faded in some points try to compare the color of those points to the one of the frame they shouldn't be the same as it would indicate a one piece construction. While for the markings I did some research and they could be hallmarked just as their ek1 counterparts which may differ from a manufacture to another. Also try to slide a thin piece of paper between the frame and core it should slide in between. Hope this helps you.4 points
-
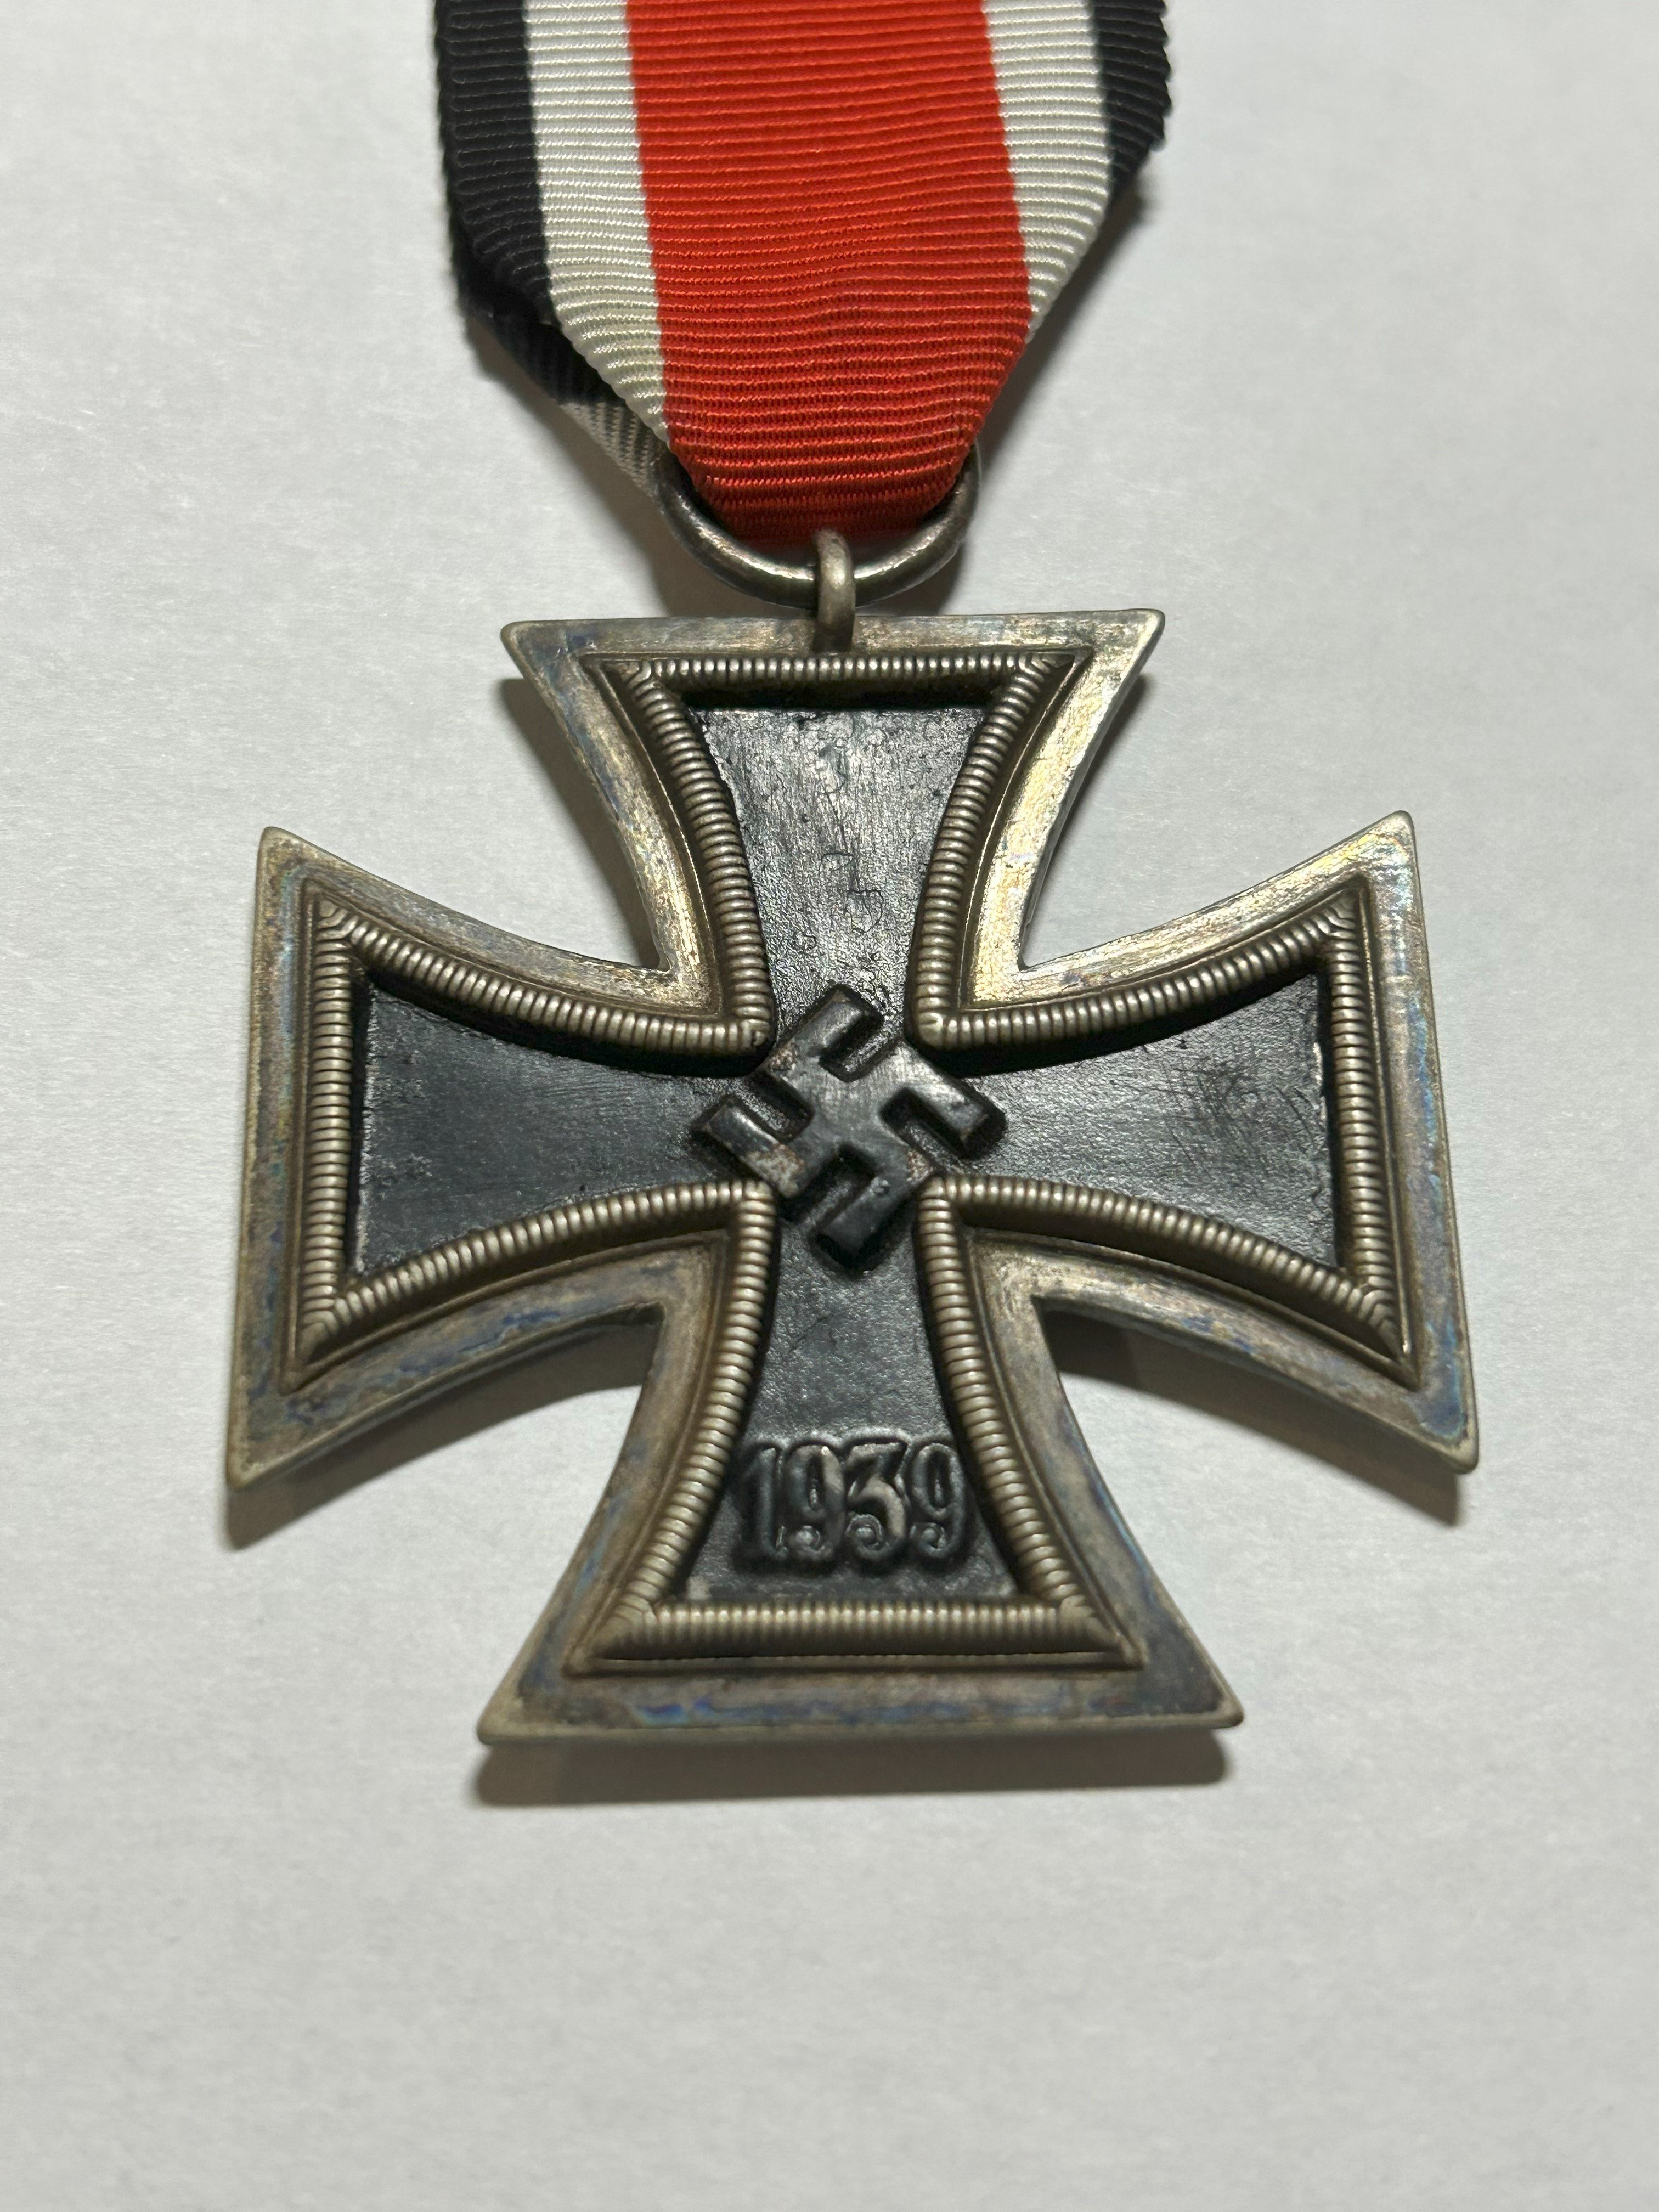
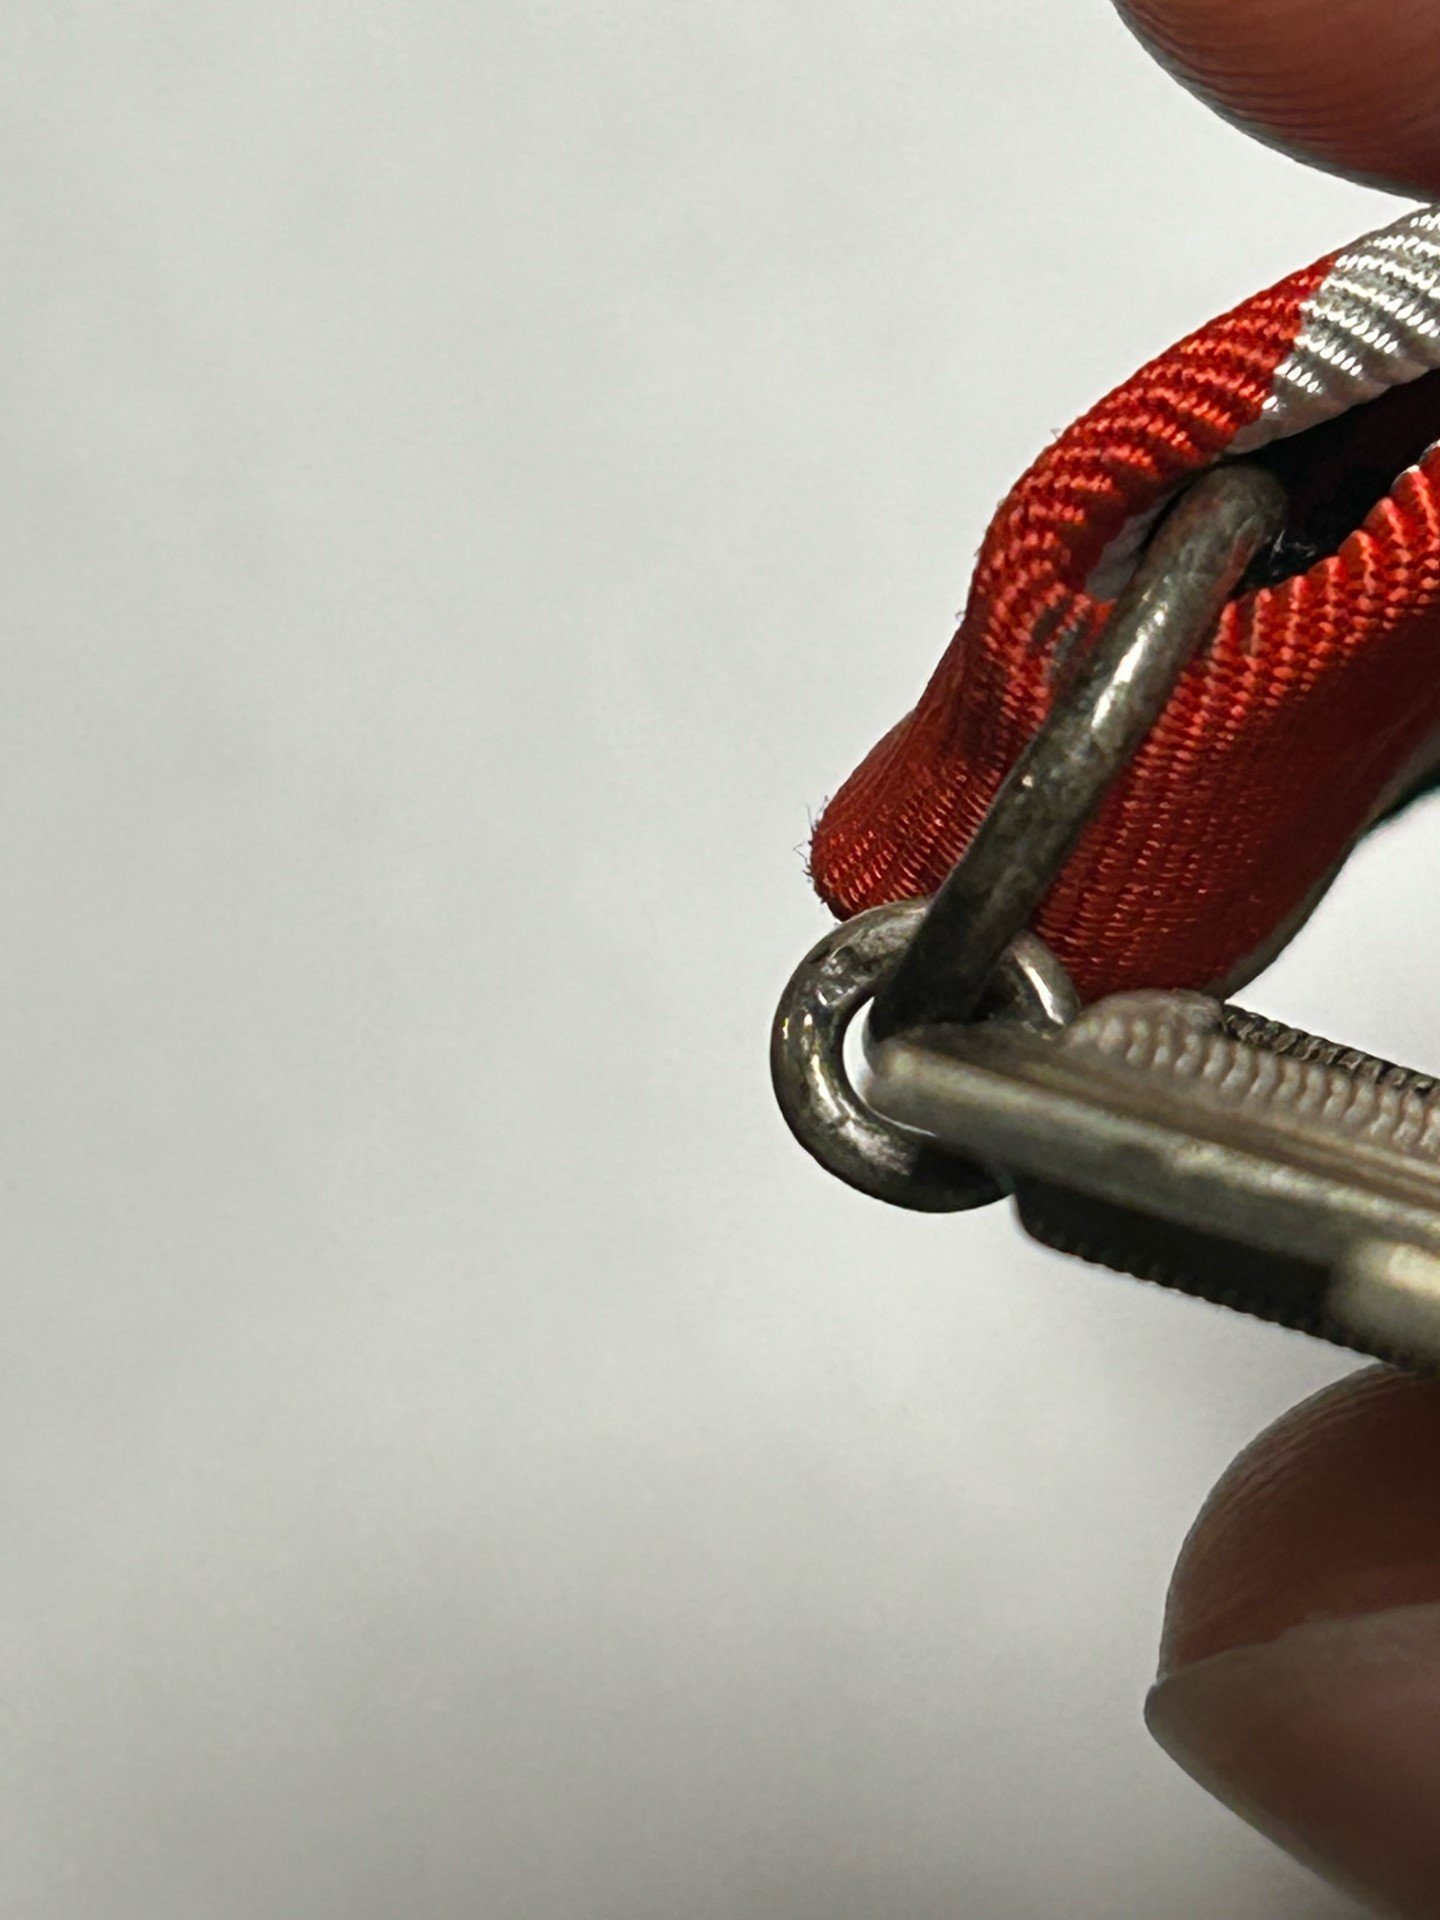
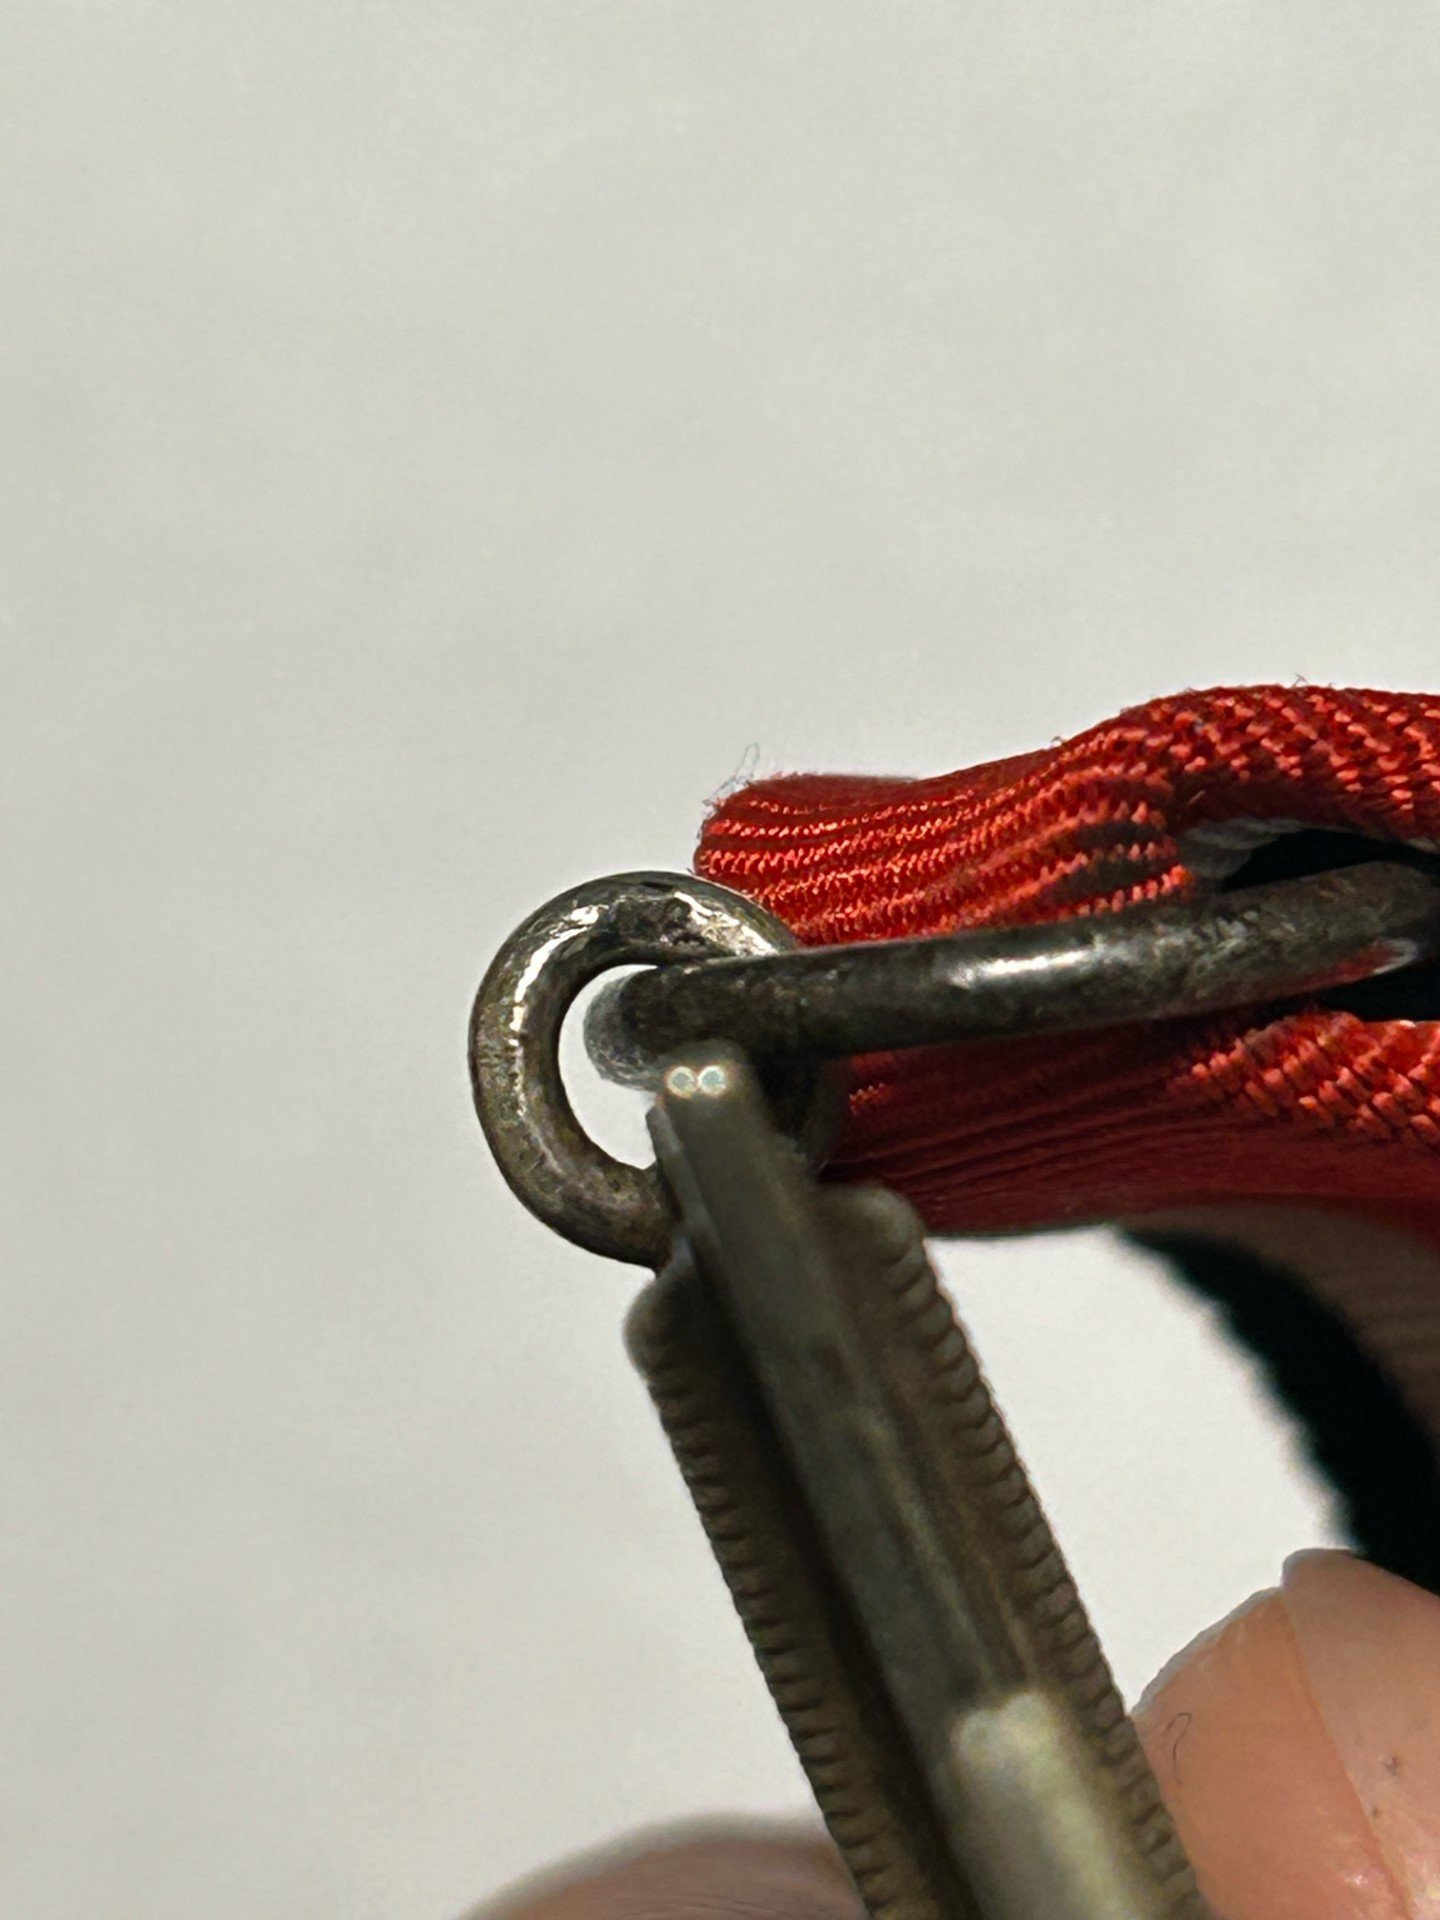
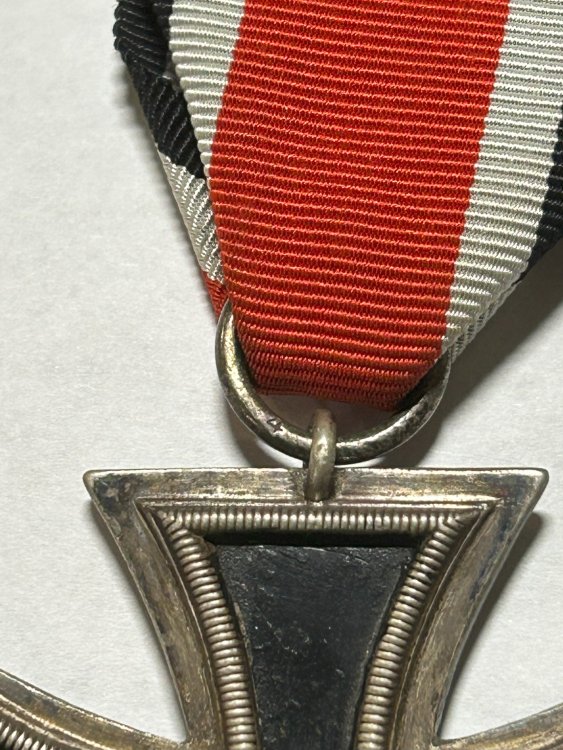
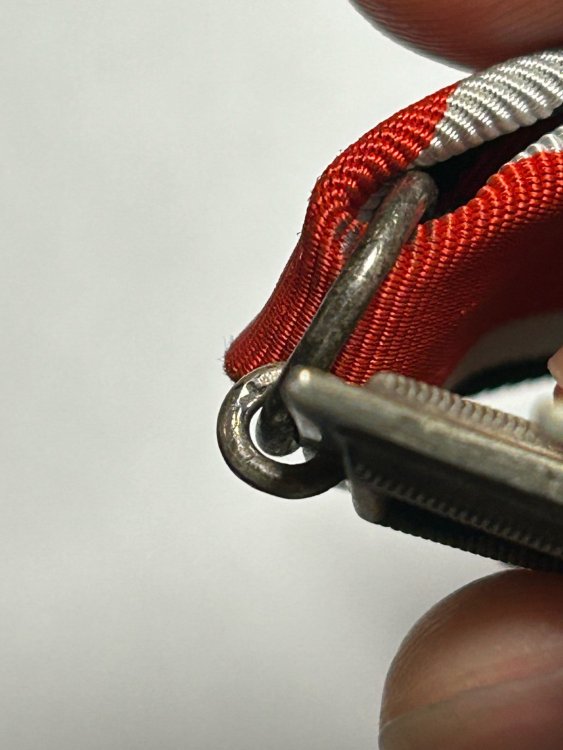
I also have an EK2 with markings on the smaller ring. It's a 1939 version, so I don't know if it would be the same story as the earlier crosses, but it seems like some makers did add additional markings to the smaller ring. I'll post some pictures below. Depending on how it catches the light, the mark on the smaller ring looks like either a fragment of an X, a kind of misshapen M, or some kind of ohm symbol, but like I said it's extremely hard to make out. I posted it to another forum because the makers mark on the main suspension didn't line up with the font of that maker, and I had concerns about its originality...it's stamped "4" which would be for Steinhauer & Lück, but the style of the 4 doesn't look like any of theirs I've seen. The consensus there was that the cross looked original, and might actually be from maker "24" who were apparently known to have mis-struck or faint 2's on some makers marked examples. They also shared some other examples from that maker with additional marks to the smaller ring as well. I would be really interested to get people's opinions on this cross here, but if we agree that this one is original, it would certainly seem like there are genuine examples out there with marks on the smaller rings.


 4 points
 -
Here are some reference links over 13 pages of photos, to some interesting pictures on another forum (milsurps sticky) that members many may enjoy viewing. I wish mg1918 would join here. I also would love to see more of your specimens. Any post cards with Mg08s? Are those cartridges from WW I, please, how about a photo of the cartridges' headstamp . MG08 https://www.milsurps.com/showthread.php?t=42631 MG08/15 https://www.milsurps.com/showthread.php?t=42632 On this forum see this amazing post:4 points
-
Here they are. I did the tests recommended in this thread and it does check out.

 4 points
 -
Picture is a two-piece officer''s visor cover for junior grade from my collection of Kriegsmarine antiques. The cap has a hand-embroidered gilt wire national emblem and, cockade, as well as gold wire piping. This cap belonged to Werner Wendt (1916-1988), Captain of U-765. The U-765 was sunk in the North Atlantic on 6 May 1944 by depth charges on its first war parol. Werner and 10 crewmen survived, 37 dead. Pictured below is the underside view of the visor cap. Pictured below is the two-piece visor cover disassembled. In this configuration, a white or blue cap-covers could be worn. Because I do not like to take this cover apart, I used a photo taken years ago.

 4 points
 -
Thank you John, and we continue to look forward to your items as well.3 points
-
Everything supposedly fake but old fakes maby .EK2 non magnetic one piece, is this cross fake and what gives it away?3 points
-
The swastika's edges look dull which is not a good sign.3 points
-
Here is my new acquired WW1 Italian Benaglia Rifle Grenade. It is in overall very good condition with small areas of pitting on the main body. This was a rodded rifle grenade used with the M91 Carcano rifle. This is the 2nd model with only one filling hole and stabilizing fins. The range of this was about 130 meters (427 ft) and could be used in both the regular length and carbine Carcano's.


 3 points
 -
Copy3 points
-
I think I would leave that one.3 points
-
XCVU, as Fritz said you might have to fiddle with the repro strap fittings to get them to work. Are the lugs clean and free of rust or corrosion?3 points
-
Gold or Silver?3 points
-
What item in your collection would be your favourite piece that you would not part with, could be that first item you aquired, price or rarity not important anything from a day badge to cloth items or even autographs.3 points
-
How to reload a shot shell (the lost information) Most readers will not be interested in this section. Here is some lost information about reloading for these shot guns from an experienced reloader. I present this as reference material for shooters because this information has been lost on the web. This was originally posted by Rapidrob from SRF, a now gone forum. All information is his work. It is reproduced from my old files. I hope reloaders will find this informative. Rapidrob states: Quote: "Cases are very easy to make for the .410 musket. You can fire form .303 Britt or .30-40 Krag. This gives you re-loadable shells and a chance to play with diff loads. The barrels are very straight and will shoot .41 pistol bullets or stacked .40 cal balls in a power-piston or shot, Any .410 load can be used. You use a large rifle primer in your .303 or .30-40 Krag fire-formed and blown out case. The case is trimmed at the mouth to make sure it is concentric. A plastic .410 wad is used and does a good job of sealing the brass case when the powder ignites. As for sealing the case to keep the shot or bullets in place,you can use wax or tape,even RTV. I use an over-the-shot card wad made from milk carton. I place a roll crimp onto the mouth of the case using a die I made from a .45-70 die. Your brass is either left as it is fireformed as to length, or trimmed back if you have a short chamber. None of my "shotguns" have a three inch chamber and I do not have to trim back the brass to fit. The modified Enfields have no choke. So keeping that in mind you want to keep a target about 25 yards at the max. Pellet count is low in the .410 so patterns are very large beyond that range. You can also use .41 pistol bullets. Either single or stacked. The .41 Magnum loads work well. The bullet will tumble of course. They do seem to fly straight for 25-30 yards. Loads are worked up by total bullet weight. Sabot loads can be made as well to launch a dart, slug or other projectiles you can think up." End of Quote If you are into reloading .410 here is the details in this new link. Quote: While there are many crates of the Indian .410 loads for their converted rifle to a .410 musket, you can load for the musket. It's easy cheap after you get the brass, fun and the results on target are better than you'd expect. Several years back when components were much cheaper than today,I used .41 Magnum bullets. Today that is not cost effective. We will be loading “00-Buckshot. What you will need is: .30-40 Krag or .303 Britt brass. Either will work. The Krag brass will give you a longer case, not a big deal. 00-Buckshot. You can find a Hornady box of two pounds or more for under 20 bucks. (.410 ammo is expensive, you will get many loads out of this box) Unique Smokeless powder. This one pound will load a lot of .410 ammo. Large rifle primers, any brand A decapping tool such as the Lee universal decapping die. Foam ear-plugs. Most ranges sell these and the trash cans are filled full of the used plugs. Wash in an old sock or your wife's old panty-hose foot. You can buy new, but free is free if you are not grossed out with used ear-plugs. The ear plugs will become the "over-the-shot" wad and fire-forming wad. .410 "skeet" plastic shot wads 2 1/2". Any GOOD gun shop or box store will sell them .They come in bags of 250,500 and 1,000 Here is the good news. You do not need a die set to load these shells. Once formed they will fit until they can no longer be shot due to case splits. 15-20 loads down the road. A used .357 Magnum, non-carbide sizing die is very handy but not 100% necessary. Cream-of-wheat dry cereal. A razor knife. A drift punch or dowel that will easily fit inside of a .41 caliber case by a few hundreds of an inch. Lee powder scoop or powder measure that will give you 9 grains of Unique. OK, lets get started. First you will need to fire form the brass you have into a straight walled .410 shotgun “Shell" Easy to do, follow my directions and you cannot screw it up. De-prime the fired case and prime the case. New brass is fine as well, once fired is cheaper.Watch out for bad .303 Brass fired in a long chambered Enfield. Articles here on SRF on what they look like. Pour in 9 grains of Unique. I've worked out the safe pressures,00 buck weight,MV and the best accuracy. Using the same Lee powder scoop or your wife's measuring spoons, fill the rest of the case with Cream-of-Wheat up to the bottom of the neck of the case. Take one full ear-plug, roll it up and stuff it on top the cream-of-wheat. Use the punch and make sure the plug is INSIDE of the case neck/mouth. You have now made a blank that will "iron" out the case neck, shoulder and fire-form a new cartridge. A brass .410 shell. The blank is not a toy. At close range it will tear flesh from bone. At 25 feet it will blind. The blank is loud and throws a pretty good fire ball. Make as many as you'd like. If a case splits, it will not hurt the musket, just your cost of a case. The cream-of-wheat will not hurt the bore. Reprime the newly made brass .410 shell. Dump in the same 9 grains of Unique. Seat the .410 wad made for the 2 1/2" Skeet load, use the punch or dowel. Make sure it is on top of the powder charge with NO air gap. You will feel it stop on top of the charge. Now seat four 00-buck, one on top of another. You do not need a filler like GREX but you can use it if you want to. I don’t. Now take one ear plug and cut it lengthwise into THREE pieces of equal length. Roll up one piece of ear-plug and stuff it into the mouth of the loaded case. (You can use a paper wad, milk carton wad, or even a real .410 over the shot wad if you'd like.) I like the foam plugs, free, easy to work with fast to insert. Let the plug expand, keep it level over the buckshot. You can stop here if you want, or…… Run the case just into the mouth of the .357 Magnum sizing die. It will "crimp" the plug/wad into place. You only need a 1/16" of an inch, no more. Going further into the die will crush your new casing. Your newly loaded 00-Buck round is accurate out to 25 yards. 50 yards max range on a man silhouette target. It would make a good close range varmint round. And you have all the materials to reload the rounds many more times. This is my second post on the do-it-yourself .410 loads for the Enfield Musket. More to come. Other than case length, there is no big deal on using either caliber original case. These muskets are very strong. You can increase the powder charge if you want. I found it opens up the shot group though. The load I posted will move the buckshot right around 1,000 fps." End of Quote Here is how to make a British .303 shell fit a normal .410. Surplusfirearm 2011 .303 British to .410 Shot shell Conversion Posted on November 16, 2011 by admin So, I’m a little pumped about being able to reload my own .410 shot-shells without a shot-shell reloading press so I head out to the not-so-local skeet range to do some hull scavenging. I get there a day after a corporate shoot expecting to find at least a small assortment of .410 hulls – and not a single one was to be found anywhere. Disappointed in my efforts to locate some .410 hulls I resorted to the internet and searched for once-fired .410 hulls. Interestingly, during my search I found some periodic comments and rough tutorials on the internet on how to convert .303 British brass to .410 shot-shell hulls. Yes, I know – you can purchase brass hulls from MagTech – but if I can make my own .410 hulls out of some once-fired .303 British brass, now that really sparks my interest. You see – anytime I can make something myself cheaper than buying it at retail prices I get interested, even if it takes some time and experimentation. I guess its the “self-sufficiency” in me. So, here we go – .303 British Brass converted to .410 shot shells. I had a bag full of once-fired .303 British brass given to me so I elected those cases to be the victim of experimentation over some of my brand new, unfired supply of .303 brass. Some of the cases had bulges just above the rim from an obvious head-space problem caused by it’s former firearm. After, checking the cases for preliminary case-head separation, discarding the obvious problematic cases, it was time to start depriming the salvageable cases and began the conversion by tumbling the brass to clean them up. The first hurdle to overcome on the conversion is to resolve an obvious problem with head-space and the .303 British case incapable of chambering in the .410 shotgun. The problem being the .410 shot-shell has a rim thickness of .063′′ with a 55 degree tapered rim and the .303 British having a .060′′ untapered rim. Despite the fact that the .303 British rim is thinner than the .410’s rim, the .303 British simply cannot fit in a .410 chamber without the taper. One way to resolve the problem is to mill a taper on the underside of the.303 British rim to make it similar to the taper of a .410 shot-shell. Problem is, I don’t have a milling machine – but why not just file a few thousands off the case head of the .303 British so it seats flush with the .410 breech. Let’s do it. I started by securing each case, one at a time, in a padded vice and began filing evenly across the case head. Initially, I was unsure as to how exactly much of the case head needed to be thinned so I started by counting the passes with the file and counted 30, 40, then 50 passes and tested the brass for a fit in the chamber until the action closed on my single shot shotgun. After an average of 50 passes with the file, and entirely removing the lettering on the case head, it was found that a rim thickness of ~.055′′ would fit flush and allow the shotgun to lock up. To the right is a comparison of a filed case and an unfiled case. Make sure that when you file the case you keep the file level, squared with the case head so as not to create an uneven surface on the face of the rim. Next, I test fitted the .303 British case against the .410 breech to ensure a flush chambering of the brass was possible. Then, I simply closed the action of the single-shot .410 shotgun with the case in the chamber and it fit perfectly. Since I’m using a single-shot .410 it was rather simple to do; however a pump or semi-auto shotgun may involve more precise fitting and workmanship. So basically, instead of removing metal from the underside of the .303 British rim to thin (or taper) the case, we simply just removed metal from the top of the rim (see below). One concern I read regarding the thinning of the case head by using a file was that, thinning the case head will make the primer seat above the head of the case. Well, that simply isn’t true. As you can see from the photo that removing only a few thousands of an inch that the primer stills seats well below the face of the case head where it belongs. Now we begin to fire-form the case to make the tapered .303 British case a straight walled .410 shot-shell brass hull. Since we have to fire-form the majority of the case to get it to become a straight-walled shot-shell, we’ll do this process in no less than two separate fire-forming procedures. The first being to blow-out the neck and shoulder and the second to make the rest of the case straight. We start by annealing the cases with a propane torch, a cold pan of water and a spark-plug socket chucked into a cordless drill. Spin the case using the drill to help in uniform annealing. As it spins you can see the color change as the metal heats up and works down the body of the case – do not, nor is it necessary, for the case to turn cherry red while annealing. Once the case turns a bluish color drop the annealed case into the water. Since we’re moving a lot brass during this fire-forming I am annealing more than just the case neck and shoulder; in fact about 2/3 of the case is annealed; being certain not to over heat the lower 1/3 – that portion should not even begin to change color – and it helps to be protected by the socket and prevent over heating. After the cases are dropped in the water they become pretty soft and malleable. Place the cases aside to dry thoroughly before priming. Once the cases have dried they were primed with large pistol primers. Since shotgun shells have very low pressure levels, lower than pistol cartridges, it makes sense to use pistol primers versus rifle primers. I used Wolf large pistol primers as they are very reasonably priced compared to their U.S.counterparts and serve this purpose very well. For the first fire-form, I load the .303 brass with 12 grains of Red Dot and pack it full of Cream of Wheat. Fill the case up to about 1/4′′ from the top of the case – then pack the Cream of Wheat. Then cover the last 1/4′′ of space with wax or other substance to keep the Cream of Wheat from falling out. Load and shoot. As you can see from the first fire-form effort the upper half of the case expands to fit the .410 chamber and the shoulder is completely blown out to form a nice straight case neck. Now that the neck and shoulder is expanded to a rough .410 shot-shell we can start loading for a second fire-form to help expand the lower section of the case. After seating new primers in the cases for the second fire-form I loaded 12 grains of Alliant 2400 powder then inserted a .410 factory wad (shown are Claybuster CB5050-410HS wads). When inserting the wad you may find that the wad does not fit entirely inside the case because the lower, unexpanded section, prevents the wad from fitting all the way in. No problem, just trim the fins on the wad and insert it into the case. Another alternative to plastic wads is to use a .410 over-shot card and a fiber cushion wad cut to the necessary diameter. I actually seen one individual stuff it with T-shirt material and shoot. Next, I filled the case with approximately 1/2 ounce of lead shot. Then, using either a .45 diameter punch or a .45 ACP empty case with the edge sharpened I cut an over-shot card to place over the shot. I then pressed the card in place with a dowel and then covered the over-shot card with Elmer’s glue to hold the card in place. After the glue dried I loaded them up and fired away. You can create a nice roll crimp on the shell using a .308 Winchester bullet seating die as an alternative to gluing the card in place. I chose not to do this since I don’t want to work the brass anymore than necessary – but it is an option. To the right we see the results of the second fire-form. Not too bad if I say so myself. Might need one more 1/2 ounce load to get the final needed expansion at the base but most certainly loadable. I need to note that the brass case is thinner walled than the plastic cases. That said, you may need to modify your choice of wad column diameter. What I’ve done is to cut a 1/8′′ over-powder card the diameter of .460′′ to place over the powder charge to ensure a seal, then place a plastic Claybuster wad on top of that, fill with 1/2 ounce shot, then cut an over-shot card out of cereal boxes at .460′′ and seal it with Elmer’s Glue. The punch I use is the same one used to cut wads for my .44 black powder pistol. Punches are available at Harbor Freight for about $8. And finally, if you find your brass sticking in your chamber and need to resize the cases you can place the shell in a .303 British shell-holder and run it up into a .45 ACP sizing die and size about 5/8 of the case for a smooth chambering. Wrapping up I wanted to comment that I read in an older reloading manual that when it comes to brass shot-shell cases that, “Not going on much here. If you have any of these, put them up on a mantle and think up a good “Grandpa told me” story to tell people when they ask, “What’s that?”. I got a better idea – why not show those people how to make, load and shoot these old brass cases and carry on the legacy of our Great Grandparents...I bet you’ll have more fun actually doing it than talking about it. Safe Shooting! End of Quote End of Reloading Reference3 points
-
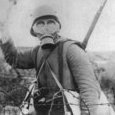
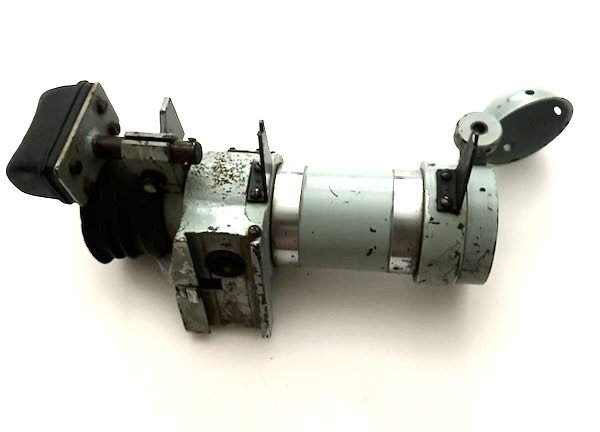
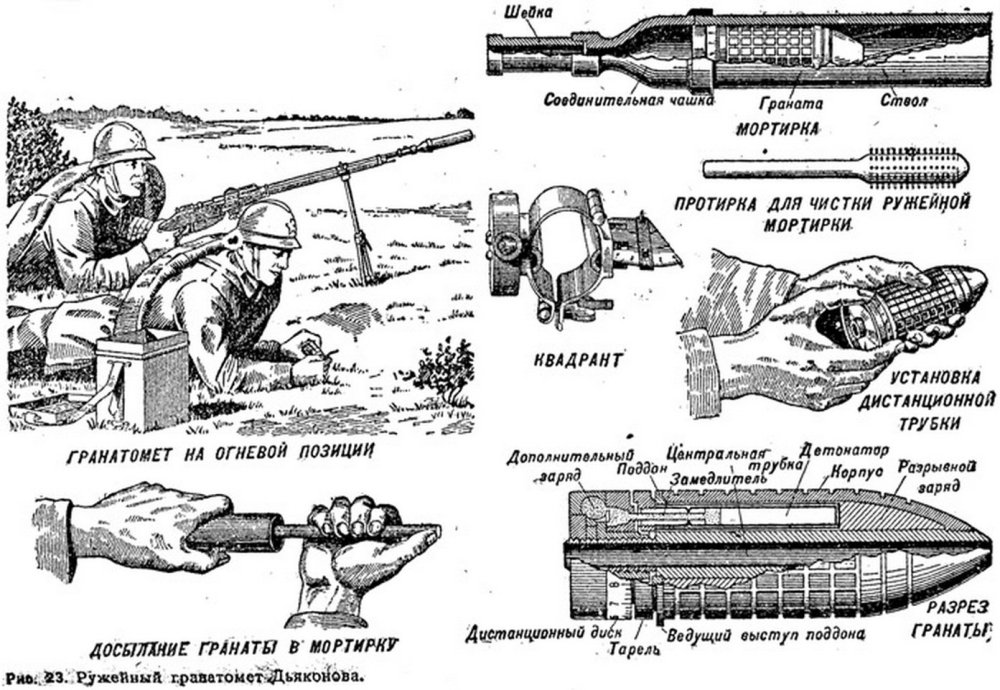
Another new item, this is a Russian Dyakonov rifle grenade. This grenade and Laucher were developed in March of 1916, the subsequent trails went very well and the impressed General Brusilov immediately requested 40,000 launchers and over 6,000,000 grenades to be fabricated in December of 1916. From what I have been able to gather on this grenade and system was that while production was ramping up, the revolution broke out and production was halted, so it's unclear if these got to see any use. The launcher was kept in inventory updated and modified in the 1920's and was in use up till early WW2 when it was replaced with a more modern system. The grenade was cylindrical with a pointed nose, and there were 2 versions, a smooth body and a segmented body. The grey painted nose indicated a TNT filling. The grenade is 115mm long, and weighs 350g. Last 2 images show the rifle with the grenade launcher and bi-pod (source, internet).


 3 points
 -
Found this image on the internet, showing how the rifle grenade system worked for the Dyakonov.
 3 points
 -
Thanks everyone! And thank you for the reference links! I don't have any postcards with german machine guns, but I have quite a few postcards written by belgian frontline soldiers. There are definitely a few interesting ones among those. I checked the headstamps of the cartridges again and they're all 1918 dated. I thought they were 1916 and 1917, but apparently I remembered that wrong.
 3 points
 -
I'm about to arrive home and I'll post a picture of the marking.3 points
-
I have one marked with an ,,u" in the exact same spot besides mine I've never seen another EK2 marked on the smaller ring.3 points
-
A perfectly good example with a lot of patina3 points
-
I would find it hard to let go of my AH formal pattern fork that was taken from the Eagles nest, it came via a dealer direct from the vet with a porfolio of pictures of him and his unit removing the silverware. The sale of the vet's silverware was used to rebuild his local church's roof.3 points
-
I have two I would never part with. My combined pilots and observer's badge by W.Deumer.....And my Flier's Commemorative badge by C.E.Junker.3 points